Thank you! Your submission has been received!
Oops! Something went wrong while submitting the form.
MENU

Many creators are hoping to create professional-looking videos for your online course, but are not sure where to start. Using Keynote (or its Microsoft equivalent, PowerPoint) is a simple and fun way to make beautiful videos at home. It’s relatively easy to make an animated videos with Keynote. We’ll show you how.
Animation on Keynote is kind of magical. And it’s way more powerful than you might think.
For example, we made this colorful white-boarding presentation all on Keynote. But, you probably couldn’t tell right away by just looking at it. Just think about all the weeks or months you’d have to spend learning complex animation software to get the same results. Even the process of selecting animation software is overwhelming, and can be a huge barrier to new course creators.
You can harness this power too. And it’s not nearly as difficult as you might think. Below, we’ll walk you through step-by-step how to make animated videos with Keynote (without it even looking like Keynote at all).
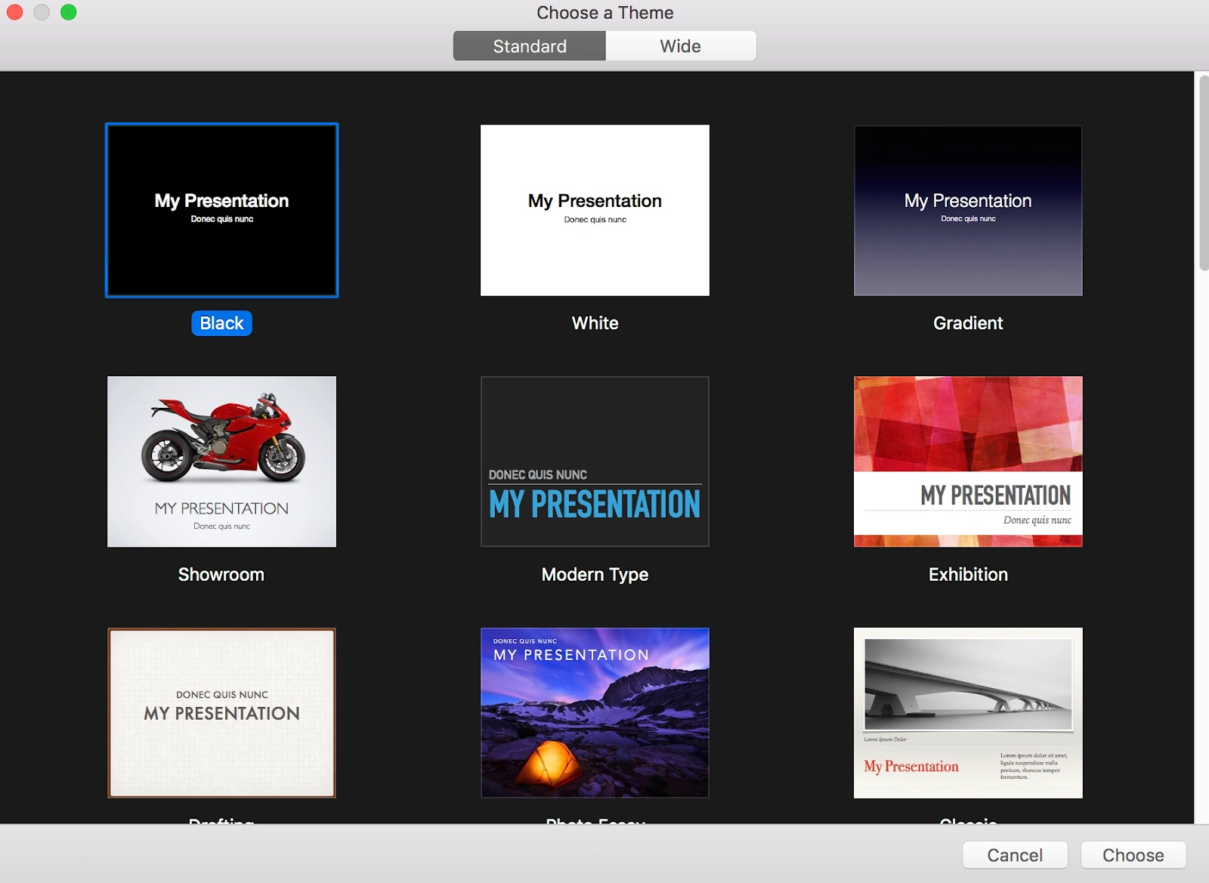
Create a new Keynote presentation to start. You’ll see that a new Keynote theme usually begins in “standard” size. Standard isn’t good for video, so you want wide instead.
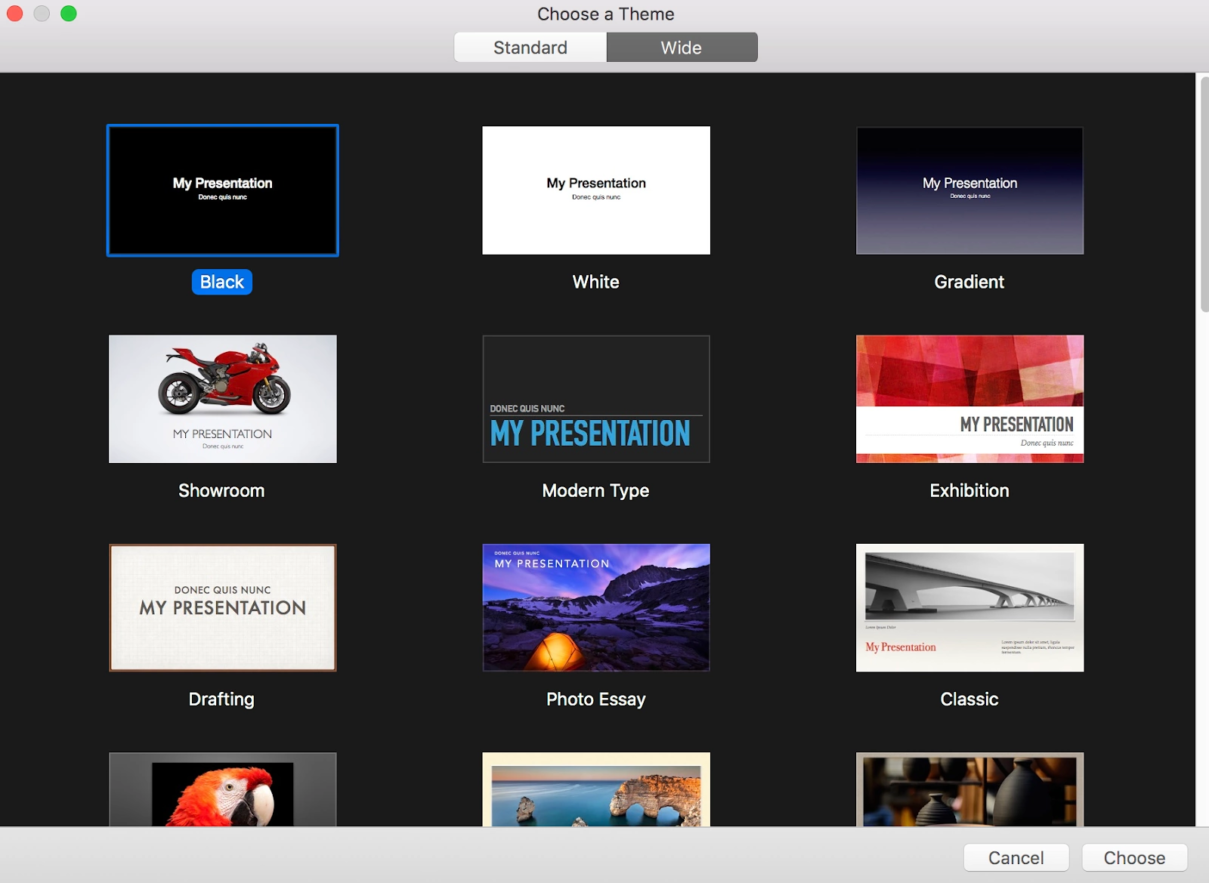
Select “Wide” at the top and choose the theme you want to begin with.
Before you start changing around colors, or adding text and images, this is the most important action you’ll take. Customize your dimensions so they fit YouTube’s high-quality resolution. This will also upload seamlessly onto Teachable’s platform.
To do this, check out the righthand bar of your Keynote program. Select Document. Then you’ll see a category below named Slide Size. Click on that, and toggle to Custom Slide Size.
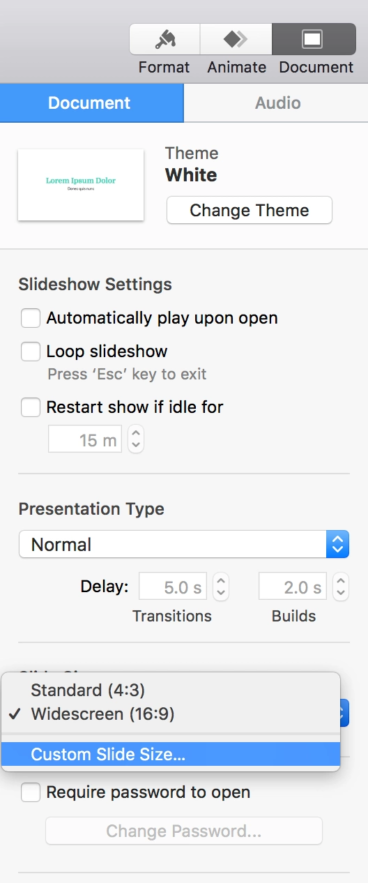
Next, enter the optimal custom slide size. We highly recommend 1920×1080, which we will consistently use throughout the course of this tutorial on how make animated videos with Keynote.
Dimensions are really important. If you don’t get them right the first time, you’ll spend hours fixing it later.

Now that your dimensions are set up, you can start on the design portion. It’s easy to customize Keynote slides to fit your brand colors and fonts.

You’ll find this customization on the right hand corner of your screen under Format > Edit Master Slide.
Editing the master slide means that you’ll pick the default colors and fonts for all the slides. This will make your life easier in the long run, because you won’t have to change font sizes, colors, and background colors every time you create a new slide.

You’ll get this warning because editing master slides will change all slides. Because you haven’t made any slides yet, though, this will be an asset instead of a problem. After you’ve selected your brand fonts, colors, backgrounds and overlays, you can finally get down to creating your course content.
Keynote leaves you plenty of versatility to add shapes, photos, charts, GIFs.
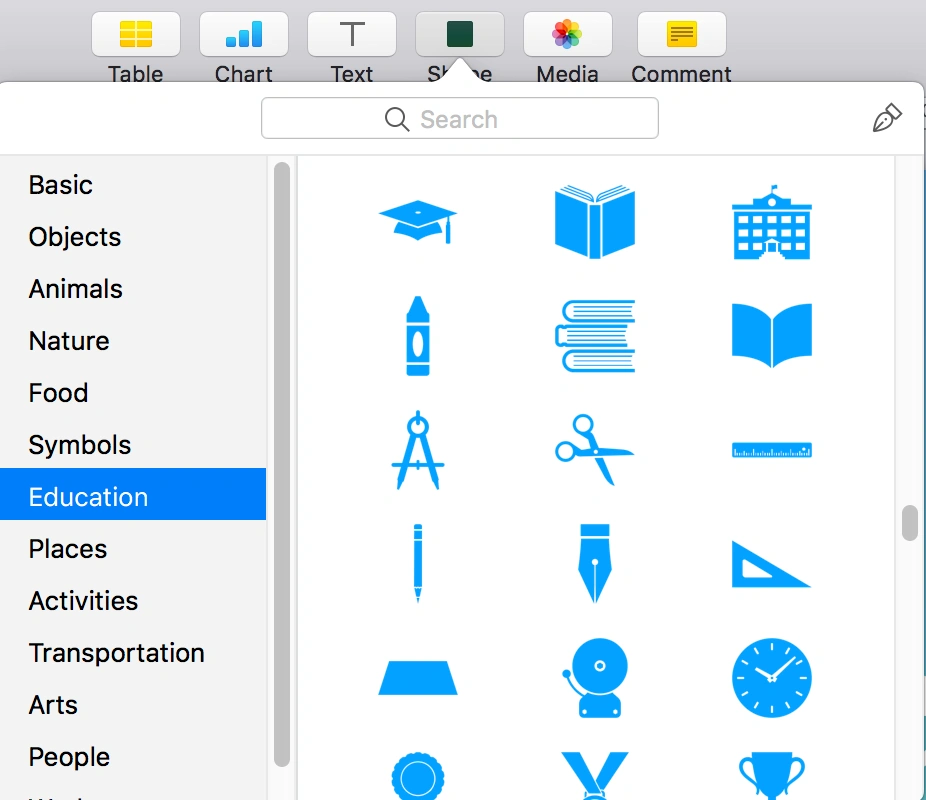
We especially love using their “Shape” section to animate our own videos. You can select as many of these icons as you want, then customize the color or add dimension.
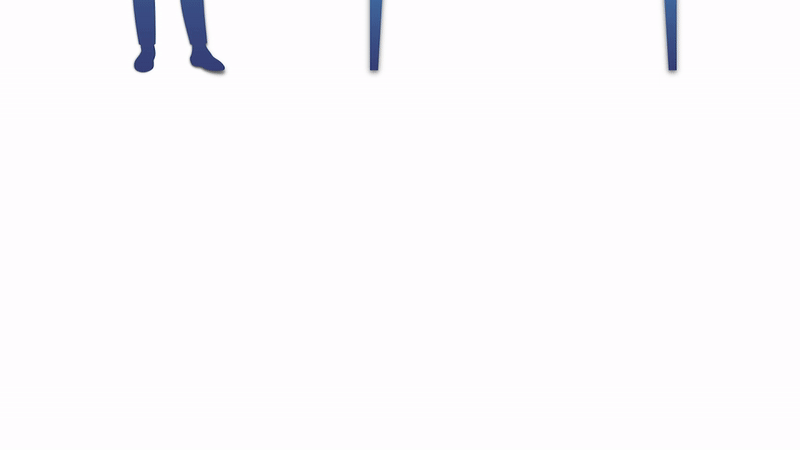
For the SEO course we created, we used the free Keynote icons under “Shape” to animate the introductory video. Here’s an example of how it can look:

Once you’ve added all the imagery and text you want for each slide, you’ve finally arrived to the part that makes this program special: animation.
This is where you can bring your keynote slides to life and make them look like a professionally animated video. Think of this as a shortcut to making professional, fun, highly engaging video, with just a few clicks of a button.

Click on the piece of text or image that you want to animate. Make sure you’ve toggled to the Animate button in the right hand corner, which sits between Format and Document.
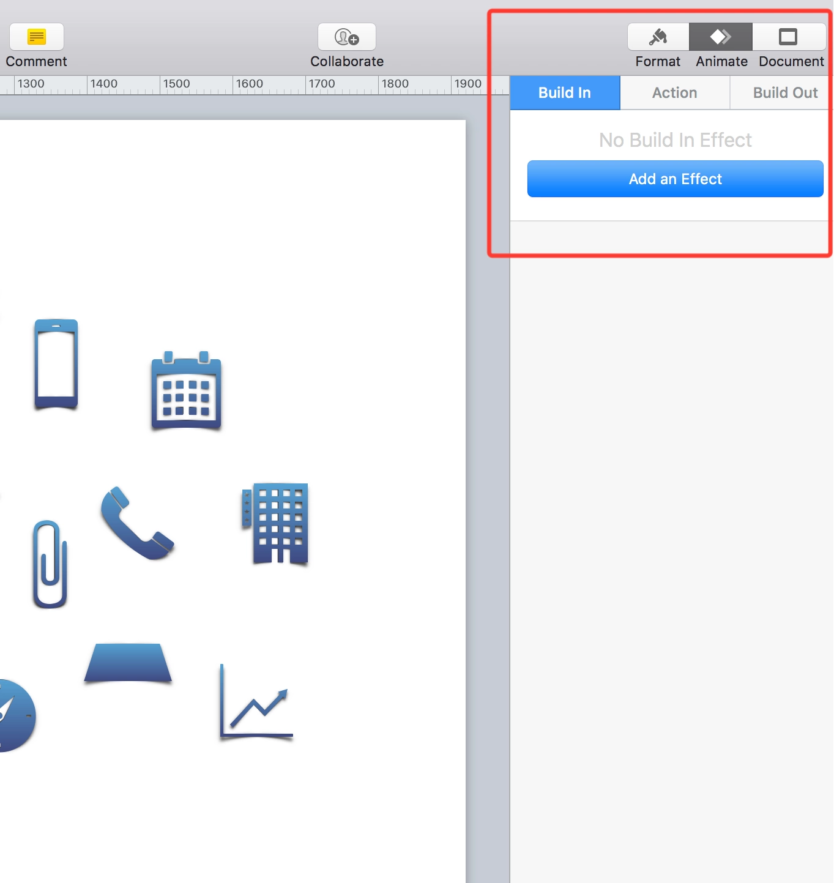
Here are what the Keynote animation features mean:
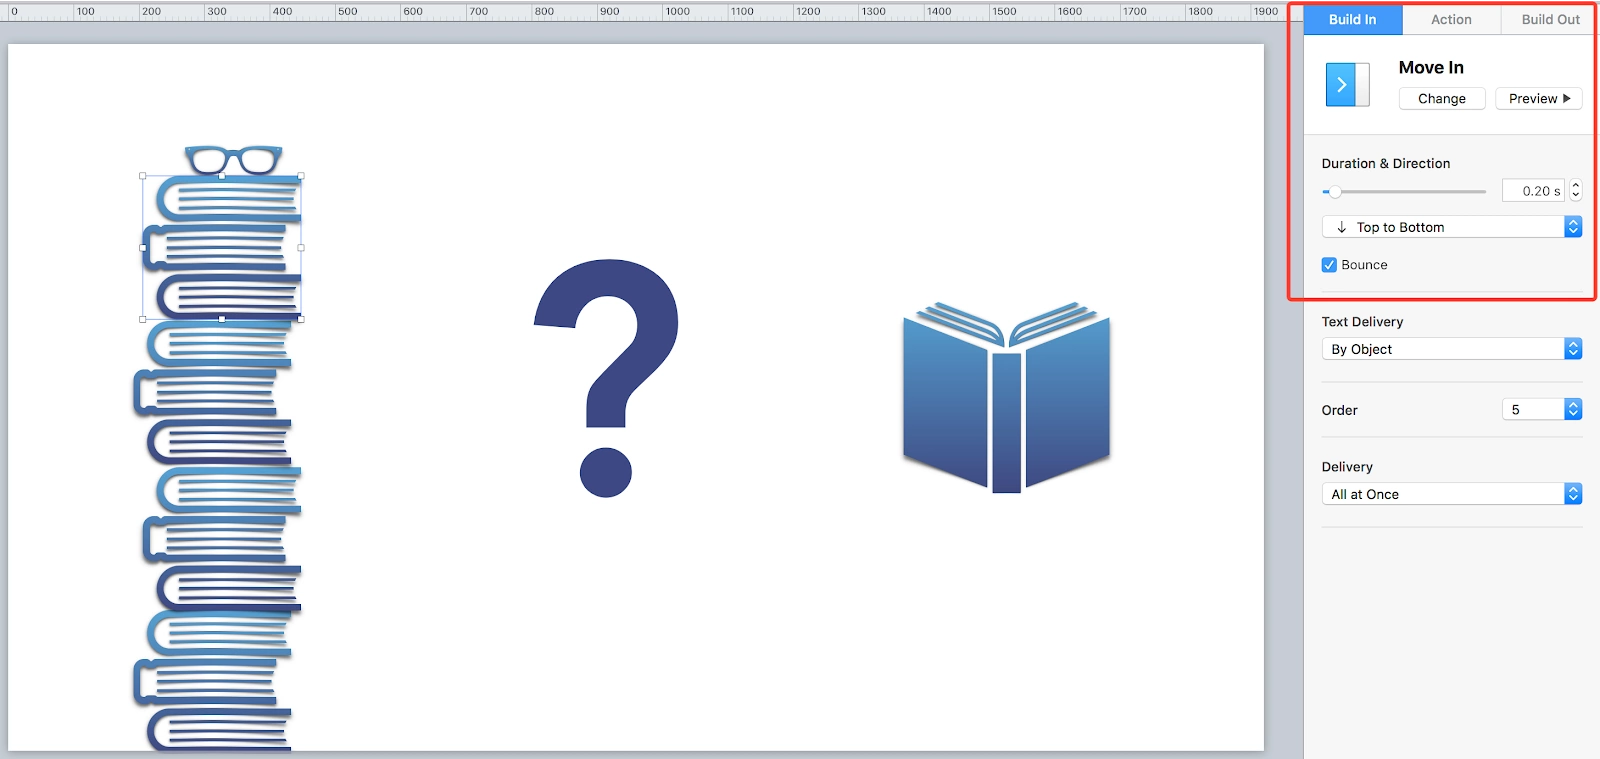
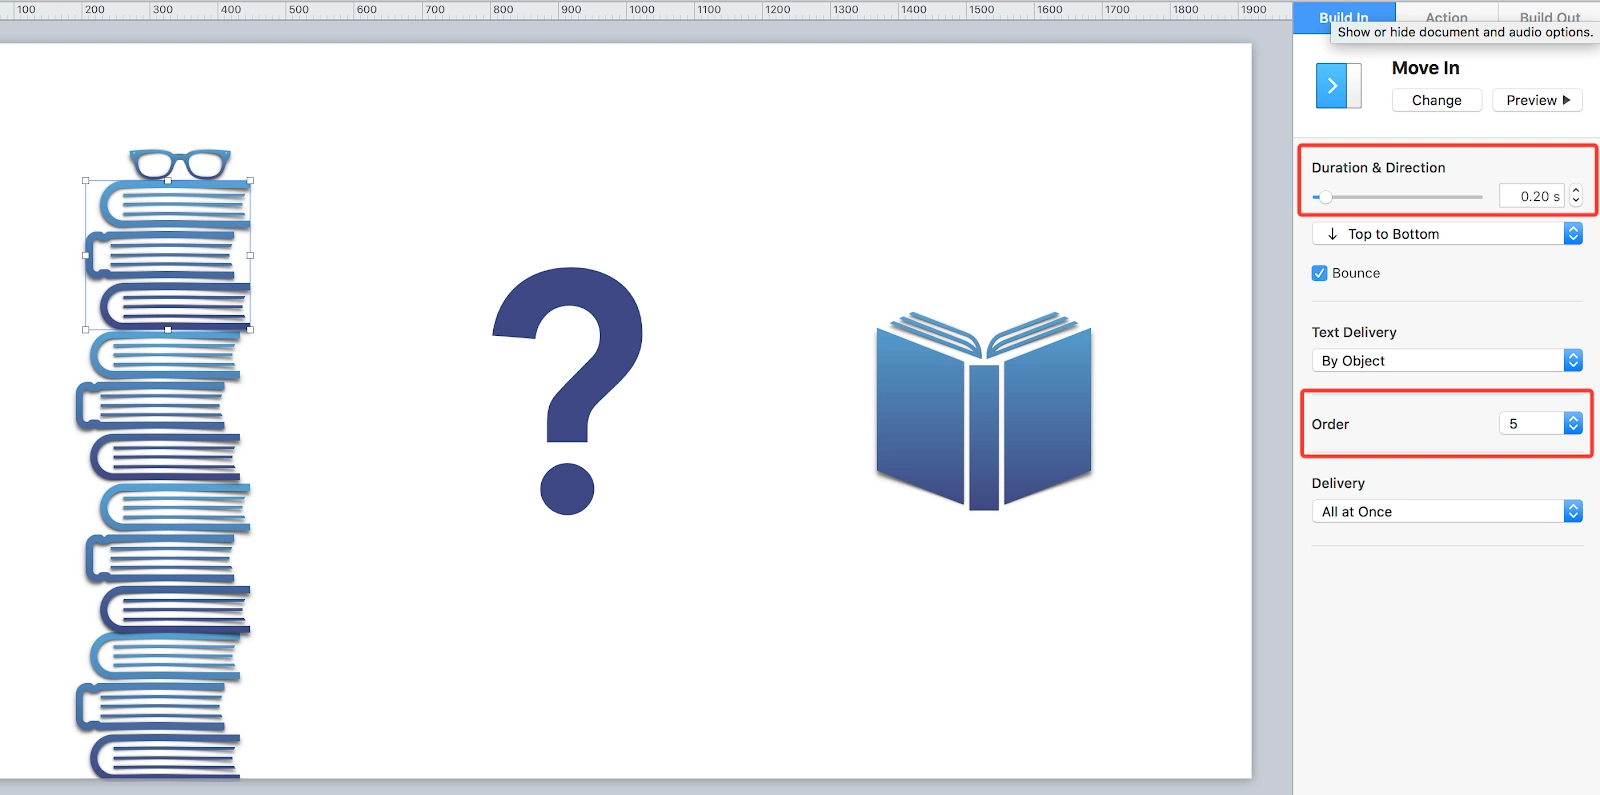
The best part? There are all different kinds of animations. Toggle around and hit the preview button to see what they’re like.
They’ll make your selected text or objects bounce, fly, go up in flames, burst into fireworks, or wipe away. With such a variety, you can make your videos look way more fun and engaging.

For example, in this part of my video, we used the transitions Move In, Scale, and Move Out. We also checked the Bounce box to give the objects a little pep.
Other features worth mentioning when learning how to make animated videos with Keynote:
Want to see more keynote to video clips? Here’s another Keynote animation example of the slides.
Note that we’ve put this in GIF format for easier viewing, but the frame rates are seamless and clean in the actual video.
Once you’ve completed your animation, you’re ready to prepare for recording. Many people hit snags in this process because the format of their screen is different from the format of their slides.
First, download SwitchResX, or a similar screen resizing software.

Once you’ve installed it, you can temporarily change the resolution size of your screen. Go to SwitchResX > Color LCD > Current Resolutions. You’ll see what your screen is already at (mine is usually set at 1680×1050).
Remember how we formatted the Keynote slides to 1920×1080 in the beginning? You’ll select the same screen resolution here to make sure your slides and your screen are perfectly aligned.

You’ll notice your screen resolution shift and things will look a little different. Don’t worry, that just means it’s working. Now, you’re ready to record.
There are several different ways to record your Keynote to video once it’s ready for action. Which method you choose largely depends on your preferences, but I’ll list some pros and cons of each.
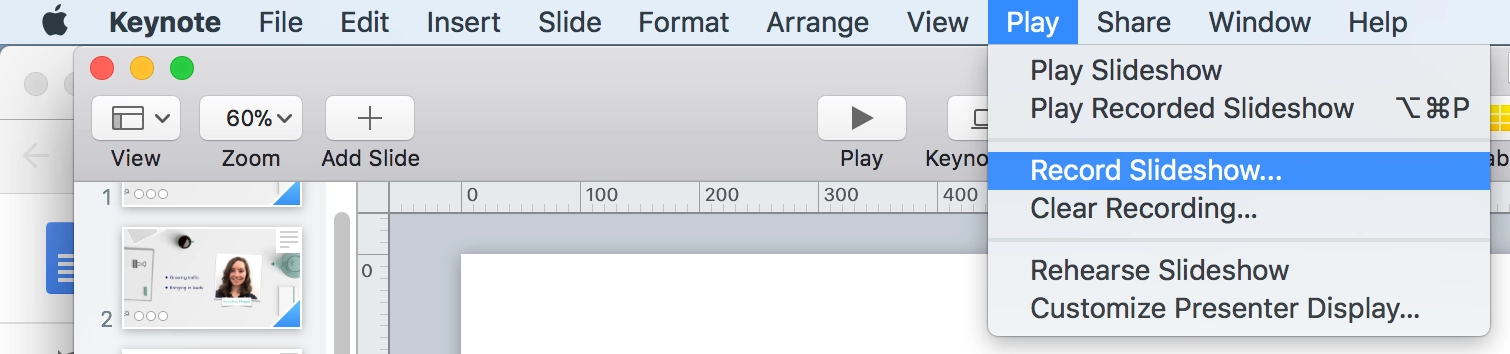
As it turns out, Keynote has its very own recording app.
Screenflow is an app that can simultaneously record your screen and your computer audio at the same time.
Consider recording the screenflow first and then bring in audio recorded from an external mic in later.

You can also see your Keynote program while using QuickTime. All you have to do is enter the program and then select File > New Screen Recording. You can select the entire screen instead of cropping because you’ve already formatted the screen correctly.
Once you’ve completed recording a video, make sure to export it in the correct dimensions as well. (See why we wanted you to know about all of them!)

For example, with QuickTime, once the recording is over, you’ll want to save the file in the correct dimensions as well. You can do this by going to File > Export As > 1080. This fits the YouTube-style resolution we’ve been consistently using throughout.
Now, it’s time to mix your animated slides and audio together.
If you’ve decided to go with a computer mic and recorded this all together on Keynote, you may even skip this step. (We do recommend that you use an external mic or headphone mic if possible. You can read more about recording quality sound here.)
If you’d like to add intro and outtro slides, music, or other effects, you’ll need video editing software to complete the job. Here are some basic options, along with the pros and cons.
Apple Movie comes with Macs and has an incredibly simple user interface.
Adobe Premiere Pro is the industry standard for video editing. The industry standard used to be Final Cut Pro, until their product became too similar to Apple Movie.
Overall, the choice of video editor is yours! Do your research to see which one would best fit your needs and your process to make animated videos with Keynote.
We’ve talked about dimensions a lot in this post. But this is tip a million and one: Check your dimensions throughout every step of the process when it comes to understanding the process to make animated videos with Keynote. Here is where you’ve ensured your dimensions are 1920×1080 so far:
Next, you’ll have to look out for these, too:
You’ve created your slides. You’ve learned how to make animated videos with Keynote. And then you’ve edited and uploaded them with the perfect dimensions in mind. Once you complete these steps, you’ll have gorgeous, animated videos built for an exceptional online course.
Still curious what they can look like? Here’s another video we produced with Keynote:

And a couple others we found online:


Those videos will look so professional and may give you the justification to charge more for your courses.