Webinars are powerful marketing tools because they help you really connect with your audience. They’re often more attractive to your audience than simple blog posts or podcasts because speaking directly to your audience live on camera feels more personal. But webinars aren’t everybody’s cup of tea.
In fact, they’re some people’s nightmares. Never mind the stage fright that comes from going live on video and knowing that there are hundreds of people watching your every move, the tech side of things can be a nightmare, too. Luckily, we’re walking you through how to host webinars on Teachable.
Why host webinars on Teachable?
Creating a one-stop shop for your online business is so valuable because it establishes cohesiveness around your brand and eliminates any potential confusion from your students. While there are third-party webinar programs that are wonderful, hosting webinars directly through your Teachable school can save you money and save your students the confusion of where exactly to find you.
Happy hosting
To be clear: Teachable isn’t a webinar platform. And we don’t have a native webinar hosting feature. But, the workaround is simple enough that it may as well be native. To host webinars on Teachable, you’ll need to choose a third-party livestream program to embed into your Teachable school.
Here are a few of our suggestions:
For the purpose of this blog post, we’ll walk you through hosting webinars on Teachable through YouTube’s live stream feature, but just know the steps are nearly identical for all programs.
Using YouTube to host webinars on Teachable
If you don’t already have a YouTube account, sign up for one and verify your account using your phone number. Once you’re logged into your YouTube account, click the icon in the upper right hand corner of the page and select “YouTube Studio (beta).”
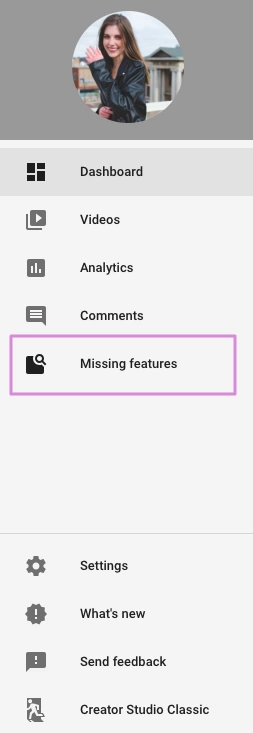
From there, you’ll be taken to the YouTube Studio where you’ll be presented with a new sidebar on the left of the screen. Click “missing features” and then “live streaming.”
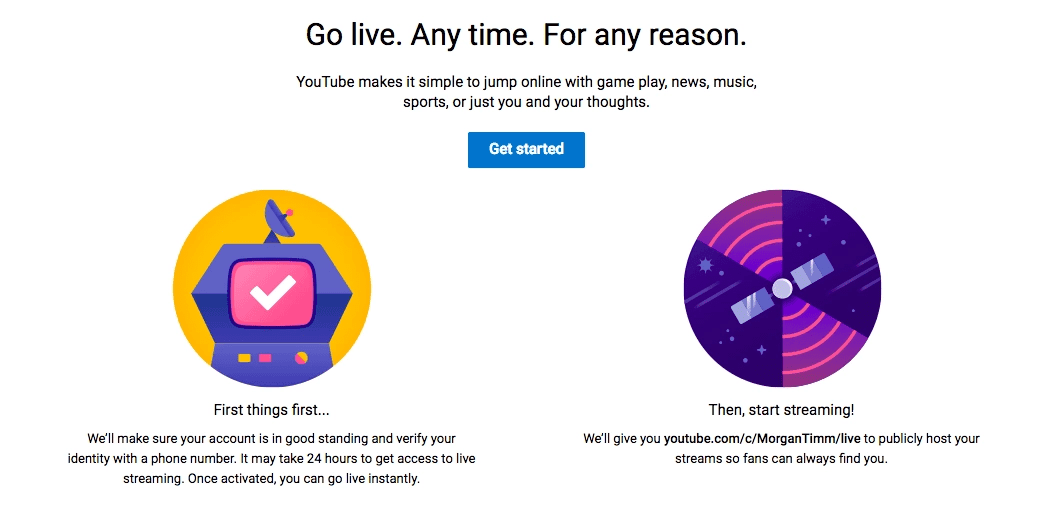
Setting up your livestream on YouTube
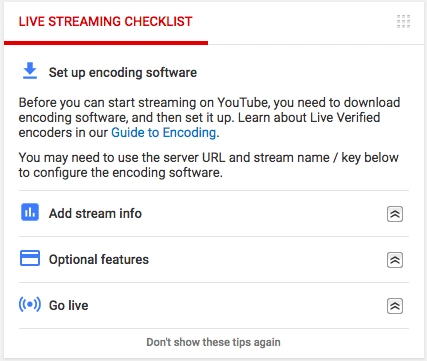
Click “get started.” From there, things are going to get just a tiny bit complicated because you have to set up encoding. Now, this isn’t nearly as difficult as it sounds and YouTube will walk you through start to finish.
Chances are, you’ll be live streaming using your computer’s webcam. With that in mind, select this option on YouTube’s Guide to Encoding page.
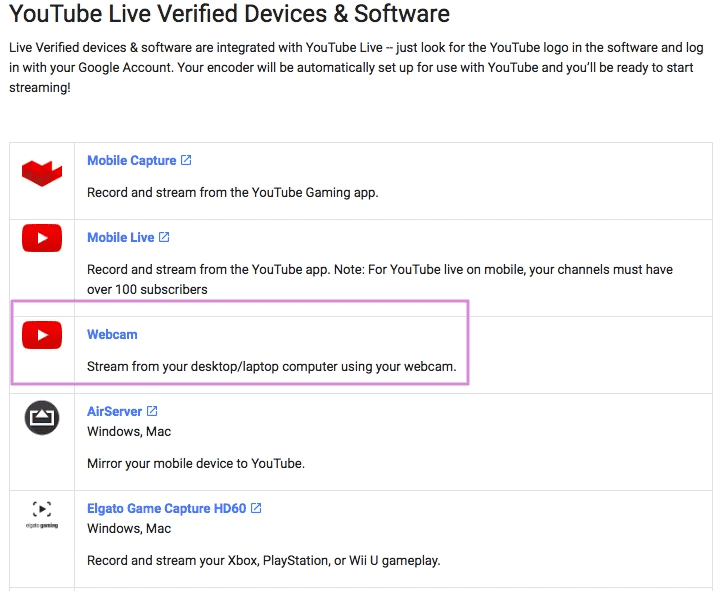
This is one of the most straightforward options. And, there are very few steps you’ll need to take to get started.
If you’re on the go, you can also choose one of the YouTube-approved mobile stream encoders, in which case you’ll need to download the programs and insert your Stream Key to identify yourself. (You can find your stream key on your YouTube live page.)

Customizing your livestream on YouTube
Next step for understanding how to host webinars on Teachable, customize your livestream by adding a title, description, and thumbnail. You should also select a relevant category from the drop down menu and schedule the livestream so it begins at your advertised time.
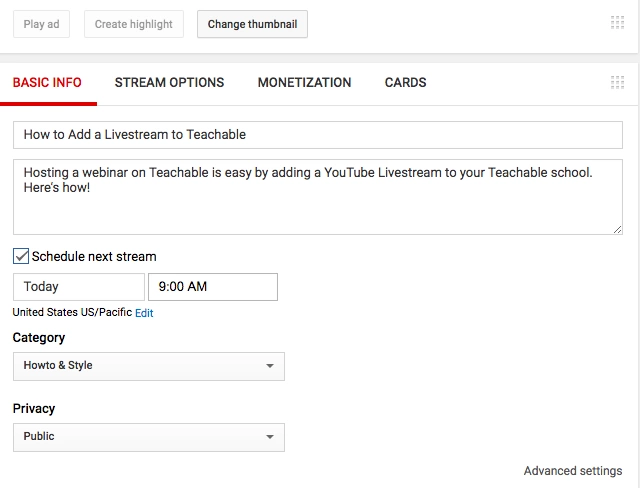
Finding your livestream embed code
Once your live stream is set up and ready to go, your next step is to embed it into your Teachable school. To get your embed code, scroll to the bottom of the YouTube Livestream page to find the sharing options and click “view on watch page.”
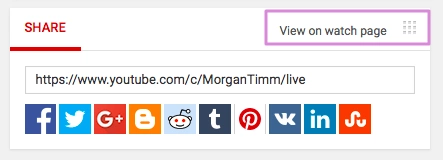
That will take you to the live page of your livestream. If you spend any time on YouTube, the page should look familiar. Livestreams and prerecorded YouTube videos both live on watch pages with the same format. Click “share.”

By clicking share, you’ll pull up a share page with a handful of options. Click “embed.”
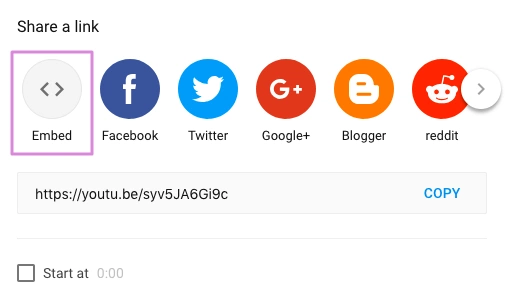
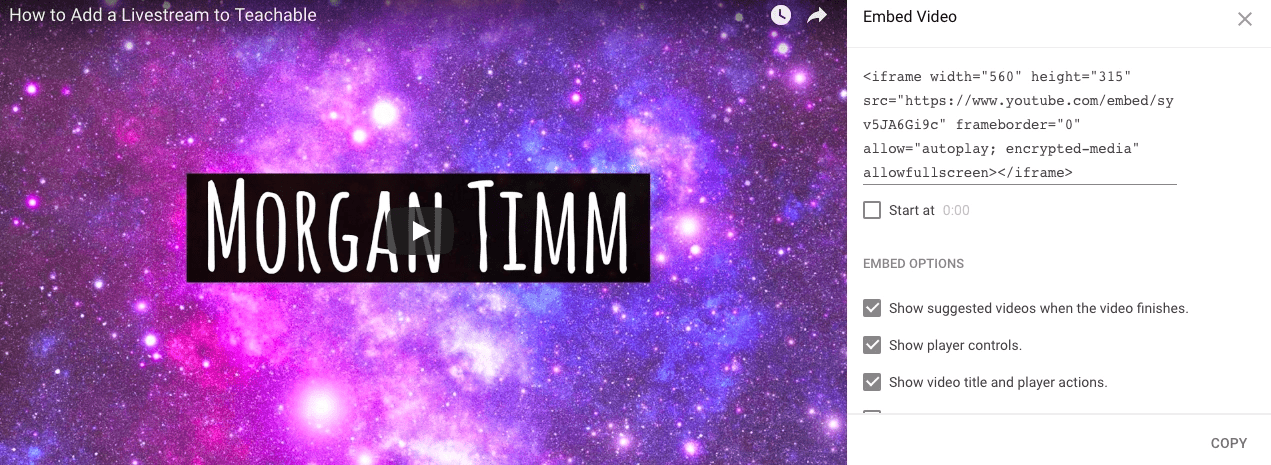
From there, your embed code will pop up. Copy that and log into your Teachable school.
Embedding your live stream into your Teachable school
Select which course you’d like to embed your live stream into, and then choose or create the lesson where your live stream will end.
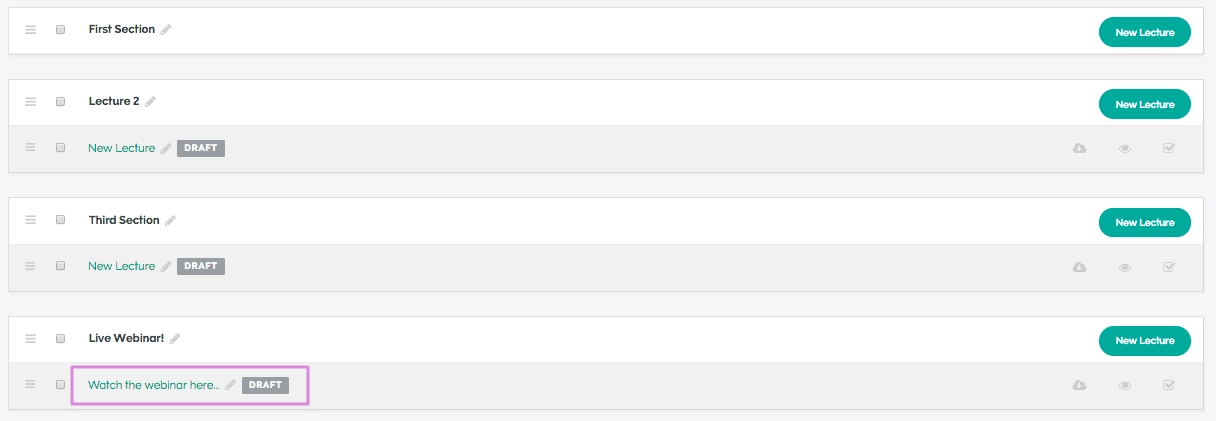
Click “add code.”

Paste the embed code we copied earlier into the code box and click “save.”
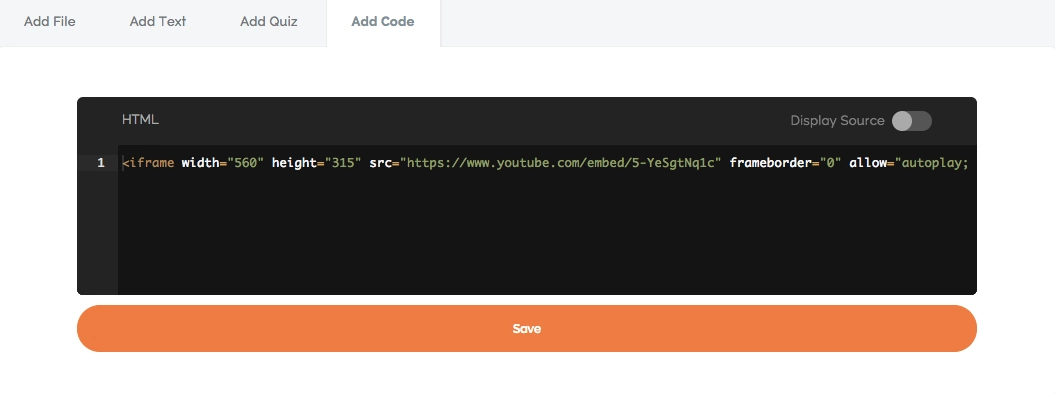
When it comes time to start your webinar, depending on the encoder you’re using, you can either go to the livestream page on YouTube and go live or open the encoder you downloaded, authenticate your livesteam, and click “stream.”
Using livestreams in Teachable to build your list
Even if you haven’t created your online course yet, you can still host webinars in your Teachable school to build your email list. If you don’t have a Teachable account yet, you can sign up for one for free here.
From there, make a new “course” (even though it’ll only exist to host your webinar) and name it whatever you’re calling your webinar.
Next, create a new “lesson” and follow the above steps to embed your YouTube livestream into the lesson.
You should also create a lesson letting your audience know where else they can find you and follow you, and link them to other resources you’ve created.
Set the pricing to free
Next, set up the pricing plan to “free” so people can sign up using only their email addresses. You’ll be able to find their emails and add them to your email list in your Teachable admin.
Set up your sales page
Teachable makes creating professional and beautiful sales pages easy, so you won’t have to fight through coding your own.
Your sales page should walk your audience through what your webinar will cover and who it is for. You can add blocks like testimonials or videos to further compel your audience to sign up.
Join more than 150,000 creators who use Teachable to make a real impact and earn a real income.


