Thank you! Your submission has been received!
Oops! Something went wrong while submitting the form.
MENU


When it comes to marketing your online business there really is no “secret sauce,” however, learning how to create a webinar has proven effective time and time again. Create your product, market it to an interested audience, profit. The thing is, a lot of people get caught up with the second step. There are a million different online marketing techniques to consider, each with their own set of pros and cons. Deciding on which will best serve you and your business goals can leave you in a bind. Thankfully, learning how to create a webinar isn’t as hard as it sounds. We’ll walk you through it.
Webinars are free online events that people can tune into live, like a radio show, or watch later as a recording. Webinars are usually hosted by an authority in a given niche or industry and it’s still one of the most effective ways for brands and content creators to share valuable content with their audiences.
There are three common webinar styles:
Most webinars are around 30-60 minutes long, and the majority of them are free. The reason for it is that most often webinars are used for lead generation. On average, for B2C (business-to-consumers), 20-40% of webinar attendees turn into leads, and for B2B (business-to-business) the conversion rate is 70%.
The key to a successful webinar that converts people into leads is to provide value to the audience tuned in. The subject matter for the webinar can be anything from a demonstration to an informal interview covering a specific topic, as long as it’s valuable to the audience.
Sales webinars (which we’re focusing on here) also include a pitch, usually during the second half of the allotted time. Most live webinars include a few minutes for Q&A for engaging with your audience, moderated via live chat.
If you’re in the online entrepreneurial space, you may have heard of Mariah Coz. She’s the name behind the business Fearless CEO, her brand, and the online school currently hosted on Teachable.
In 2015, Mariah hosted her first webinar. She gave herself a 24-hour deadline to prep for it, notify her audience, and figure out the tech side of things. During the one-hour webinar, she made $4,000. Since that moment, she’s hosted hundreds more webinars and grown her email list by tens of thousands of people.
We’re going to take a look at exactly what works so well about Mariah’s webinars. But first, let’s take a step back and talk about what a webinar entails.
{{minicourse-component="/blog-shortcodes/blog-popup"}}
First you must define the product that you’re going to sell. In this instance, it will be your course.
After you’ve defined the course you want to sell, you need to craft a compelling webinar theme that will naturally flow into the sale of your course. Depending on your audience sophistication and interest, you’ll want to position this in a way that the largest number of people sign up.
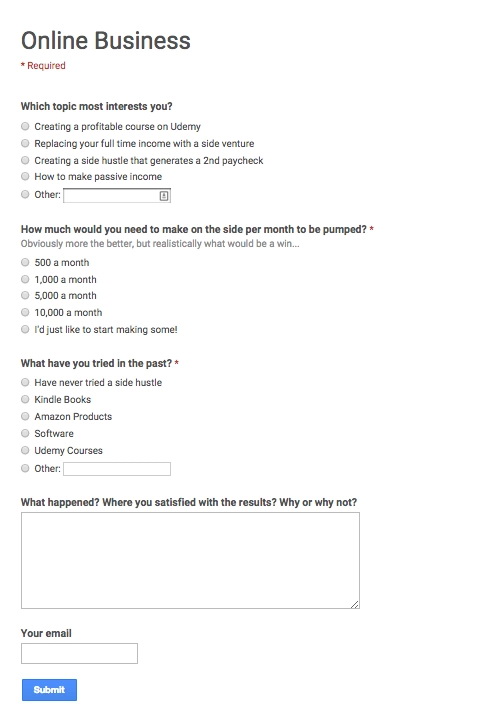
In the case of Scott’s webinar, he decided not to disclose anything about Udemy on the registration page. He did this for a few reasons:
He surveyed his email list, and it turned out people were most interested in “creating passive income” and creating enough of it to replace their full-time paycheck versus creating a Udemy course specifically.
Some people have no idea what Udemy is.
Some people do know what Udemy is and might immediately thin-slice this presentation as something they’re not interested in based on a very limited experience with the site.
Sometimes you need to sell people what they want and give them what they need.
Here is a link to the exact survey Scott used to define my positioning.
Once you’ve determined your webinar title and positioning, it’s time to create the actual content. From there, you’ll also want to do a dry run.
There are a variety of ways to do this, but here is how Scott did it:
First create a brief outline of how the presentation will flow. For Scott’s webinars, he always does the following:
From here, use your outline to write a script for the webinar.
This helps you think through everything you want to touch on. The balance should be 80 percent free content and value and 20 percent selling only after you’ve given a lot of free value.
After you have your script, use that to create a well-designed slide presentation that accompanies your script. You should aim for the whole presentation to be 60 to 90 minutes. To give you an idea, Scott’s script was 40 pages long in Google Docs and the presentation was 90 minutes long.
The offer is basically how you’re going to sell your course. It can be as simple as selling your course as is, or you can offer bonuses if people buy the course before a certain time period.
For Scott’s webinar, he sold the “Udemy Fast Track” course, but also bundled in six of his other courses and a friend’s course called “Double Your Udemy Sales.”
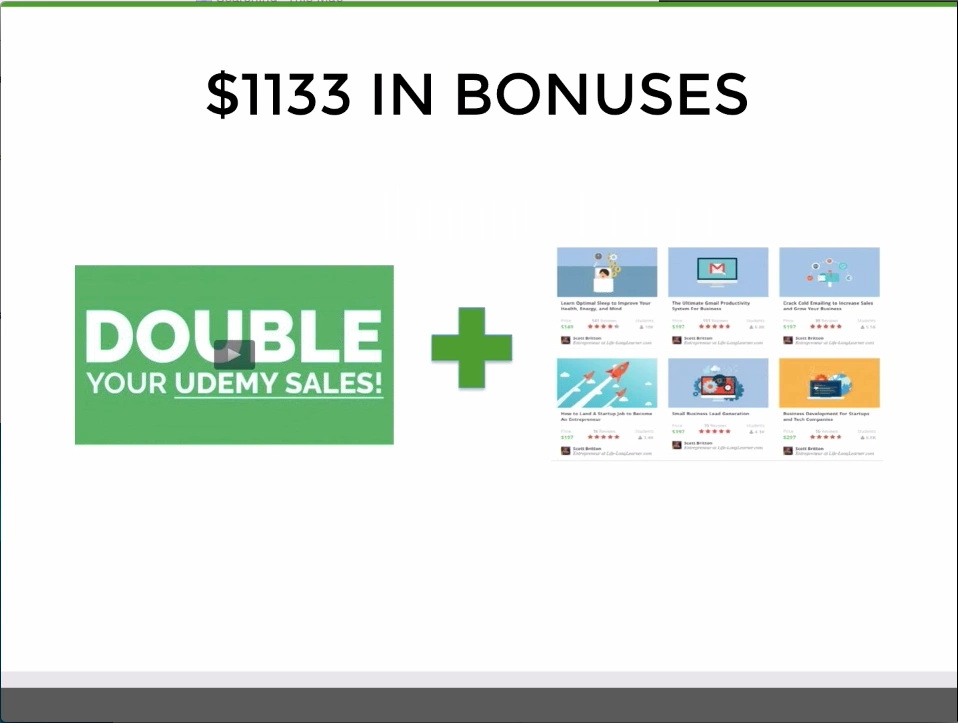
The idea here is to sweeten the deal so much that buying is a no brainer. In this instance, for $297 people were getting $1430 value (1133+297) for $297.
Again, you’ll want to make this offer time sensitive so that people feel a sense of urgency to buy. You can even go as far as giving people who purchase within one hour of the webinar an additional bonus to incentivize people to not only attend, but also strike while they’re excited about your offering.
You know your audience and the times that will be easiest for them to attend the webinar best, but as a general rule of thumb, we recommend hosting live events on Wednesday evenings EST.
This allows you to do your promotional activity early in the week and close the offer out on the weekend. We’ll go into the ideal schedule in a bit more depth shortly.
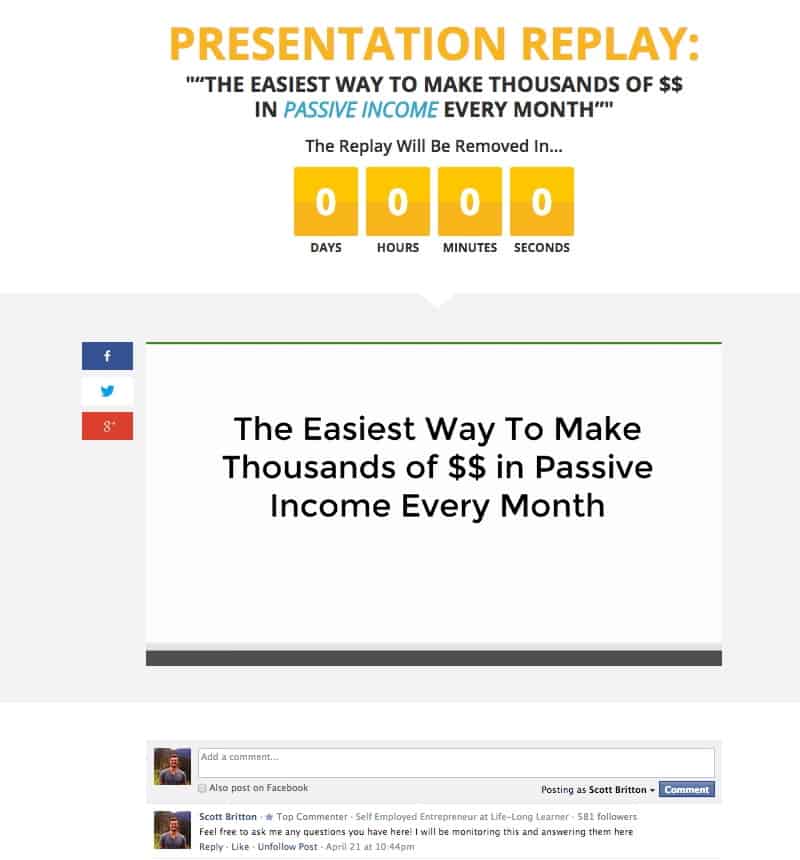
You can see the registration page for my webinar above. We highly recommend using Leadpages for this part of the process. They have a ton of great out of the box templates as well as plug and play integrations with most email providers and webinar software.
The most important function of the registration page is that you have a way to capture registrants information to remind and direct everyone who signs up to your webinar. You don’t have to use leadpages, but make sure whatever you use can accomplish this. Again, a Google form would be the most basic tool for this.
My software stack which we highly recommend is the following:
Because Leadpages allows me to integrate directly with both GoToWebinar and Aweber, as soon as someone registers, they’re immediately confirmed with GoToWebinar as well as added to a special mailing list for the event.
GoToWebinar sends reminders leading up to the event and Aweber allows me to communicate with this audience on a more personalized level leading up to the event as well as after.
Before driving signups, we recommend creating a series of emails for each part of the webinar funnel which includes sign ups, registrant reminders, and post event follow-up.
If you already have an email list or are partnering with someone else who has an email list, we think it’s appropriate to create two emails with a call to action for people to register. The first will be sent to everyone on that list. The second can be a follow-up with a title change to people who did not open the first email. You should appeal to a slightly different hot button in the subject line of your second email.
Email Title 1: Passive Income
Email Title 2 Sent to Unopens: One Way To Fund Your [X]
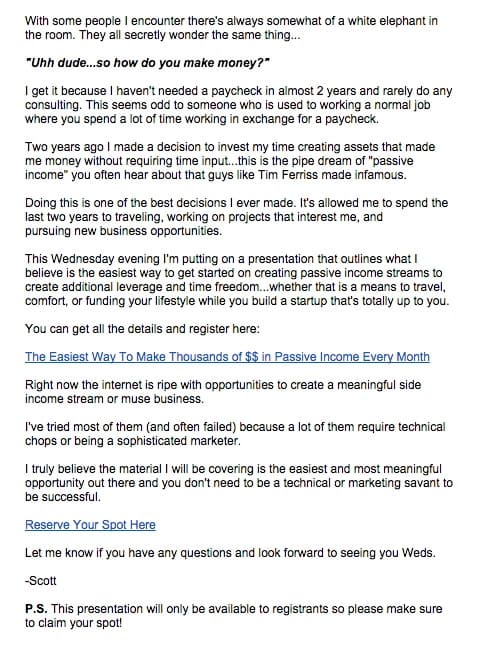
Here is the first email for Scott’s webinar:
Once someone signs up for the webinar, you still need to make sure people show up.
To do this you should be reminding all registrants leading up to the webinar the details like date and time as well as all the awesome things they are going to learn. Depending upon lead time, we recommend sending reminders at minimum 24 hours and one hour in advance of the actual event.
Many people who signed up for your webinar will not have actually attended the event. In addition, many attendees that attended will still be on the fence about whether or not they should purchase your product. This is why you need to send follow-up emails to people after the webinar to push them to ideally take both actions.
Depending on whether you want to try and segment people who attended the webinar versus non-attendees (which you can do in GoToWebinar), you should focus the first one to two messages on watching the replay and the last one to two follow-ups on purchasing the product you’re selling.
We like having all of these emails written in advance, so that we don’t feel like we have to scramble to get all the pieces together in order to maximize the results from the event the week of.
Once you have all your emails and webinar content queued up, it’s time to promote your webinar and push people to sign up for the webinar.
For Scott’s webinar, he sent two email blasts out to his email list and some light social media. The first day he sent it to everyone on my email list. And as mentioned earlier the following morning he sent an email to the segment of people who didn’t open that email.
If you don’t have an email list, you could drive traffic to this page by:
Because you’ve done a lot of the preparation work beforehand, this is really the last new step in the process. After this, it’s all just about executing everything you’ve already created from emails to attendees to the presentation and follow-up process.
By sending out the mailer on Monday, you give people a few days to register for the event as well as time to remind attendees. Give prospects time to register for a time in the near future, otherwise, they’ll sign up and forget about it. It’s always best to strike while the iron is hot.
We’d recommend Wednesday and Thursday to host the actual webinar because generally, people are less busy than say perhaps a Friday night.
Lastly, we like to always make the offer and replay expire around 48 hours after the live presentation, which in this instance was on Friday. If you leave the replay and offer it up forever, there won’t be a strong enough sense of urgency to watch and subsequently buy the product, which is why time-boxing it is so effective.
If someone isn’t able to watch it prior to the expiration and emails you, you can always just send them a link to the video off the record.
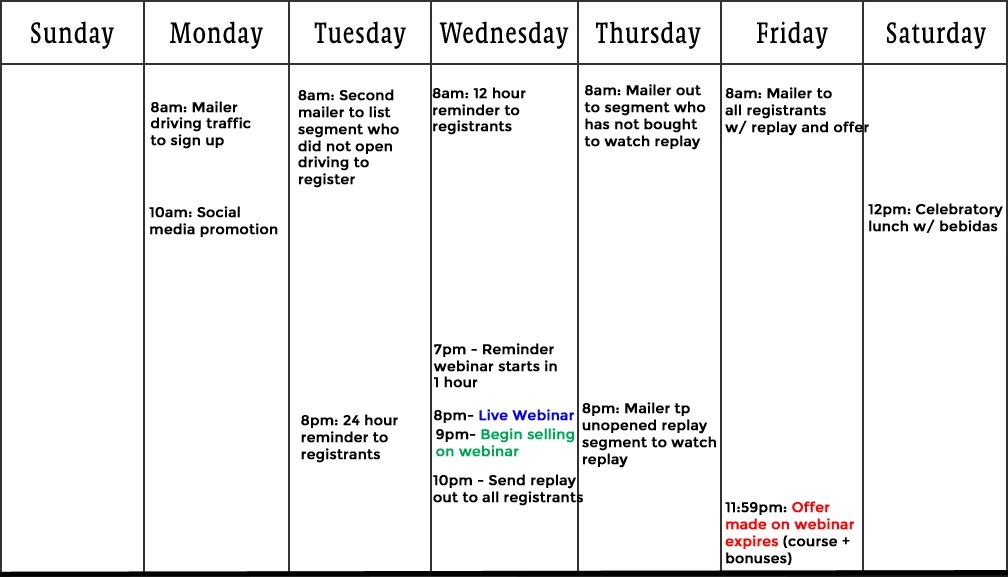
There are a ton of components to this process and timing is very important. Below is what we believe to be the ideal execution schedule for a webinar and the exact one we used for the webinar outlined in this post.
Now, you’ve learned how to create a webinar and done most of the heavy lifting at this point, but you need to make sure to bring your A game during the actual webinar.
Know also that every time you do this, you will get better and more comfortable. So don’t worry if you don’t come out of the gates perfectly.
Immediately after the webinar, you’re going to want to export the webinar recording (often known as a replay), which can be done automatically with GoToWebinar or even hangouts on air. This will be sent out to everyone who registered.
You should host this on a new page that includes a place for attendees to buy the product and ask questions.
If you really want to get fancy, here are a few other best practices:
Note that only after someone has watched the webinar for 60 minutes, a yellow button will appear that allows watchers to purchase.
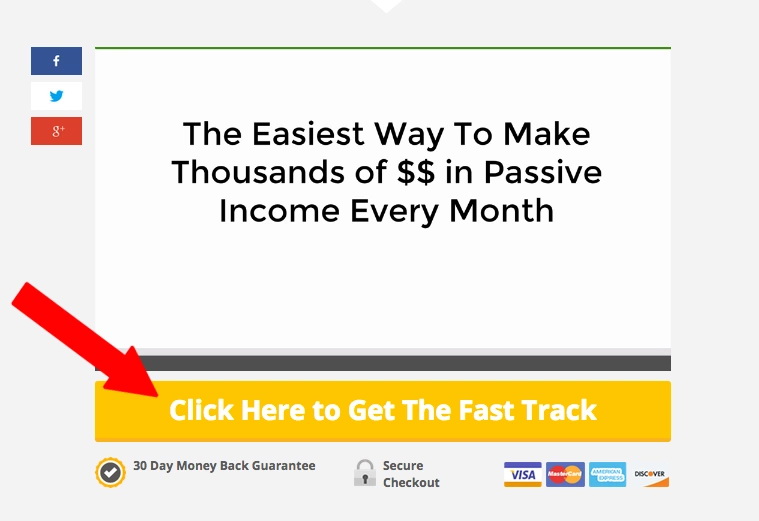
Again, the reason it’s better to time release is so that you have a chance to sell someone before exposing your offer.
After you’ve put your replay page up, it’s now time to send out those emails you constructed!
These emails will all look pretty similar and the goal is the same: do everything you can to get anyone who signed up for the webinar to watch the presentation, if they haven’t already, with the goal of them ultimately purchasing.
If you’re not sure when to schedule these, check out the ideal schedule image above again.
After you’ve executed this whole process, it’s always a best practice to review the analytics of your entire funnel.
This will help understand where you can improve, and provide potential affiliates who might be interested in doing a joint webinar to their audience where you perform the same presentation and go 50/50 on the profits.
Here are the results of Scott’s funnel:
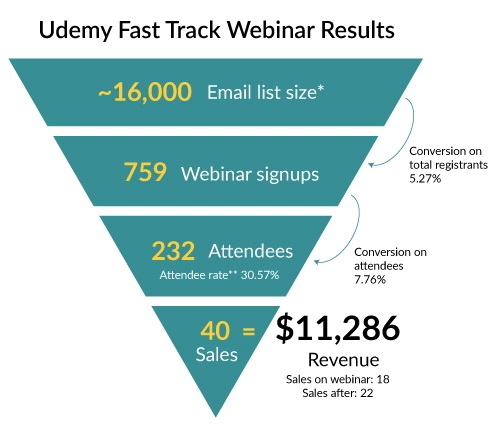
“If I had to give myself constructive feedback, I could have absolutely looked to improve upon the number of registrants as well as attendees. The conversion on attendees and total registrants is pretty on par for a $297 product from what I’ve seen,” said Scott.
If you want more from Scott you can check him out at Life-Long Learner.
If you want to host a webinar to attract new leads and engage your audience, you’ll need to learn how to build a webinar. Creating a webinar that’s engaging and valuable is fairly simple and straightforward, but it does require some preparation beforehand.
The most important tool you’ll need for a webinar presentation is a webinar hosting platform. We recommend using GoToWebinar as it’s a platform designed to help creators and businesses host webinars with ease.
If you choose to use GoToWebinar, let’s go over a quick step-by-step guide on setting up a webinar:
Congratulations, you are ready to host a webinar! As you can see, technical webinar setup is super easy and can be done in less than a few hours. The only thing to keep in mind is your internet connection.
You want to do your best to avoid losing your internet connection or having a poor internet connection during your webinar as it can greatly disturb the experience for the audience. So, make sure you’re in a place with a stable internet connection, and avoid places like libraries, and coffee shops.
Let’s look at a few successful webinar presentation examples to give you a better understanding of how to create a webinar, no matter your niche or industry.
Author and founder of Science of People, Vanessa Van Edwards uses webinars in many different ways to generate leads and sales for her business.
In her 2022 Goal Setting Webinar she teaches the audience how to set goals effectively, and then at the end of the webinar she pitches her program that would help the audience to not only set their goals but also achieve them.
But that’s not the only way Edwards utilizes the power of webinars. On her website, she offers free training (webinar) that you can gain access to if you sign up for her email list. It’s a very effective strategy to grow an email list.

Mariah has come a long way since her first webinar in 2015 and has been using webinars to generate leads and sales successfully since then. She has a selection of free webinars that people can access if they sign up for her email list:

Marketing educator and influencer Jenna Kutcher sells many courses on social media and marketing. For each of her courses that she has, she has hosted a webinar that briefly explains the topic of her course and how people can use it.

And then, at the end of each webinar, she invites people to sign up for her courses so they could further implement the strategies she covered in the webinar.
Lastly, let’s look at an example of a webinar that’s not free, but just as effective in driving sales and generating leads. Kristine Fernandez is a fashion influencer and stylist, and she sells a webinar on how to build the perfect wardrobe.

The webinar is packed with value, and it’s only $7. Plus, to make the offer even more appealing, Kristine invites people who are signing up to grab another of her offers, a style workshop, for a heavily discounted price. For certain niches, this type of webinar presentation model can be very effective.
“Webinars are the best way to share your expertise. The conversion rates are insane. Starting to do webinars to sell my courses has changed my business. I went from making six figures a year to making six figures a month,” says Mariah.
A webinar is a powerful tool for making money online. But why is that? Here are a few reasons webinars can make such a difference to your bottom line:
Whenever you host a webinar, anyone signing up for the event is also adding their email to your subscriber list. Your email list gives you direct access to your audience and to your customers, and it’s a group of people who opted in and asked you to engage with them.
According to Mariah, the standard conversion rate on an email, from opening the email to purchasing, is around two to three percent. Mariah’s webinars consistently convert at a rate of 30 to 40 percent! A number like this is incredibly powerful.
When you team up with someone to conduct a webinar, you’re both tapping into each other’s network and making money from the event. Hosting webinars as a joint venture or an affiliate is also a great way to build your industry relationships, which will expand your audience and further establish you as an authority.
You can find someone else in your niche who is an expert on a complementary topic and then combine your knowledge to create an informative webinar that benefits both audiences.
There’s nothing like a live training for hundreds of people to spur testimonials and social proof about your product. People love connecting with an actual person, and being able to talk live with your audience and directly answer questions will strengthen the connection they feel with you (and create goodwill).
Your personal brand is basically what people think of when they think of you. By hosting these webinars, you’ll help your audience consider you an expert at whatever you’re teaching. “My brand skyrocketed after webinars because you have a name and brand recognition,” Mariah said in her webinar with us.
In the world of online business, recycling, and repurposing content is a big deal. Every time you sit down to write, you don’t need to recreate the wheel. You can build off of what you have.
Sometimes this means combining several blog posts. It might also mean turning a blog post into an online course, turning a webinar into a blog post…or a blog post into a webinar!
To get the most out of your content, always be sure to record your webinar.
You can use one webinar to:
Plus, webinars are scalable. There is a very small difference in your presentation if you’re speaking to 100 people or 400.
We recommend webinars as a number one tactic for growing your online business, and specifically your online course business, but how do you get started?
Scott Britton of Life-Long Learner created a detailed guide to hosting a successful webinar. (We originally published Scott’s guide over two years ago, but it’s so good that we’re sharing it again.)
Scott is a webinar expert and has hosted more webinars than we can count, and hosted a single webinar that made him $11,286 for his online course Udemy Fast Track.
{{coursecurriculum-component="/blog-shortcodes/blog-popup"}}
Webinars are free online trainings that people can tune into live or watch later as a recording. To attend a webinar, registrants sign up with their email address and get access to a private link. Webinars are usually hosted by an authority in a given niche, or someone who is beginning to establish themselves as an authority and has seen some success.
You know your audience and the times that will be easiest for them to attend the webinar best, but as a general rule of thumb, we recommend hosting live webinar events on Wednesday evenings EST. This allows you to do your promotional activity early in the week and close the offer out on the weekend.
Webinars are often hosted by one expert, who gives a prepared presentation with an accompanying slide deck. Interview formats are also common, in which a host interviews an expert guest. Panel discussions are less common but allow you to harness the expertise of several guests at once. While attendees can engage with the host via the chat, unlike a Zoom meeting, they cannot unmute themselves and be seen or heard.

Today, there are countless methods you can use to monetize a blog. The trick to learning how to monetize a blog is in choosing the right option for you and your online business.
Some bloggers see thousands of visitors per month on their sites, and yet, blog monetization eludes them.
You may be surprised to know that quite a few Teachable employees have online side hustles. Some of us are bloggers or course creators, while others fall somewhere else entirely.
You can make money as a blogger in a number of ways, and they are not all created equal. In this post, we will explore how to get traffic to your site and the best ways to monetize your blog.
To make money as a blogger, you need to first build an audience. After all, content alone doesn’t make money, the influence that you have on others does. The more people follow and engage with your blog, the more potential you have to make money.
To gain that influence you should be promoting your blog posts and strategically growing your website traffic. There are a couple of ways that you can do this, but the most important is to make it easy for people to find your blog through SEO.
SEO, or search engine optimization, is a strategy that businesses use to increase their site’s visibility. Mainly, it focuses on increasing your search engine position or ranking in Google for target keywords—the words and phrases that your target audience is searching for.
For example, if you run a “van life” blog, your target audience might search for things related to vans and travel topics—van and road trip advice, destinations, camping, and so on. To capture SEO, you’d conduct keyword research that dives further into those topics.
Your keyword list might include:
Next, you’d create blog content for each of these target keywords. SEO encompasses much more than topics and keyword research, but this will get you started. Plus, here are a few more insider SEO tips.
You can check out this 6-step guide for more blog SEO tips.
Besides SEO, you can also leverage social media to grow your blog traffic. Here are some social media tactics to try.
Once you have the traffic coming to your blog, turn your readers into active and engaged audience members. One way you can do this is by offering lead magnets, templates, and resources that go beyond blog content.
What’s important is that you’re active, consistent, and solve problems for your audience. Once they begin to trust you, then you have influence.
There are many ways that you can make money blogging, but it’s up to you to decide which is the best fit. We’ve outlined some of the most popular methods for how to monetize a blog below, with tips and steps you can apply to your own business.
When it comes to how to monetize a blog, running display ads is one of the most common tactics. It’s the first monetization step that bloggers take because it’s the easiest.
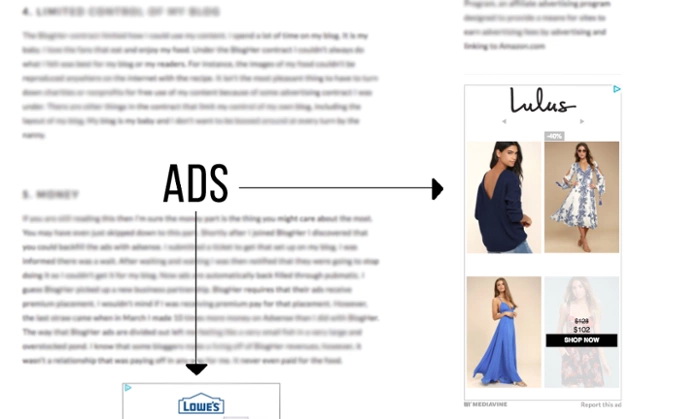
Even if you aren’t familiar with the term “display ads”, you’ve seen them (on pretty much every news site on the Internet). They are digital ads that appear at the top, sides, bottom, or in-between sections of content on your website.
To start running ads, you’ll need to use an ad network. In general terms, ad networks are marketplaces where you can list ad space on your site and advertisers can buy it.
There are hundreds of ad networks you can use to run ads on your blog.
By far, the most popular ad network for bloggers is AdSense. Most bloggers start there because Google has fewer requirements to join and advertise. On the other hand, more established bloggers might use networks that are harder to join but have better compensation.
Different ad networks have different standards. Some have requirements like minimum page views or monthly sessions to join. Others only work with bloggers who get a certain amount of traffic each month.
It’s best to explore each one to see if you have the criteria needed to join.
Once you’ve been accepted into your chosen ad network, you’ll be given a code to put into the backend of your blog. After adding this snippet of code, ads will begin to appear on your website.
Some ad networks are better than others as far as targeting the ads and making sure they’re relevant to you and your site. Others will run any ads (even ones that might hurt your brand) without giving you any power over what is seen.
Of course, if you are asking how to monetize your blog, you’re also thinking about how much you’ll get paid. Ad networks will typically pay blogs based on RPM (revenue per thousand visitors). It’s an estimate of how much revenue a site can generate for every thousand visitors.
Some factors that impact how much money you make from ads on your blog include:
On a similar note, some ad networks are more profitable than others. While some networks only give you credit when someone actually clicks the ad, others are impressions based. In the latter case, you get paid regardless of whether or not someone clicked on the ad.
Depending upon your niche and the size of your audience, RPM can fluctuate. Rates can be anywhere from $7-$40 per thousand visitors depending on how likely your audience is to buy. If you blog about pop culture, your RPM will likely be much lower than a blog that writes about personal finance.
Pros
Cons
Overall, you won’t get rich off display ads alone, unless you get millions of pageviews each month. Display ads are best used in conjunction with a larger monetization strategy.
If you’re looking for how to monetize a blog, you’ve probably thought about affiliate marketing. With affiliate marketing, you promote a product or service to your audience and get a commission when someone purchases through your affiliate link. This is a great way to monetize your blog if you are not looking to create your own products.
In order for you to get paid, most affiliate marketing programs require your audience to take action or make a purchase.
Affiliate marketing is a scalable revenue opportunity for blogs. Many bloggers leverage it to generate significant revenue. However, like display ad networks, not all affiliate programs are created equal. Different ones pay different commissions.
There are two primary ways you can look for affiliate marketing opportunities—affiliate platforms or directly through brands.
Here are the most common platforms for affiliate marketing.
You most commonly hear about fashion bloggers making their living using LTK on Instagram, but no matter your niche you can find a program for you.
Create a list of affiliate opportunities for your blog based on the content you create. Then you can select the most lucrative and profitable opportunities.
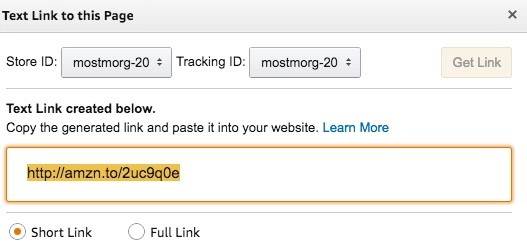
Once you get accepted, your first step should be to get your affiliate links, so you can track clicks and conversions (and get paid). This is what pulling an affiliate link from Amazon looks like:
Then, go through the content you’ve posted and add affiliate links to your highest-performance blog posts. These are posts that are already getting views and engagement so you can start gaining traction right away.
In the future, when you’re writing blog posts check to see if you can link an affiliate rather than a direct link. Once you’ve gotten enough affiliate links added to your backlog of content, you’ll begin to see consistent passive income trickling (then hopefully pouring) in.
Commission, aka how much you get paid f each purchase, varies by company.
The average affiliate commission is anywhere between 5-30% depending on the industry. As your blog gains more traffic, you can negotiate your rates with the affiliate manager.
You can increase the blog revenue you get from affiliate marketing by writing more content and getting more website visitors.
Pros
Cons
As a revenue stream, affiliate marketing and display ads are more passive. Once you have published a piece of content, it can become a stream of passive income.
People who already have an audience and blog traffic will see the most immediate results with affiliate marketing. But, anyone who creates content can use it. Your niche doesn’t matter, either. There are affiliate programs for any niche imaginable.
Note, when you use affiliate links, you need to add a disclaimer that states you may receive payment should someone choose to buy something you’ve shared. The FTC has guidelines for affiliate marketing, but this is its example statement you can repurpose for your blog.

Sponsorships are opportunities where companies pay you to write about their brand, product, or service. There are two types of sponsorship opportunities for most blogs—sponsored posts and sponsorship deals.
Bloggers often partner with brands to publish sponsored posts, and content that highlights a specific product or service.
Put simply, sponsored posts are to blogs what product placement is in movies. You know when you’re watching ET and the classic Reese’s Pieces scene comes on? Sponsored posts are the same idea: A product is naturally woven into a great piece of content.
Here is an example of a sponsored post by Kelsey of Blondes and Bagels. Kelsey worked the product into her post in an organic way, while offering actionable advice to her audience.
The rates for these posts can be very lucrative and they depend on the size of your audience along with your niche.
Sponsorship deals are longer-term arrangements where a sponsor will work with you to promote their business. These deals are not very common, but they are also lucrative. This generally occurs when you write a few sponsored posts for a sponsor and they generate significant revenue.
A sponsorship deal acts as a long-term deal between you and the sponsor and it can be a great revenue stream for your blog. You can negotiate for even bigger deals by asking competitors what they would offer for sponsorships.
Sponsorships are harder to get started with than ads because you need a higher level of influence for brands to want to work with you directly.
A company that provides services for your readers might reach out to you and propose an opportunity. You can also seek out sponsorship opportunities.
Similar to affiliate marketing, there are two ways to look for and land sponsorship opportunities—joining influencer sponsorship networks and pitching directly to brands.
There are dozens of platforms and influencer agencies that serve as middlemen between bloggers and brands. They’ll act as your main contact for communication and oftentimes, you’ll never speak to an actual brand rep directly.
You might see some overlap with affiliate and sponsorship networks. Working with platforms means you’re legally taken care of and you’ve got a team who is going to ensure you get paid. It also means that team will take a cut of that pay, too. When working with networks rather than working directly with the brand you can expect to be paid less.
Other times, a representative from a brand may reach out to you directly—or you to them—and you can negotiate a partnership without a network. When working with the brands directly be careful to read the contract thoroughly, as it covers the brand, not you.
You can also pitch brands directly. When you’re pitching a brand, be concise and to the point. Convey who you are and what you can do for the brand. To give you an idea, here is an example sponsorship pitch template.
Hi there,
Nice to connect with you. I’m (your name), I write (name of your blog with a link)—(add a short 4-6 word description of your content).
(Add a sentence that explains why you want to promote the brand you’re emailing, and why you are an ideal fit.)
I have an audience of (add the size of your audience) that includes (overview your audience niche).
I’ve attached my partnership deck here for more details. Would you like to explore a collaboration between (brand) and (blog name)?
Looking forward to hearing from you and thanks for your time,
(Signature)
A brand partnership deck, also known as a press kit, is an indispensable resource to have if you are reaching out to brands for sponsorships. It goes more in-depth about you, your audience, and past success stories with other brand deals. Also, it should include exact metrics like your monthly organic traffic, click-through rates, and revenue generated.
If you have a large active following on social media, you may also want to include a link to those channels in your email.
Sponsorships need to be mutually beneficial. The brand benefits you by offering you product and compensation. In return, you need to provide a benefit to the brand whether it’s in driving sales, traffic, or brand recognition.
Before you email brands for sponsorship, ask yourself:
If you didn’t answer yes to all three of those questions, take a step back and focus on your problem areas. Once you’ve done that, you can revisit brand sponsorships.
There is no exact audience size you need to start working with brands. In most cases, you won’t see many offers from sponsors until you have at least 10k monthly page views.
Bloggers need to be careful about accepting sponsored posts, though, as your audience may be more attuned to your habits than you’d expect. Pushing products that you don’t genuinely use or enjoy can come back to hurt your business in the long run by ruining trust with your audience.
Creating a connection with brands and getting to try new (and often yet-to-be-released) products is a lot of fun, and after you brush up on your negotiation skills pays very well, too.
Of course, sponsorships come with their own set of pros and cons.
Pros
Cons
Sponsored posts aren’t reserved for any one niche or type of blogger. Anyone from mommy bloggers to food bloggers to tech bloggers can make a significant income by partnering with brands for sponsorships.
However, sponsored posts work best for bloggers who are already organically talking about their favorite brands and products in their blog.
Like affiliate links, sponsored content should have a disclaimer. Here’s an example:

Many established influencers eventually move away from relying solely on revenue from promoting products from other companies. They tend to do less paid ads and affiliate marketing in favor of creating and selling their own products—which can include everything from a few items of merch to a full-blown business enterprise.
For example, Emma Chamberlain launched Chamberlain Coffee. Aimee Song, the fashion blogger behind Song of Style, launched a clothing line in partnership with REVOLVE.
When you create and sell your own products, you are in control. It’s a lot of work, but it has a lot of rewards. For one, you are not sharing commissions or sales with as many people, so you can make a lot of money.
That said, it’s a business, and you have to consider initial costs to create physical products, market, and deliver them. However, you can increase your profit margins—how much money you make—if you have a large, active fanbase.
For example, Emma Chamberlain and Aimee Song have millions of followers and years of experience marketing for brands. This has allowed them to explore their own ventures and have more ownership over their revenue streams.
Although established influencers see the fastest gains from selling physical products, it doesn’t mean that a blogger with a growing audience can’t as well. You might just have different revenue expectations.
In addition to physical products, you can sell digital products and services. Even better, with digital products, there are little to no initial costs to get started. At the same time, you still have the same control over what you sell and how much money you make.
Let’s take a look at the digital products you can offer.
Courses are by far the most lucrative blog monetization technique. Creating an online course is an easy way to establish yourself as an expert in your niche and make a consistent living online.
Most blog posts cover the basics of a topic and leave the reader looking for more.
This is why creating courses on specific pain points for readers is a good opportunity for both your blog and the reader. For the reader, they get access to pre-packaged information and years of your expertise at a fixed cost. In terms of your blog, you get an opportunity to solve your reader’s pain points—all while adding a new consistent revenue stream to your business.
Anyone can sell a course, and you can get started as soon as today for free when you sign up for a Teachable account.
We have full guides on Teachable to help you plan, create and launch a course. But, here are the cliff-notes steps to add courses to a blog—with links to each resource.
Once your courses are live, you’ll also want to internally link to them in blog posts.
For bloggers, a successful course launch can be life-changing.
Adam Enfroy is a recent example of a successful course launch. His blogging course generated nearly $200,000 within the first month.
With a successful course, you can generate thousands of dollars on the day of launch and significant revenue over the lifetime of your blog.
Consulting, or coaching, is another high-ticket blog monetization technique. When your blog is in its early stages, you don’t have the traffic needed to generate significant revenue from ads, affiliate marketing, and sponsorships.
With consulting and coaching, you can start monetizing your blog immediately.
When a visitor from Google lands on one of your blog posts, you are helping them address a specific need. It’s likely that you have written several other blogs that can provide value to that same reader. If you add a call to action on all your blogs for readers to book consultations with you, you can build up a clientele quickly.
As a consultant, you’ll provide tailored advice to your customers. Since you’re already familiar with the topics, you can charge an hourly rate for each coaching session.
The success of your consulting will depend on how much value you bring to customers. If you can help your customer succeed in their objectives, they are far more likely to become a recurring consulting client.
You can charge for consulting and coaching by the hour, by package, or in a payment plan that works for your customers.
One strategy you can use to multiply the amount of money you make from consulting is to target B2B clients instead of B2C clients. B2B clients are typically enterprises and businesses that are looking for help with the topics that you blog about.
They have much more money to spend than your average reader. If you can land a few B2B clients, this can add thousands of dollars of revenue to your blog each month. Like courses, Teachable makes it easy to start your coaching business for free.
One of the most overlooked ways to monetize a blog is to offer a membership plan where your readers pay you monthly for a service.
A membership plan is extremely advantageous because it’s a monthly subscription. It is a more reliable or recurring stream of income each month for your blog and business as a whole.
Out of your entire audience demographic, there will be a small percentage of fanatical members who want to know more details about the content you provide. You can use the membership plan to give your readers exclusive information and access to you.
To have a successful membership plan for your audience, you have to address a specific niche issue.
Understand your audience’s needs to entice them to sign up for the membership plan. Then, develop a value proposition for your membership plan. It can include:
When your audience signs up for your membership plan, they want access to data and information that the general public does not.
You can provide significant value by sharing exclusive information on your business or the topics that you cover. The type of exclusive information you share will depend on your audience’s needs.
The most important value any membership can provide is a community. There’s no way you can interact with all the members of your group on a daily basis. With a community, you can act as an administrator and help delegate other tasks to moderators and other members of a group. This collective effort will bring a lot of value to a single user who signs up for your membership plan.
If you’ve been running your blog for a significant time, you’ll quickly realize that your audience is scattered across the globe.
Many readers who have been fans of your content would love the opportunity to connect with you and other readers. Meetups can be done either in-person or remotely with tools like Zoom. You could run meetups as part of your membership program or as one-off paid events.
If you’ve been blogging for a year or so, you probably have a lot of content under your belt. It is a natural transition from writing blogs to writing ebooks. You can use free design tools like Canva to create your ebook.
Unlike blogs, you can easily charge readers for ebooks. When you sell an ebook, you are usually self-publishing. The most common way for authors to do this is through Amazon’s Kindle Direct Publishing (KDP).
It is free to use and simple. You add your book and it appears in the Kindle Store. However, Amazon takes a percent of sales. The amount varies depending on the country and royalty model you choose. You get between 35% to 70% of sales, and Amazon gets the rest.
Another option is to sell directly through your site. It isn’t a standalone feature, but it’s possible to use the Teachable platform to add ebooks.
Much like selling physical items, selling digital products puts you in control. There is no need to rely on getting sponsored posts or hoping that you get ad clicks. The more you promote and hone your target audience, the more successful you can be.
Like everything else, though, creating and selling digital products has pros and cons.
Pros
Cons
Selling digital products is an ideal option for any online entrepreneur, regardless of niche.
We’ve seen people sell successful online courses for any topic you can imagine. From an iron deficiency in goats to yoga for bros—there are limitless possibilities.
Those who have an established audience will see the most immediate return from digital products.
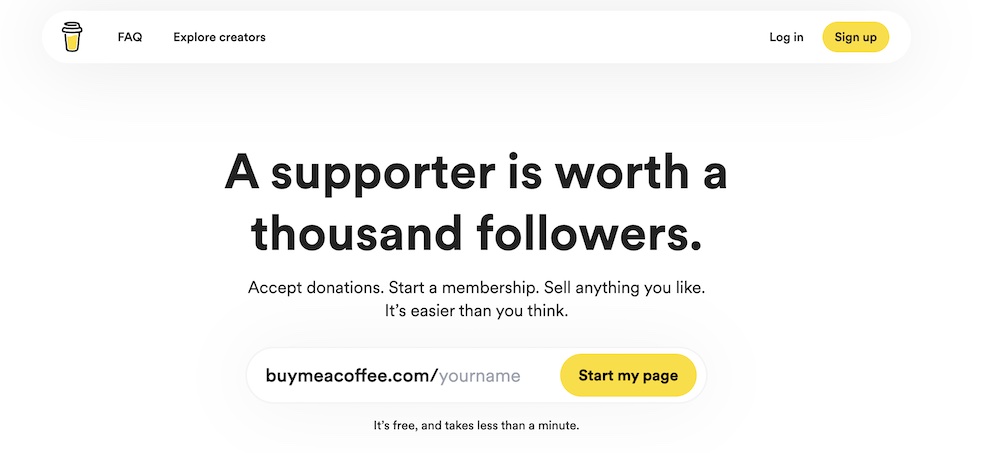
You might be wondering how to monetize a blog with donations. With a loyal audience, you don’t need to sell them anything. Apps like Buy Me A Coffee and Patreon have been created so that fans can show support to their favorite creators with a donation.
Adding donations to your blog is simple and easy. You just choose which platform you want to use and put it on your blog. You can use one of the platforms mentioned above, but keep in mind that they may take a portion of those donations or also have a payment processing fee.
For example, Buy Me a Coffee, takes a 5% transaction fee, and you keep the rest. Ko-fi, a Buy Me a Coffee alternative, claims that it takes 0% of your donations.
Most bloggers will add a link to donate in their about me pages or author bios. You can also subtly link to it in the footer of your site or on social media pages.
Remember that you don’t want to hound your readers to donate. It’s more to let them know that the option is there. With that in mind, donations are not a stable source of income. However, they can be an addition to what you’re currently doing to monetize your blog.
When choosing tactics for how to monetize a blog, it’s up to you. Everyone is going to have different goals and motivations when monetizing their blog, so understand that what might work for one blogger isn’t necessarily the best course of action for you.
Some monetization strategies take longer but are more profitable in the long run. Some may be passive and require little effort, but do not pay as well.
We have seen plenty of people make their entire living selling online courses or writing sponsored posts only. But, it’s best not to put all your eggs in one basket.
These are just some of the ways that you can begin monetizing your blog today. Learn how to get started now for free and create an online course for your audience easily with Teachable.

One of the first questions that Teachable creators ask is how to create a curriculum for a course. A course curriculum outlines everything that students will learn. It can include a collection of lessons, quizzes, and other resources.
Building a course curriculum can be challenging. This might be your first time creating a course or you could be a seasoned creator experiencing writer’s block. Think back to when you were first learning. Some topics that seem obvious to you now weren’t when you were a beginner. Another challenge is knowing where to start and organizing your thoughts into a structured plan.
Thousands of creators have built online courses with Teachable, and the most successful ones have thoughtful, easy-to-follow curriculums. But, how do you create a course curriculum that helps you teach students successfully?
In this article, we’ll outline a nine-step curriculum development process. We’ll also show you how to build one with AI using Teachable’s curriculum generator.
{{coursecurriculum-component="/blog-shortcodes/blog-popup"}}
The best topics for online courses solve a problem and help students achieve a specific goal. They’re also in demand. So, remember: If there’s an audience interested in learning about your expertise, they will pay for access to it.
To start, brainstorm course ideas that reflect your interests and skills. For example, let’s say you like to go thrift shopping, sew, and repurpose old clothes. You could create a course on sewing for beginners or focus it on how to make money upcycling and reselling vintage clothes.
Of course, the topic you start with isn’t set in stone. You can always refine your idea after doing research and working with students.
Creating a course curriculum is a little easier (and faster) when you use Teachable. All you need is an idea and one to three sentences that describe the topics you’ll teach. When you create a new course, you can use Teachable’s AI curriculum generator to build an outline.
For instance, if you teach how to repurpose clothing, you might start with the prompt below.

The generator’s outline would look something like this:

As with any AI tool, this would be more of a starting point that you can refine and edit to suit your needs. You can upload the AI curriculum directly to your Teachable school, but most creators do a little more research before publishing their courses.

{{aicurriculum-component="/blog-shortcodes/blog-cta"}}
It’s hard to explain how to create a curriculum for a course without considering your potential students and their needs. So, next, you need to identify your audience and their pain points. Start by answering these questions:
If you think, “My audience is bloggers,” dig deeper and niche down. Your target audience may actually be college women who want to turn their blogs into full-time careers.
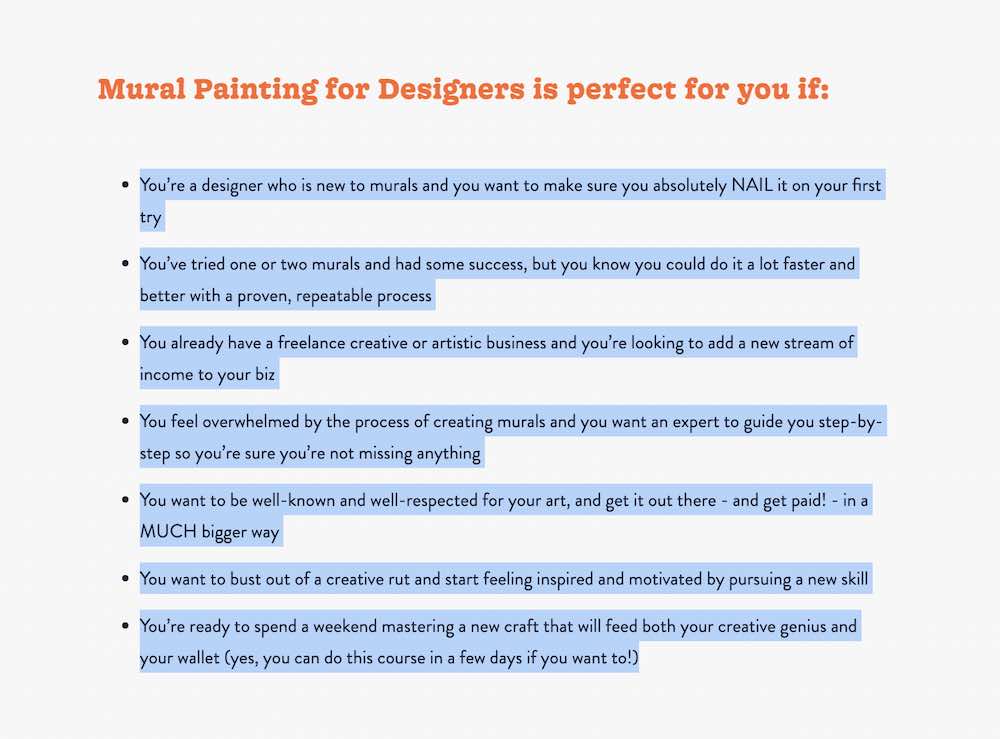
The better you understand your audience, the easier it will be to connect with them. Teachable creator and artist Lauren Hom, whose sales page is below, didn’t just say her mural class was for designers. She identified the struggles and reasons why designers take her classes.
She acknowledged that painting on a large surface can be overwhelming. Then, connect that challenge back to learning outcomes.
Do research to uncover your audience’s pain points. These are the problems your course helps solve. There are two primary ways that you can tackle this:
If you’re in the early stages, you might not have potential students to survey. In this case, there are tons of online communities and tools that help you connect with and survey your target audience. Here are a few tactics that you can use:
Make note of frequently asked questions in these groups. You can also post and ask what topics they’d like to learn about or the challenges they face.
If you already have a sizeable audience, send a survey. You can send one to your email list with a few questions that help you better understand their struggles. For example, if your audience is bloggers, you might ask:
Participants can answer anonymously, just ask a few demographic questions to help you sort through outliers.
Here are a few strategies for polling your audience and understanding their struggles:
Once you’ve polled your audience, look for patterns and make a list of pain points that they frequently mention.
Students take courses to reach an outcome. Assuming that you already have an idea and did audience research, your next step is to define student outcomes.
Let’s pretend that your audience is struggling to go from earning a few hundred dollars a month from their blog to making a full-time income.
Your goal could be to teach students to increase their blog revenue five times over by using specific tactics that you outline in your course. Once you’ve defined your outcome, you can start developing a curriculum.
To get started, ask these questions:
You should clearly outline the outcomes of your teachings on your sales page. For example, going back to Lauren Hom’s Painting Murals for Designers course, she includes a bulleted list of the skills that students will have upon completion.

Put yourself in your students’ shoes. Think about every skill you needed to learn or action you took to get to where you are today. Then, write everything down in a list. Each item on your list is a potential lesson.
As an example, the list you’d make for a full-time blogger course might look like this:
Once you have your list, group each into modules or sections. Pulling from the example list above, you might call a section ‘working with brands’. Inside it, you could group together: joining blogging networks, reaching out to PR companies, and emailing potential blog sponsors. This way, each section is broken into shorter, easy-to-digest lessons.
The goal is to create five to ten that move from easy to more challenging. Starting with easy ones first gives students quick wins. They’ll be motivated to keep going. Then, as they build their skills, you can work up to the more time-consuming and difficult lessons.
Keep in mind that students might not consume your content all at once or from start to finish. Make it as easy as possible for them to find each lecture and jump around.
If you want students to learn from beginning to end without jumping around, you can do so with a Teachable paid plan. When adding your curriculum to Teachable, you can use the course compliance feature. With it, you can enforce a lecture order so that students must watch certain sections to move forward. You can also make it so they must watch 90% of a video before moving to the next lesson.
Your students will not only be investing their money but also their time. Naturally, they’ll want to know how long it will take to complete your course. To estimate the completion time, plan out the length of each of your lessons.
Try to keep each lesson video under ten minutes. In most cases, it’s better to have a handful of short videos than to jam all the information into one 30-minute video.
Of course, there are exceptions. You can break the rules if you think it will create better learning experiences. For example, if you’re teaching an art class and doing a Bob Ross-style “paint with me,” you may record a longer video.
There’s much more to how to create a curriculum for a course than writing down a bulleted list of lessons. You have to create course content, record videos, upload files, add quizzes, and more.
It might seem like a lot but you don’t need fancy, expensive recording equipment to start. You can make an online course by recording a Loom, using your mobile phone, or voicing over a Google slides presentation. The important part is that each piece of content ties back to your course curriculum and student outcomes.
Make sure to answer these questions when creating materials and resources:
It may seem like creating courses will take a lot of work, but planning your curriculum makes it easier.
Writing a curriculum is no easy feat. It’s also a learning process for you. Ask for feedback from current and past students.
Getting feedback from students can help you improve your learning experiences and overall outcomes. As time goes on, you’ll make small changes and updates to your course curriculum.
By making little improvements over time, you’ll build a curriculum that consistently delivers positive student experiences and results.
Now that you’ve explored how to create a curriculum for a course, you may be itching to start producing videos and launching online. To create and sell your course, sign up for Teachable. You can get started with a free plan, build a curriculum with AI, and sell other digital products.

Pre-selling your online course might just be as valuable to your course launch success as your course content itself. A successful pre-sale is the number one way to ensure you’re creating an online product that has an audience and is exactly what your audience wants and needs. Luckily, learning how to pre-sell your online course is easy.
A pre-sale is a targeted sale before your product actually goes live. You sell the idea of your course to a small portion of your audience before you’ve created all of your course content. Typically, you pre-sell by setting up your sales page, discounting your course, and sending an email out to your list (or communicating the sale to your audience in another way). This process gives you feedback to improve your course content, which can then allow you to charge more in the long run.
You pre-sell so you can drip out your content and get feedback from a small batch of customers. You will use this feedback to adjust your game plan as you go and improve the quality of your course before you launch and begin promoting to your entire audience. It’s as simple as that.
Collecting feedback from a targeted audience who wants you to succeed is powerful. You can use that feedback to increase the value of your course and work out all of the kinks before you make your course available to the public.
Collecting feedback also allows you to move past the common “what ifs” fear that Pat Flynn mentioned in his book Will it Fly?.
“A lot of people have ideas, but they don’t want to execute because they’re not sure whether or not that thing that they are going to be working on is actually worth that time and effort. And those what ifs, which are initially, ‘What if this works’, ‘What if this is the one’, those end up turning into: ‘What if I fail’, ‘What if I let my family down’ and ‘What if it was all for nothing.’ And they don’t do anything—they are much more comfortable being complacent with where they are than potentially failing.”
A successful pre-sale of your online course will make you feel confident your course will make money. Pre-sales also allow you to create a course catered to your audience, work out any kinks, and ensure that you’re selling the best product that you possibly can.
Now that you have an idea of what a pre-sale is and why it’s a must for launching your online course, let’s dive into how to create a successful pre-sale for your online course.
It’s likely you already spend a lot of time in the same communities that your audience does, so now all you have to do is take note of the conversations and locate common pain points. When you know what your audience is struggling with, it’ll be easier to cater a course directly to them and ensure that you’re providing the most value possible.
Just don’t build all of it. We recommend dripping your course out and creating content as you go as opposed to creating your entire course before launching any sort of sale.
Make around 20% of your course to begin with and make that portion available to your beta testers. Collect their early feedback before creating the rest of your course.
This is important for four reasons:
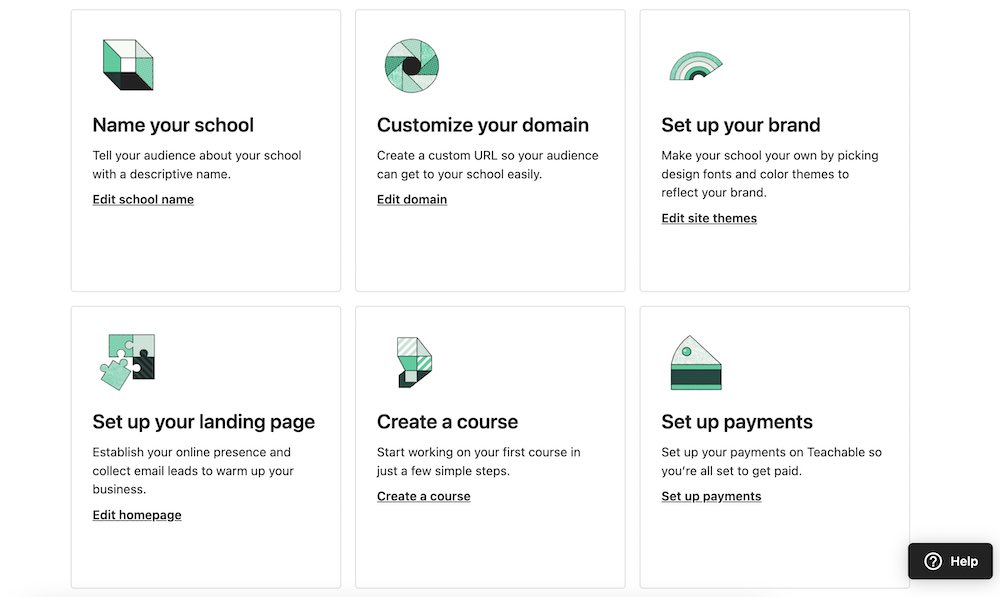
Before you can start generating pre-sales, you want somewhere to send students. Creating a sales page on Teachable is intuitive, but here’s a quick peek of what your sales page on Teachable can look like:
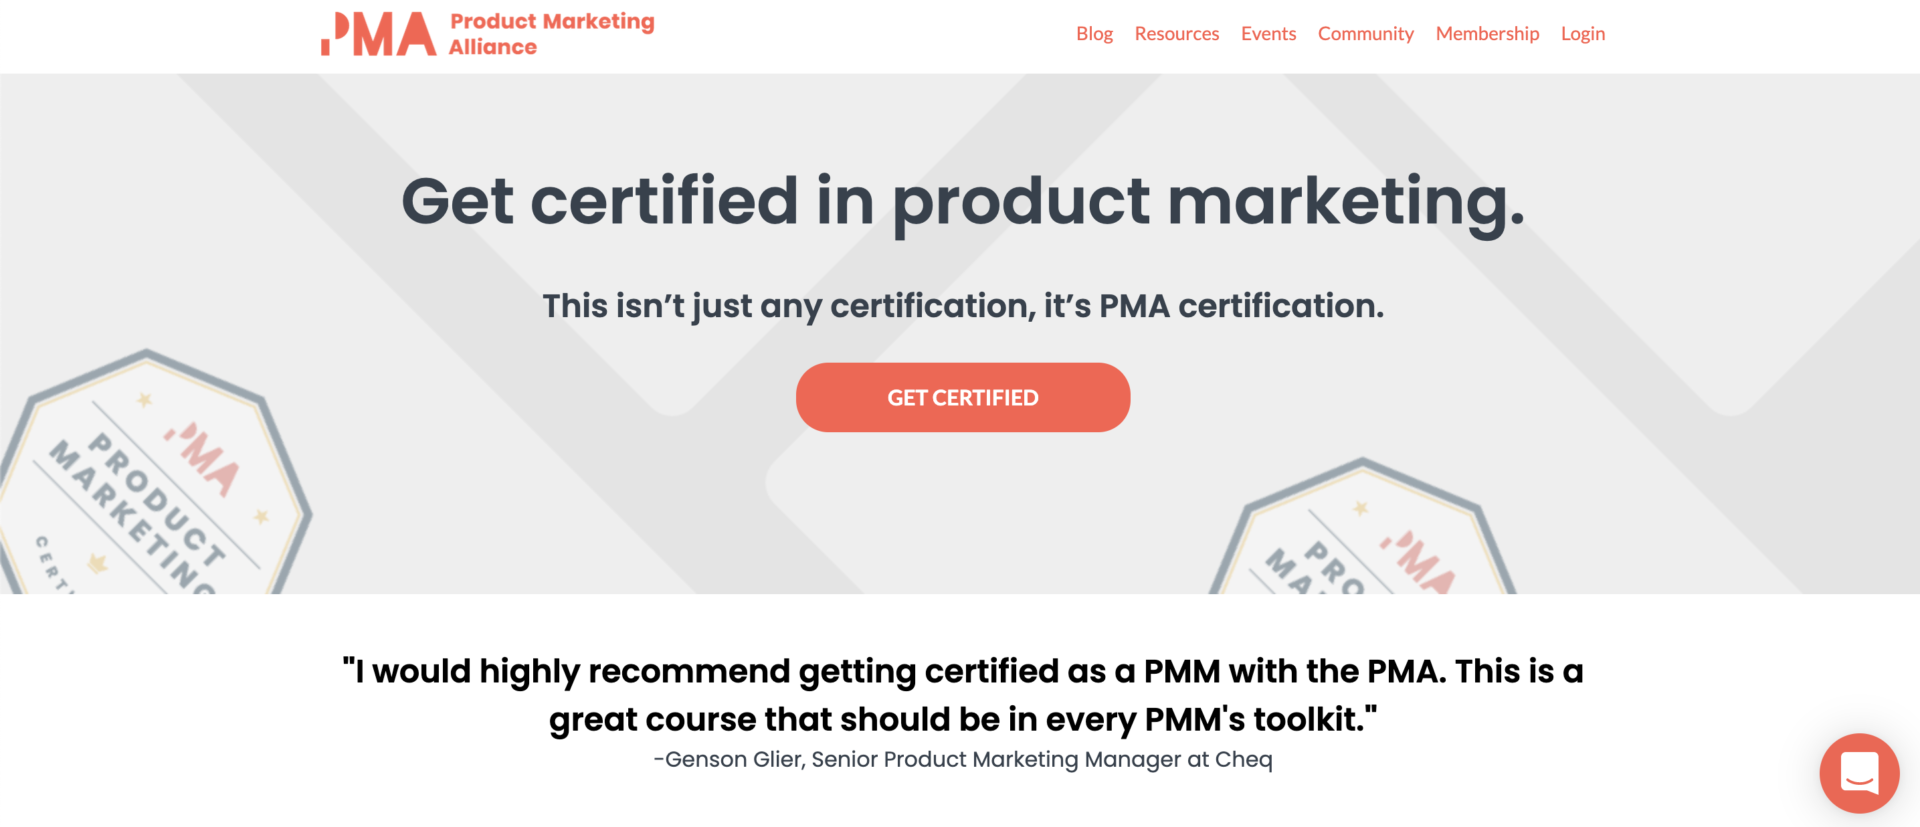
Find more examples of more inspirational sales pages here. You can get creative with the design and formatting of your page, but you should consider adding these elements in addition to what we recommend in a standard sales page.
We’ve seen first-time instructors have successful pre-sales and make five to six figures. For instance, Bree Noble runs The Female Musician Academy & Artist Collective where she helps women master the business of music. Her successful pre-sale strategy was simple, but it worked.
Bree pre-sold her course before she had created any content at all using only her sales page. She said, “…my new students told me that my Teachable school was so beautiful that they could tell the course was going to be amazing.”
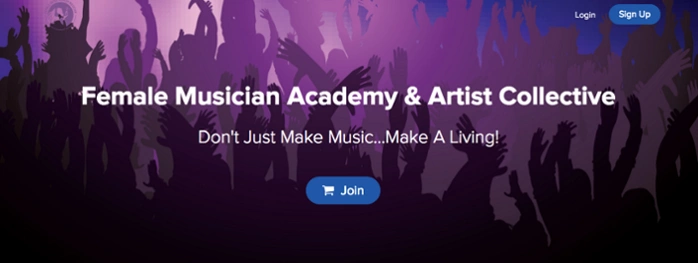
Using her sales page alone, Bree pre-sold to 15 people at $290 each, making $4,350 off of her course before it even launched.
During a successful pre-sale, you don’t want to market to your entire audience. Rather, you’ll market to a select group of people in your network. At Teachable, we recommend sending your pre-sale offer to your email list.
Your email list is full of people who are already fans of yours, and you’ve already provided them with a lot of high-quality content. From there, you should send your list a single pre-sale email. This email should announce your course and let your audience know that they have the exclusive opportunity to be beta students.
The key to marketing to your email list is to send only one email announcing your pre-launch. By sending only one email, you’re targeting your most engaged, loyal, perceptive subscribers. But it’s not enough to simply ask your audience to purchase. You want to be strategic and clearly communicate your expectations.
Get your audience excited about your content and about having the opportunity to directly influence your course through their feedback. Let’s break this down further:
Collecting feedback and taking action is the best way you can increase the value of your course and cater it to your audience. There are three different ways for you to collect feedback:
A few general questions you may want to ask are:
Stress to your students that you will use their feedback to make the course even better. And remind them that as your beta testers, they have lifetime access so they will be able to enjoy the improved course content that will come from their feedback.
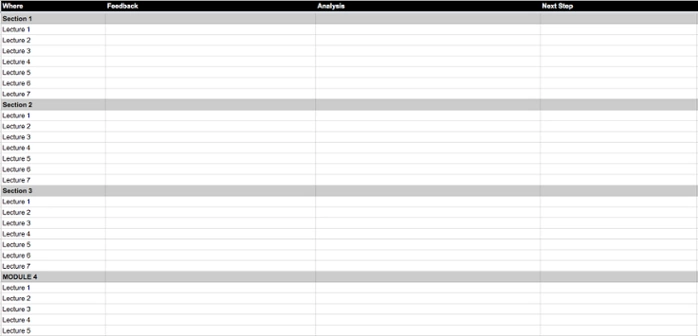
Being able to see everything in one place will help you fight negative bias and also organize all of the ideas presented into one place.
While collecting feedback from your first round of students, consider collecting testimonials, too. Now that you’ve had students complete your course, you can get rid of the more general testimonials in exchange for custom ones that speak directly to your course—and you.
You can pick through the positive feedback that you received from the feedback form to find testimonials, or you can send an email out to your first round of students asking for direct quotes to use on your sales page. Naturally, you never want to tell them what to say, but you can guide them by asking how your course helped them, under what time frame were they able to complete the course, and what their transformation was.
Testimonials are powerful because they prove to prospective customers that you are a true authority and you have delivered on your promise. They’re also an essential part to any successful pre-sale.
At this stage, you’ve launched a successful pre-sale. And you should have everything you need to produce a completed, high-quality course that you know an audience is eager to buy. The pre-sell phase is now over, and you can move on to the exciting phase of launching your course.
Word to the wise: While you’re preparing to transition from pre-sale to launch, make sure that you update your course sales page to reflect current pricing and change any pre-sale language.
{{todolist-component="/blog-shortcodes/blog-popup"}}

How to come up with your profitable course idea is something many course creators struggle with. The right idea can mean the difference between a life-changing launch and something that falls flat and fizzles. Luckily, we’ve got tried and true strategies for coming up with your course idea and are going to share our signature methods with you. Plus, don’t forget to download our “7 steps to launch your own profitable online course” worksheet.
In this post you’ll learn how to:
Whether you’re a blogger, teacher, coach, or just enthusiast within your niche, turn to content you’ve created or ideas you’ve already brainstormed before starting fresh.
{{profitable-component="/blog-shortcodes/blog-popup"}}

Theoretically, you could create dozens of online courses and bring all of your brilliant ideas to life. But for the sake of this post, we’re going to pretend that your goal is to release your first profitable online course as quickly as possible.
Validating your profitable online course idea is essential if you’re worried about whether or not you’ll have any interest in your course.
Searching: Searching is the easiest and fastest way to validate your course topic. All you do is search the Internet to see what other people are looking for, clicking on, and engaging with.

BuzzSumo is a great tool for seeing what online content is attracting the most attention. It’s particularly useful for seeing what is being shared on social media. Another tool is the Amazon Kindle Store, which is actually a search engine filled with ebooks and other information products. You can search for successful ebooks on your topic.
Listening: See what people in your target audience are already wondering. Quora is a place for people to ask any kind of question they have, and wait for subject matter experts to weigh in on the answers. It’s valuable here for you to see not just what questions people are asking, but also how others are answering.
Asking: Get the answer on whether or not people will buy straight from the source. The thing is, you can’t actually straight up ask because often times people aren’t able to accurately predict their own future behavior. Instead, you should ask questions that will tell you what challenges people are facing. If your course solves their problems, that’s a good sign that people will purchase.

Testing: The idea is to put a product in front of your audience and see if they’re interested in buying. This can be a smaller ticket item like an ebook or PDF. Instead of starting off the bat with a paid product, you can use a lead magnet. This allows you to see if your audience are willing to give you something in exchange for your expertise. In this case, it’s just their email address. Once you’ve got your foot in the door, they’ll be more likely to pay for your products down the road.
The more nitty gritty you can get with your topic, the better chance it has to become a profitable online course idea. If you’re too broad, you’ll find yourself in the creation stage for forever. Try to narrow it down to one specific transformation. For example:
Instead of creating a course on how to open your own online shop on Etsy, you could create a course walking your audience through how to create your own online shop selling handmade soaps on Etsy while balancing your full-time job.
It’s important to try not to be everything for everyone. As appealing as it would be to say that your course could help every single Etsy seller ever, that’s unrealistic. Think about who would benefit the most from your expertise, and cater your online course to them.
Let’s go through a few more examples of profitable online course ideas. Let’s pretend that your niche is interior design and you want to teach people how to decorate their living rooms.
Instead of saying, “Everyone with a living room! This is the online course for you!” narrow it down. Your course shouldn’t be “How to decorate your living room.” instead, it could be “How to decorate your living room for less than $1,500.” or “How to decorate your living room with thrift store finds.” or “How to decorate your living room as a minimalist.”
People want to feel like they’re buying a product catered to them, it feels more personal and it gets your audience excited.
Have a specific audience in mind, because you can’t make an entire broad niche happy with your online course. Make sure you’ve narrowed it down and you’re offering something specific and nitty gritty. When it comes to profitable online course ideas, the more niche the better. And remember: No one can offer your POV quite like you can.

If you’ve been wondering how to create an online course, we’ll walk you through the entire process.
With the rise of online course creators, more people are interested in how to start teaching online for a living. Is it profitable to sell online courses? Our answer would be yes. We’ve seen instructors acquire over five million customers and make more than $50 million in sales.
That said, when it comes to how to sell a video course, PDFs, templates, quizzes, live coaching, or other teaching resources, there are best practices to keep in mind. After analyzing over 12,000 course launches, we found a standard pattern that has been proven successful time and time again.
In this post, we’ll walk you through ideation, creation, launching, and more. Everything you need to know about how to create an online course and start making money is here.
{{minicourse-component="/blog-shortcodes/blog-popup"}}
For some, coming up with a course idea is the hardest part of the process. We all want a slice of that multi-billion dollar pie, but how do you know your online course idea is profitable?
We created a profitable course idea workbook to help you unleash your money-making course idea. Download our guide if you’re ready to:
Believe it or not, everyone has an online course in them. We all have unique hobbies, passions, and skills that can translate into an online course. We have profitable teachers with courses ranging from cake decorating to watercolor painting.
When it comes to finding your profitable course idea, it can be broken down into three main questions:
Luckily, we focus on knowledge at Teachable. If you know a topic, you can create a profitable online course.
For example, perhaps you’re passionate about horticulture. While everyone may not be invested in aquaponics, some are dying to learn more about aquaponics.
You just need to find them.
{{profitable-component="/blog-shortcodes/blog-popup"}}
Finding your audience is easy. Your audience may hang out in the same online spaces that you do. Whether you frequent horticulture subreddits or are active in Facebook groups, go there and ask about their struggles.
Think about the transformation your course provides for your target audience. What outcome will students have after taking your course? As a course creator, you need to make that outcome apparent in your pitch to potential students.
Do your students want to learn all about aquaponic gardens? Maybe not. But if you can teach them how to set one up in their own home on a budget, that will get people excited!
To ensure that your customers value your course, present it clearly. You can tell them that you’ll teach them programming, and that’s fine and dandy. However, you’ll show them real value if you tell them instead that you’ll teach them programming so they can get a job that pays more and has more flexibility.
It’s great to advertise what your customers are going to learn. It’s even better if you can market your course and tell them what they will get from learning the skills you’ll teach them.
Find out whether you should create a cohort-based course or a self-paced course.
Many creators have brought in attractive, sizable incomes through online courses. Setting clear income goals is important, but your goals should be more specific than “make money.”
Whether you’re hoping to make $1,000 or $10,000, keep that number in your mind while you’re pricing your course. You can systematically work backward to make sure you hit your revenue goal.
To make $10,000 from creating an online course you could either sell it for $10 to 1,000 students or for $100 to 100 students.
To make more money with an online course, the answer is simple: charge more.
We dug into the data and found that students hold courses that they’ve paid more for as being more valuable and thus, they are more likely to complete them. People oftentimes associate “cheap” with “low-quality” and will be less inclined to buy based on that perceived value.
There are many benefits to using premium pricing. Here are a few proven ones to consider:
There are many considerations when it comes to pricing, so we have an in-depth post on other pricing strategies here.
Charging more for your courses is one of the easiest and most important tactics you should take. However, there are other ways that you can make more money. We’ve built-in course features like upsells, course bundles, and more to help Teachable users increase course revenue.
{{coursepricing-component="/blog-shortcodes/blog-popup"}}
You’ve got your idea and you’ve figured out pricing. Now you get to start creating your course.
When people set out to create an online course, this is often where they get stuck. They know what they want to teach, but implementing it is another story entirely.
The best way to plan your course is to write down every step that students would need to do in chronological order to get their desired outcome. Each step becomes a lesson in your course.
Keep in mind that the purpose of your course is to bring your students to a transformation, so plan your course accordingly. Each lesson should lead to that final outcome.
Once you’ve outlined your lesson topics, you’re one step closer to building a complete curriculum. You’ll probably spend the most time here, and it makes sense. Your course is your product.
Developing a full course curriculum can feel overwhelming, so complete it in small steps. For example, set aside at least 30 minutes a few days a week to develop a 10-minute lesson. When it’s broken up into smaller tasks, it feels easier to accomplish.
Also, remember that the curriculum you use after your first-course cohort can change and evolve. There will be opportunities to improve your content, so gather feedback from your students. Much of the feedback you receive will be things you wouldn’t have thought about or noticed without having real student experiences to pull from. It is completely acceptable to launch your course and adjust it later, so don’t let the fear of imperfection hold you back.
It is easier to sell an online course when you have an organized curriculum with learning objectives, milestones, lessons, and estimated hours to complete. You should include these specifics on the sales page so that potential students know what to expect and understand what is expected of them in terms of time, costs, and benefits.
If you still aren’t sure where to begin, you can follow our step-by-step guide on how to create a curriculum.
Of course, your course will need a home. Before you can launch, you’ll need to decide where you will host your content. At a minimum, the platform that you choose should house your course materials in various formats—video, PDF, and so on. It should also serve as a sales page, also called a landing page.
This will help potential students learn more about you and your course. It’s also where they will hit buy and make a purchase.
There are typically three options for hosting:
An online course platform is designed for creators. For instance, with Teachable, you’ll have everything you need to create and sell online courses, on your terms. You can sign up for free and start uploading your videos, PDFs, and other course materials right away.
There is also the option to host your site on Teachable. Alternatively, if you already have a website, Teachable can easily integrate with it.
Even though Teachable makes it easy to host your courses, you have control over your content and online business, which is a key point that marketplaces lack. (More on the specifics below.)
With self-hosting, you set up everything yourself. You’ll need to set up and pay for a server to host your site. Then, you have to build the site, set up payment processing, design landing pages, and everything in between.
Self-hosting gives you the freedom to build your site how you like, but doing that also takes a significant amount of time and technical knowledge.
In terms of hosting, learning marketplaces like Udemy and Skillshare act similarly to YouTube. They host everything on their site, and you upload the videos. The appeal for some is that these sites have users and traffic, although, that doesn’t mean that those users will watch your video course.
We commonly see creators move away from marketplaces because the platforms take a significant portion of a creator’s revenue. Usually, these platforms compensate creators based on how many minutes of their videos visitors watch. After putting hours of time into a course, you could end up making pennies and dollars because the marketplace platform takes as much as 30% to 50%.
When you’re figuring out how to create an online course, consider which features are not negotiable for you. Here is what many creators prioritize:
All of the above is available on Teachable. If you are itching to make a course, but don’t have the money to invest, you can get started right now with a free Teachable plan.
People often ask: What equipment do I need to create an online course?
With Teachable, you can get started without fancy camera or microphone equipment. Teachable allows you to upload text, PowerPoints, keynote presentations, videos, and audio interviews—meaning that you can work with whatever medium you are most comfortable with.
To create slides, you can use templates from one of the below free services, and customize them with your own personal branding:
Most often we see instructors using a combination of both text and video. If you are voicing over slides, we recommend using a free tool like Loom or trying out Screenflow for Mac. Both allow you to voiceover slides, and you can edit the video afterward.
You can also easily set up a low-cost home video studio in the beginning. As your online course business grows, you can always invest in equipment but it isn’t needed to get started. Video content can seem intimidating, but with a bit of practice, you’ll start feeling like a natural.
If you want to invest in audio, video, or other recording equipment, we have some recommendations.
You can start off using natural lighting for your videos. All you need to do is set up near a window with the light facing you. However, natural lighting can be fickle. If you are filming during rainy days or early morning and evening hours, there may not be much daylight to work with.
It is a good idea to have backup lighting equipment, and there are a lot of affordable options. With a home studio, you’ll generally want to go with two lighting choices.
If you have a space in your home or office to set up a background that reflects your brand and business, then you may not need a backdrop. However, if you don’t have a dedicated space or just want a simple background, you can do that with the help of a backdrop. If you plan to change your background through editing, grab a green screen. You can find a backdrop separately for as low as $35, or get an all-in-one studio kit that includes it along with lights.
Once you record your videos, you may want to add or overlay them with images or text. You also may make mistakes during recording. Instead of completely redoing your course, you may be able to simply clean up and cut sections. To do that, you’ll need video editing software. The most popular choices are:
When it comes to how to sell a video course, you may want to invest a little more into the production quality of your content. These tools can help give your courses a professional polish, but again, they aren’t required to get started.
You may have heard that you should build an email list for your business, but how do you do that exactly?
The fastest way to grow your email list is to give something away for free.
This free product will be your lead magnet, and it’s intended to draw in a targeted and interested audience.
This lead magnet will prove to your audience that you produce quality content and that you’re a trusted resource.

Here’s what you can give away:
Your lead magnet should be directly related to your online course content, so you attract your target audience. If you teach TikTok marketing, create a lead magnet for TikTok, not Facebook or another platform.
With a mini email course, you can look at your full, ten-section course. Then, take the first section and repurpose it into a lead magnet. The people interested in your lead magnet will also be interested in your premium offering on the same topic.
Viral giveaways are another popular way to grow your email list. With software like KingSumo, you can give away a high-value prize pack. Make sure it’s specific to your course and grow your list like crazy. Viral giveaways are effective because entrants can share a link to your giveaway to get more entries, thus advertising your giveaway with zero effort on your part.
If you have a ton of blog posts on your course topic, compile them into an ebook to giveaway to your course audience. If you already have the content it will be nearly effortless to compile and convert to a PDF. From there you can set up landing pages and lead magnets on relevant posts and begin collecting emails.
It’s usually safe to say that 2% of your email list will convert into paying customers. Going back to step two, we can figure out how large your list should be before you launch. If you need 100 students to reach your $10,000 goal, then you should aim to have a list of 5,000 before you launch.
{{digitaldownload-component="/blog-shortcodes/blog-popup"}}
Setting up your sales page is key to start making money online and creating your online course.

There are six assets that we recommend including to make your sales page as high-converting as possible:
Interested in more information on creating beautiful sales pages?
After all your hard work, it’s time to launch your online course. And, while it’s fun to experiment with different marketing techniques, we’ve found that when it comes to launching, a tried-and-true method always performs better. This is why we’ve created a plug-and-play email launch sequence for you.
It’s easy to implement, effective, and has been used by members of our community to make up to five figures on their launch.
The idea is simple: After building your email list and nurturing it with some free content (like blog posts, videos, etc.), you launch your course through a series of strategic emails. These emails work to build anticipation for your launch and the urgency to buy now.

Here’s what the sequence looks like per day:
To make it even easier, we created a full step-by-step guide and email sequence template for launching a course.
Anyone can learn how to create an online course. However, you can increase your chances of success by leveraging this step-by-step guide. With Teachable, you can start building your course as soon as today when you sign up for a free plan.