Thank you! Your submission has been received!
Oops! Something went wrong while submitting the form.
MENU

If you’ve been wondering how to upload a video or add a blog to your school (or anything in between) look no further. Here is exactly how to set up your Teachable school and optimize it for success.
But first, let’s take a little tour of your Teachable school. When you log in, you see something like this. If you don’t already have a school created, click the “create a school” button on the left sidebar.
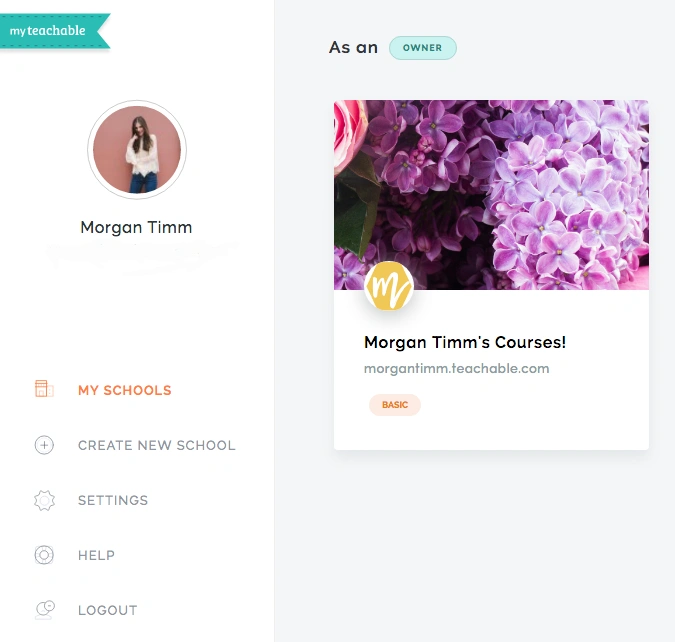
From there the front page of your school appears. Click the “admin” button on the top navigation bar to get to the back end of your school so you can get your first online course live.
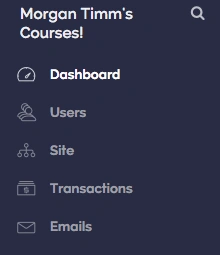
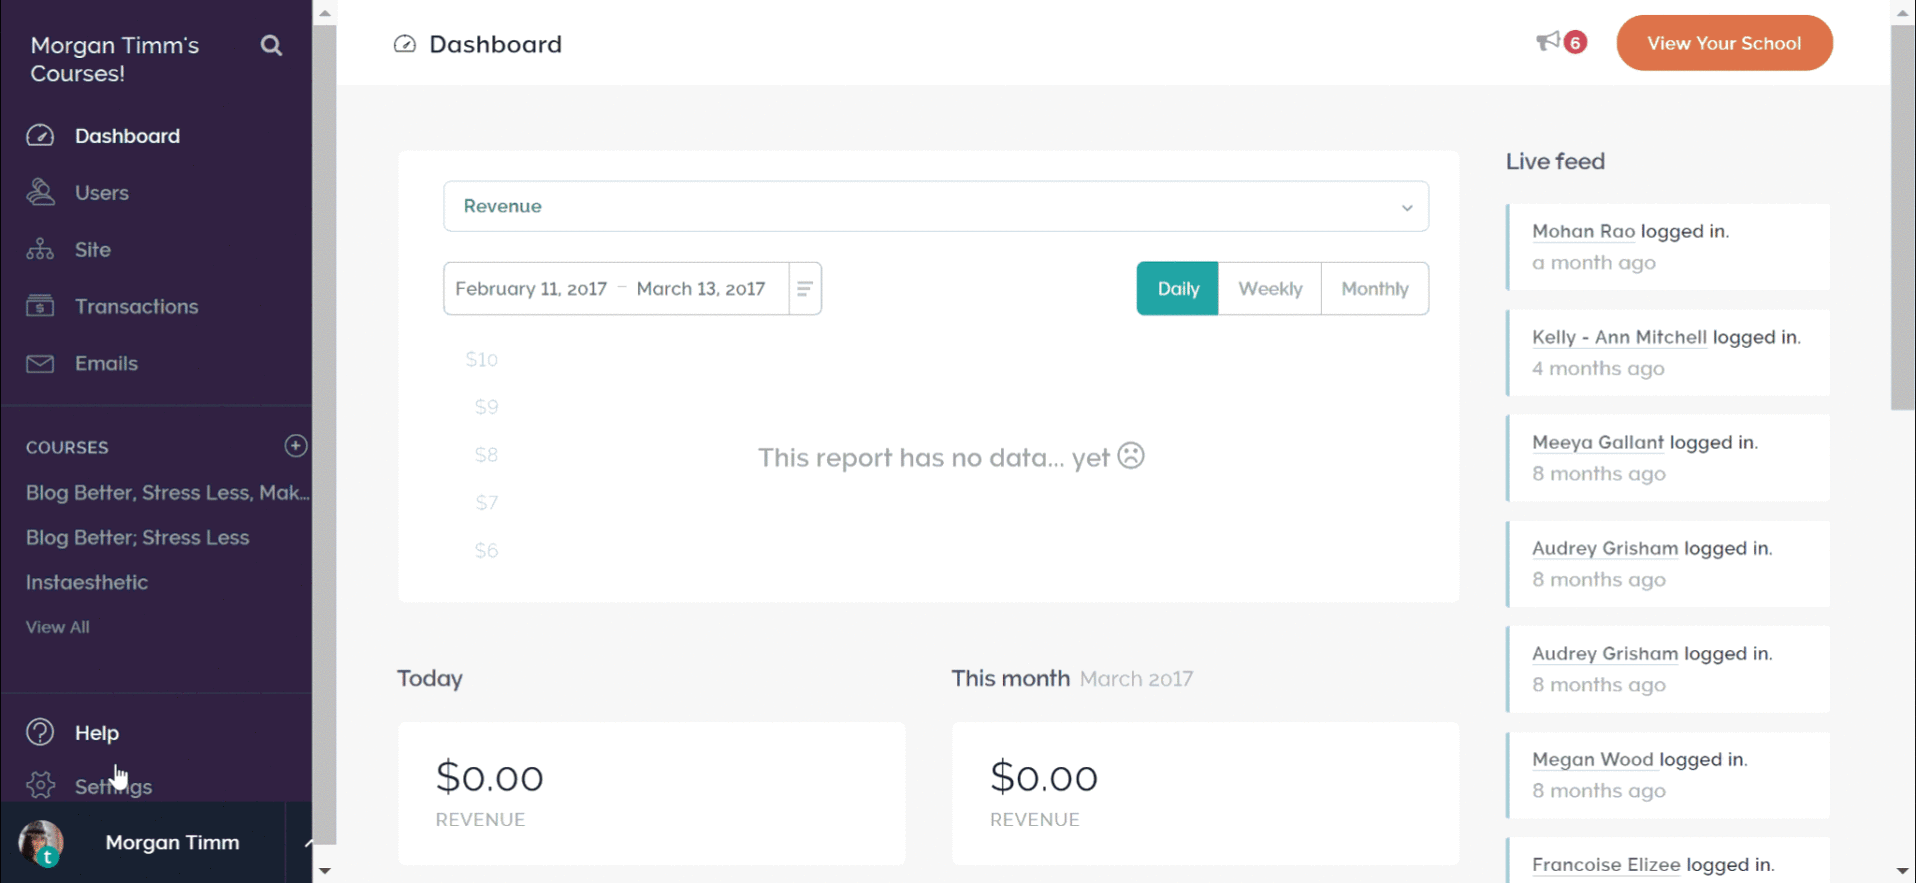
Dashboard: This takes you to your main page where you can see all of the $$$ you’ve made and your student’s activity.
Users: This shows you a list of people who have signed up, when they’ve logged in, and their email addresses.
Site: This opens a new set of menu options (more on that later) that helps you customize the look and the feel of your website.
Transactions: This option allows you to see a list of the transactions that have been made on your site where you can see a history and a breakdown by date.
Emails: This is where you can send email newsletters and updates to your audience.
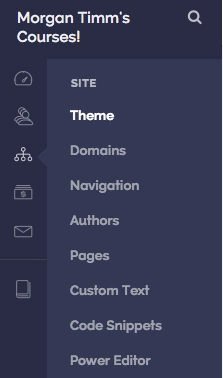
Here is where things get fun. On Teachable, you have a ton of freedom to customize your site and create it in a way that best represents you and your brand. After hitting the “site” button a new set of menu options appear that looks like this:
I’ll break this down using specifics, but first let me give you an idea of what each option allows you to do:
Theme: Add a custom logo, favicon, and background image. Pick fonts and color schemes.
Domains: Set up a custom domain. This allows you to create something like courses.yourwesbite.com.
Navigation: Select your homepage, add custom links to your site’s header & footer, and create categories to group courses by topic.
Authors: If you have others contributing to your course, you can add additional authors here.
Pages: Create new pages or edit existing pages to your Teachable website.
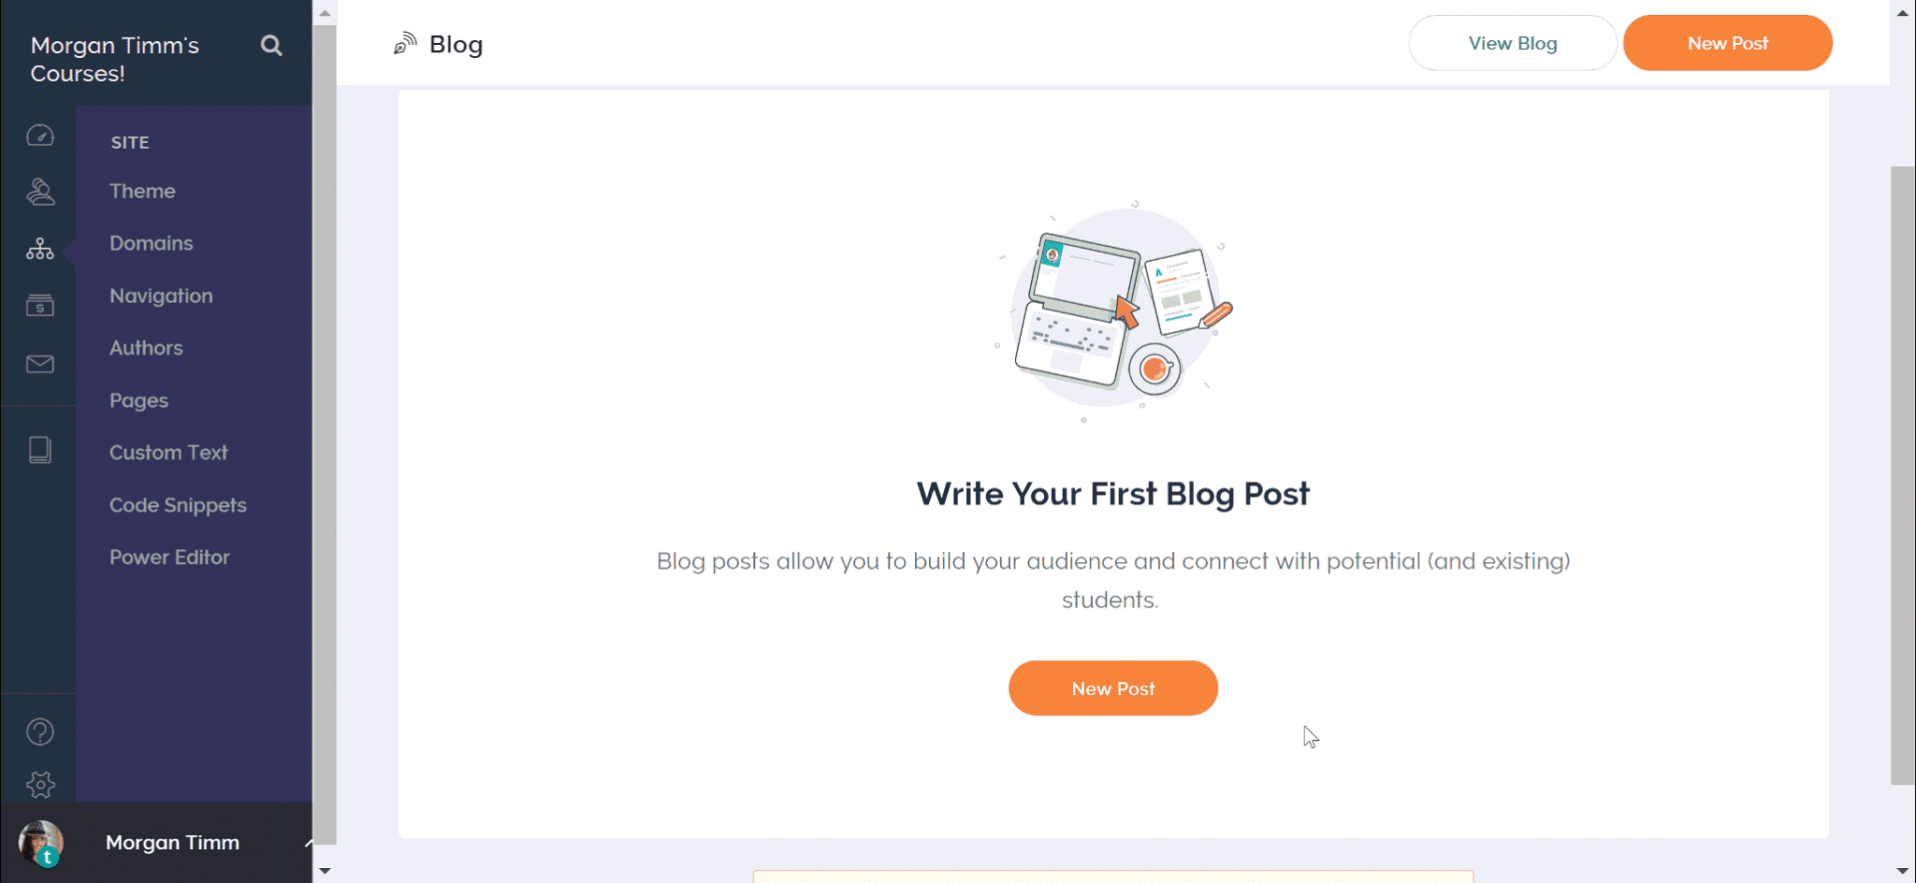
Blog: I found out that a lot of people don’t even know that you can create a blog with your Teachable site. This section is where you go to write a blog post or view your blog.
Custom Text: Customize text for menu links, buttons, in-app messages, and more.
Code Snippets: Include code snippets like the Facebook pixel, or add custom CSS across all pages on your site. This section might look intimidating – but we’ll go into depth later.
Power Editor: Here is where you can go deep in customizing your school’s templates and add in custom code.

The first section you can customize under the “theme” tab is your logo and background. This is where you add in your own branding and imagery. You use your own images, or we’ve got some free stock images you can add in if you prefer, too.
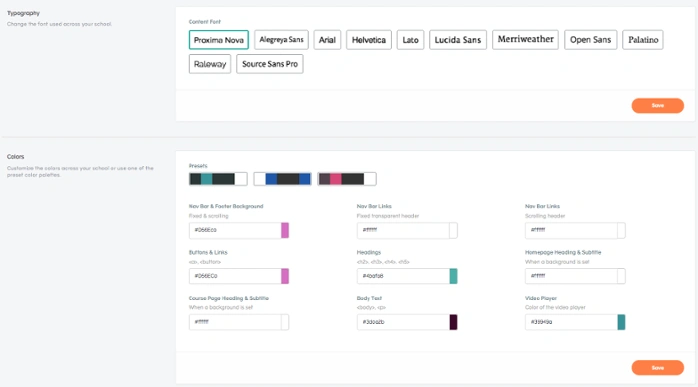
Your next customizable sections are the typography and colors which go hand in hand. Here you can choose your desired font and create a color scheme, too.
When you choose colors, consider things like readability. Even if light blue or bright yellow are you favorite colors and used in your branding – they aren’t the best options for things like the body text.

You can also check or customize your domain for your website. If you’re on a paid plan you have the option of changing your domain to a custom one.
Customizing your navigation is great if you’re hosting multiple courses or creating a full website and blog out of your Teachable school.
Here you choose what page is your homepage. If you only have one course open for enrollment, make that page your homepage to take one step out of your student’s experience. Or, if none of your courses are open for enrollment yet you can make your blog the homepage in the meantime.
This section is fairly self-explanatory. There are a lot of biz bff’s who go into their course creation adventures together. This section is great for those folk. You add in other authors here, and customize your title.

Again, you can do a lot with your Teachable site including adding a blog or other customizable pages like and “about me” or an “FAQ.”
This is a beefy section where you can customize any and all standard text on your site to better fit your brand and voice.
This is where you can add custom code snippets. These can be used in Facebook tracking pixels, analytics tools, and other web services. This section might look intimidating, but our Knowledge Base walks you through.
The power editor is enabled for people on the professional plan and higher and as the name would imply it’s a powerful tool. It’s for advanced users and not something we recommend messing around with if you’re not very comfortable with code.
Once your school is up and running it’s time for you to start creating that course that’s floating around in your head for months. We already have a ton of content on how you can actually get your content planned out and created, but we haven’t talked much about getting it up into your Teachable school yet.
Under the “courses” section you can click the orange “create a course” button in the upper right hand corner and you see text boxes where you can enter in your course’s information.
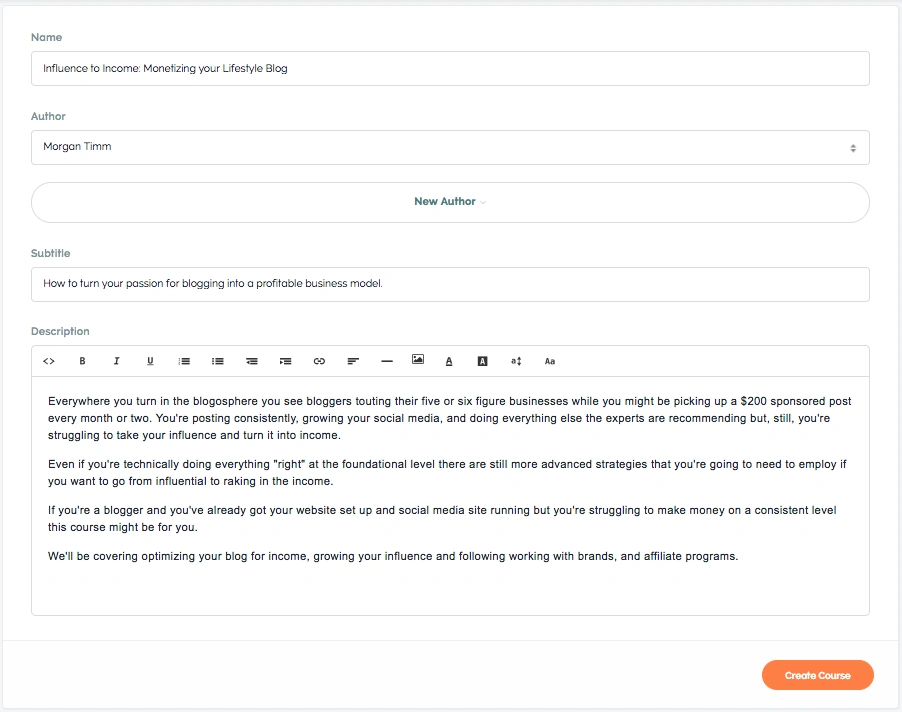
Fill this out with the title of your course, the authors, a subtitle, and a description and then hit “Create Course”.

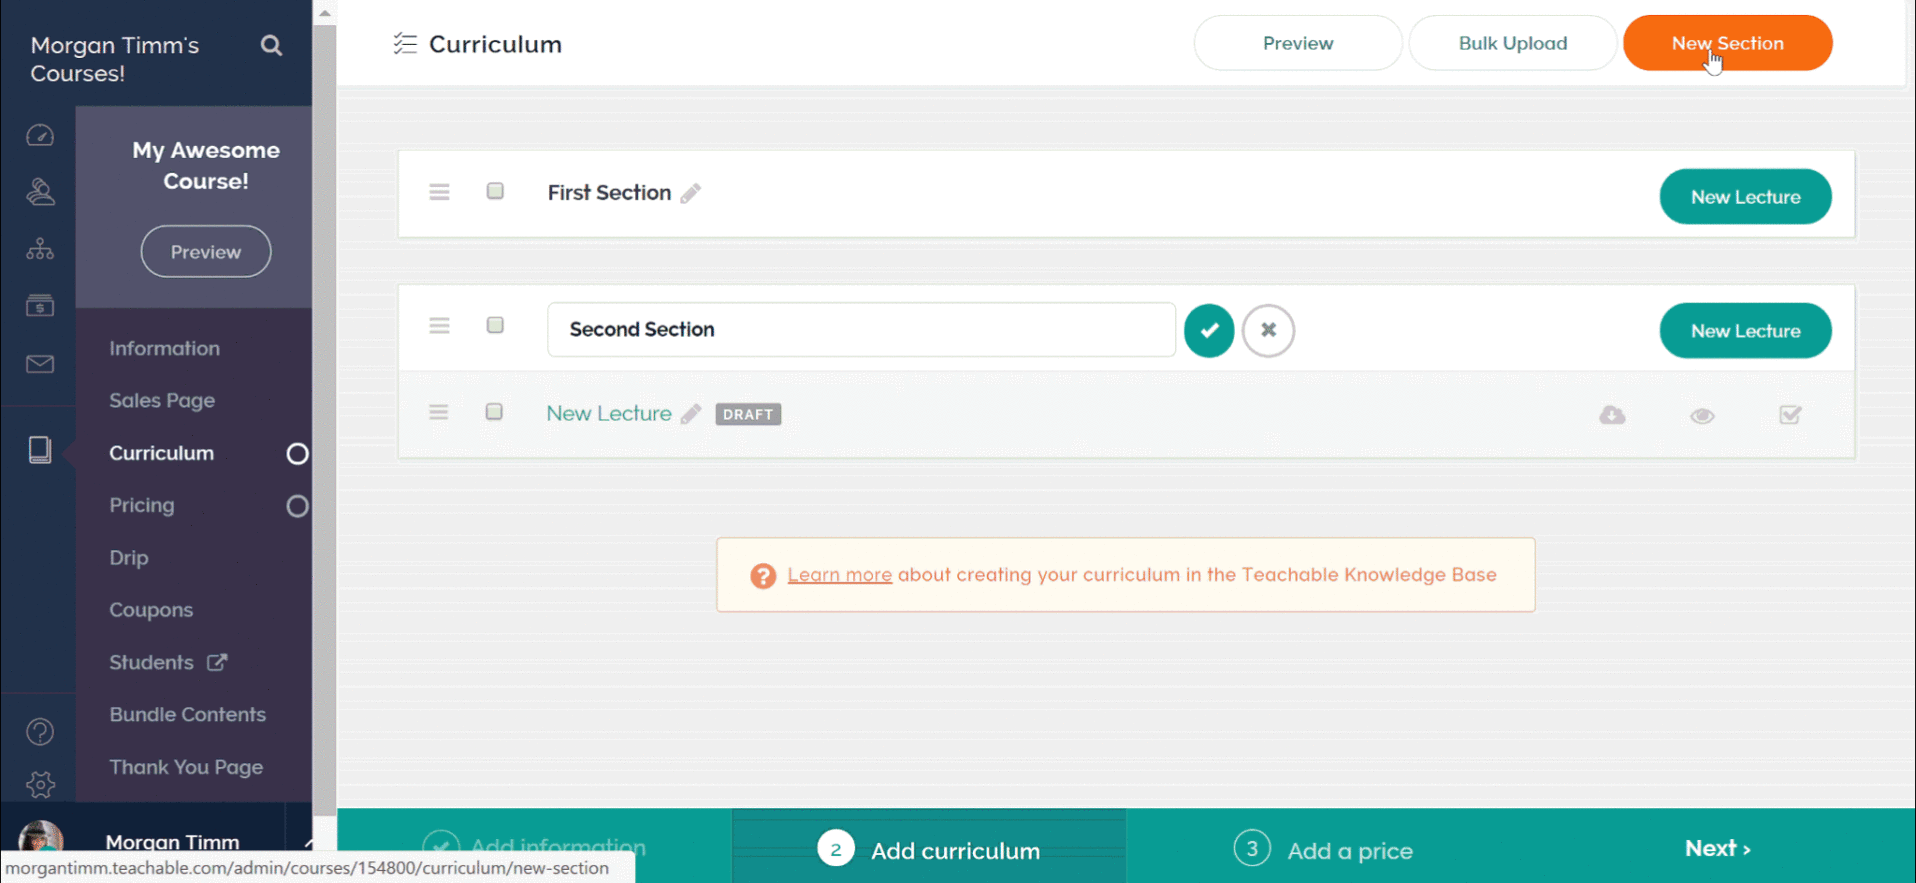
This section is where you can add and fill out the different sections and lectures in your course.
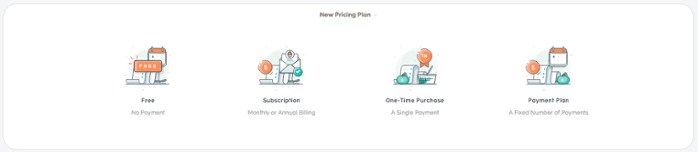
There are four different pricing plans you can use for your course. Free is pretty self-explanatory. Subscriptions allow you to choose a monthly or annual price your students pay. One-time purchases give your students lifetime access to your course for a fixed price. Payment plans allow your students to pay a fraction of the total cost each month until the course is paid off.
Once you hit publish on your course a page opens where you have a lot of customization options. Plus, you can refine the information you filled out in the beginning, customize your SEO, add branding and promo videos, and delete or duplicate your course.
Again, let’s take a look at the sidebar you’re presented when you’ve got a specific course open in your admin section.

Information is the page we just covered where you can do everything from change the title of your course to delete it entirely.
The sales page section allows you to completely customize your sales page and make it beautiful. If you’re looking for pointers, check out our sales page blog post.
Curriculum is where you go when you want to add or edit sections or lessons.
Pricing allows you to add or change the pricing plan.
Drip is an interesting feature that lets you release lessons over a period of time. You can read how to set drip up here.
Coupons allow you to create coupons for your course – pretty simple.
Students is where you’re able to access who is signed up for your course and their email addresses.
Bundle contents allows you to group more than one course together and sell it as a bundle. This is great if you’re giving away bonuses for people signing up.
The thank you page is where you can customize what your students see after they sign up for your online course.
Reports are available on professional plans and above and show insights into your course with in-depth video engagement data, leaderboard, and quiz grades.
As we mentioned earlier, Teachable is your one-stop-shop for creating your online business. It can host a blog. Setting one up is easy, too.
Furthermore, here is the long version of how you can set up your blog, but if you’re looking for something short and sweet, the process looks like this:
Blogs are living websites that are constantly being updated. Luckily it’s easy to add new blog posts to your Teachable blog.
You might already have your course created and ready to go at this point, or maybe you decided to take the more cautious route and wait to create your content until your school was set up.
If you fall into that latter group, don’t despair! WE won’t walk you through course creation in this post, but that’s only because we’ve thoroughly covered the ins and outs in the past.
At this point hopefully your Teachable school is up and running, and now you can refer to our posts on marketing your course and making money. However, if there is anything that you think we missed on setting up your school and adding content let me know in the comments! We’ll go back through and answer any question you might have.
