Thank you! Your submission has been received!
Oops! Something went wrong while submitting the form.
MENU


If it seems like everyone is learning how to create an ebook in 2022, you’re not imagining things. With the creator economy booming and a growing number of people reading digital books every year, ebooks are rising in popularity. In fact, a recent study shows that 30% of Americans read ebooks up from 25% in 2019. Compared to traditional book publishing, creating an ebook has much lower overhead costs and can take a fraction of the time to get on the virtual shelves. If you’re looking for a new way to monetize your expertise, don’t shy away from looking into tools to create an ebook.
Short for “electronic book,” an ebook is a digital version of a traditional book, designed to be read on computers, smartphones, tablets, etc. Similar to a physical book, an ebook format has a cover, table of contents, chapters, page numbers, footnotes, and more. There are a few considerations to distinguish an ebook from a hard copy, for instance, headings, colors, and design elements.
Creating ebooks is a great beginner-friendly way to get accustomed to the digital product world. Especially if you have an online course, an ebook can be a great way to offer supplemental material that can be used as an upsell or as a bundled option. It can be a simple and cost-effective lead magnet as well. Lead magnets are free resources used to provide your audience with high value content in exchange for an email address. The idea is to provide value and prompt your audience to join your email list, get them into your marketing funnels, or encourage them to upgrade to a purchase. Ebooks are fantastic lead magnets that can help with all of the above.
In addition to being an effective content marketing tool, the benefits of ebooks include:
{{guidecreatoreconomy-component="/blog-shortcodes/blog-popup"}}
When brainstorming ebook topics, consider the sweet spot between your industry or expertise and what your target audience wants or needs. Is there a problem you can help them solve? Or perhaps secrets of the trade you’ve learned over the years?
You might consider blog posts you’ve written in the past (or have thought about writing) that you can turn into longer-form content. Narrow it down to a couple of potential topics, and move on to developing your content to see which one you can write an ebook for.
Here are a few categories to help you find ideas for your ebook:
Ebooks are also a great way to test the waters for your online course ideas. If you have an idea for an online course and want to validate it first, write an ebook and see if your audience is interested in it.
Mommy blogger Carly Cambell did just that with her very successful Pinterest marketing course. At first, she wrote an ebook outlining her Pinterest growth strategies and when the ebook got plenty of love and support from the audience, she developed it into a full-fledged online course.
Her Pinterest course was an immediate success because she had already tested the idea prior and had people eager to buy the online course the moment it was launched.
The next step will be to decide what your ebook will include. You can create a working outline that might eventually become your table of contents.
It’s important to remember that every ebook (or any book really), just like your online course has a structure:
So, let’s walk you through an example. Let’s say you’re a personal finance expert and you want to write an ebook all about paying off debt. Here’s how you might want to structure your ebook:
Once you know where you’re going, you can begin writing your ebook! So, dedicate the time in your calendar for uninterrupted writing time. And don’t worry about editing, the most important thing here is to get the content down on the paper.
Depending on your creative process, however, you might swap step two with step three. If it’s easier for you to get everything out on paper (or a blank document), you can always structure and edit after you know what you want to include.
When writing, it’s best to imagine that you are talking with someone from your audience. Keep it conversational and easy to read, while still conveying the information you want your readers to learn.
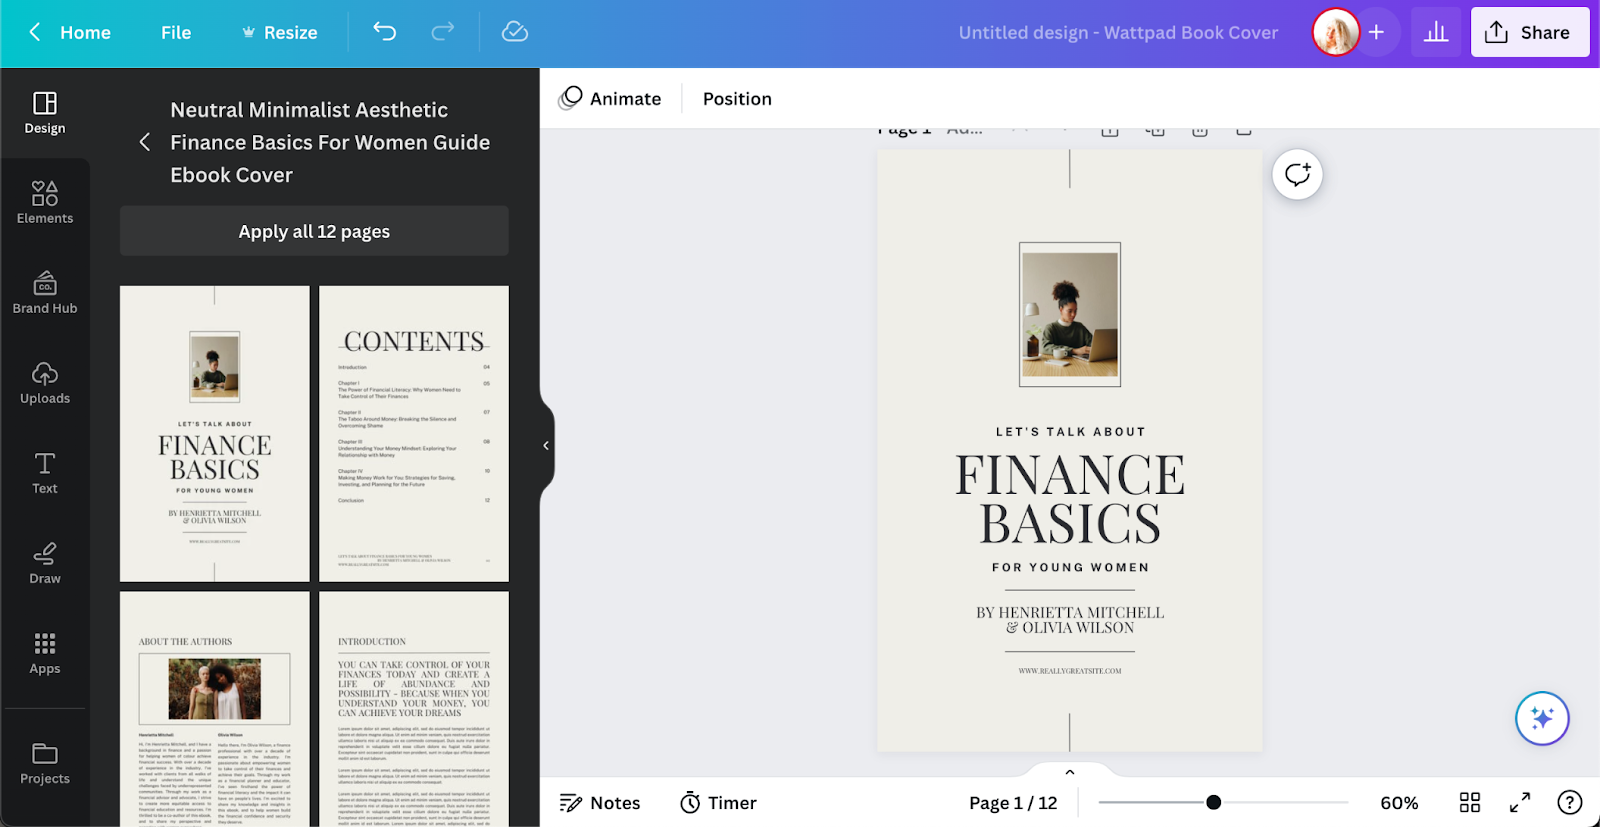
Once the content of your ebook is ready, it’s time to start working on making your book ready to be published. And the first step is to design the interior.
Even if you’re not a visual designer, there are many online tools—templates included—to make your ebook design a breeze. You only need a free Canva account to create a professional-looking ebook interior.
With Canva, you can easily drag and drop various design elements and move them around however you like. And if you want a more custom ebook interior, you can easily find affordable ebook templates on Etsy or Creative Market.
Now, there are numerous design elements to make your book visually appealing that you should consider:
Also, remember to customize the fonts and colors to align with your branding.
Your ebook cover is an important marketing asset that plays an important part when it comes to readers deciding whether they want to read it or not. So, it’s crucial to design a professional and eye-catching ebook cover.
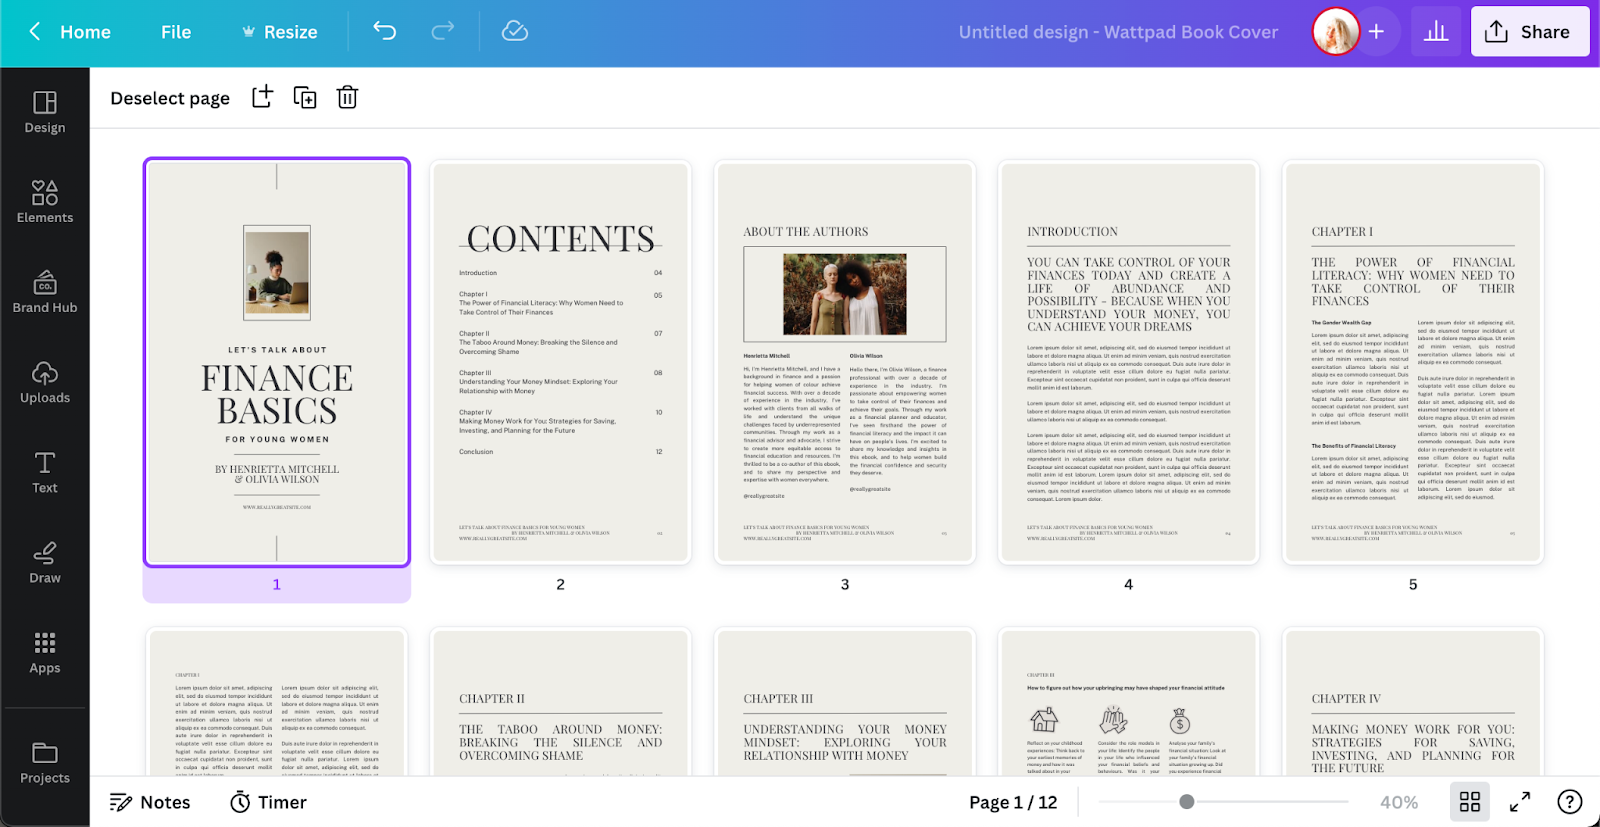
Now the good news is that you can very easily do that with very little design experience. Canva has a massive library of ebook cover design templates that you can use and customize to fit your brand and your ebook:
Some of the cover design templates even have matching ebook interior templates. This allows you to design a very professional-looking ebook that’s visually appealing and flows well with the rest of your branding:
There are three elements to include when designing an eye-catching ebook cover:
If you want to sell your ebook, you want to consider the ebook format that will work best for the majority of people. So, you want to think about what device people will be reading your ebook.
A PDF (portable document file) is the most common and accessible—and will be the easiest for readers wanting to turn the ebook into a printed book. People can easily read it on iPad and other tablets, as well as on their computers. However, it’s not the best format for reading on a Kindle and other readers.
Mobi or epub formats are also popular file types. They allow people to read the ebooks on their Kindles or Apple Books. However, it does not support audio or video elements, so if your ebook includes that, it might not be the best option for you.
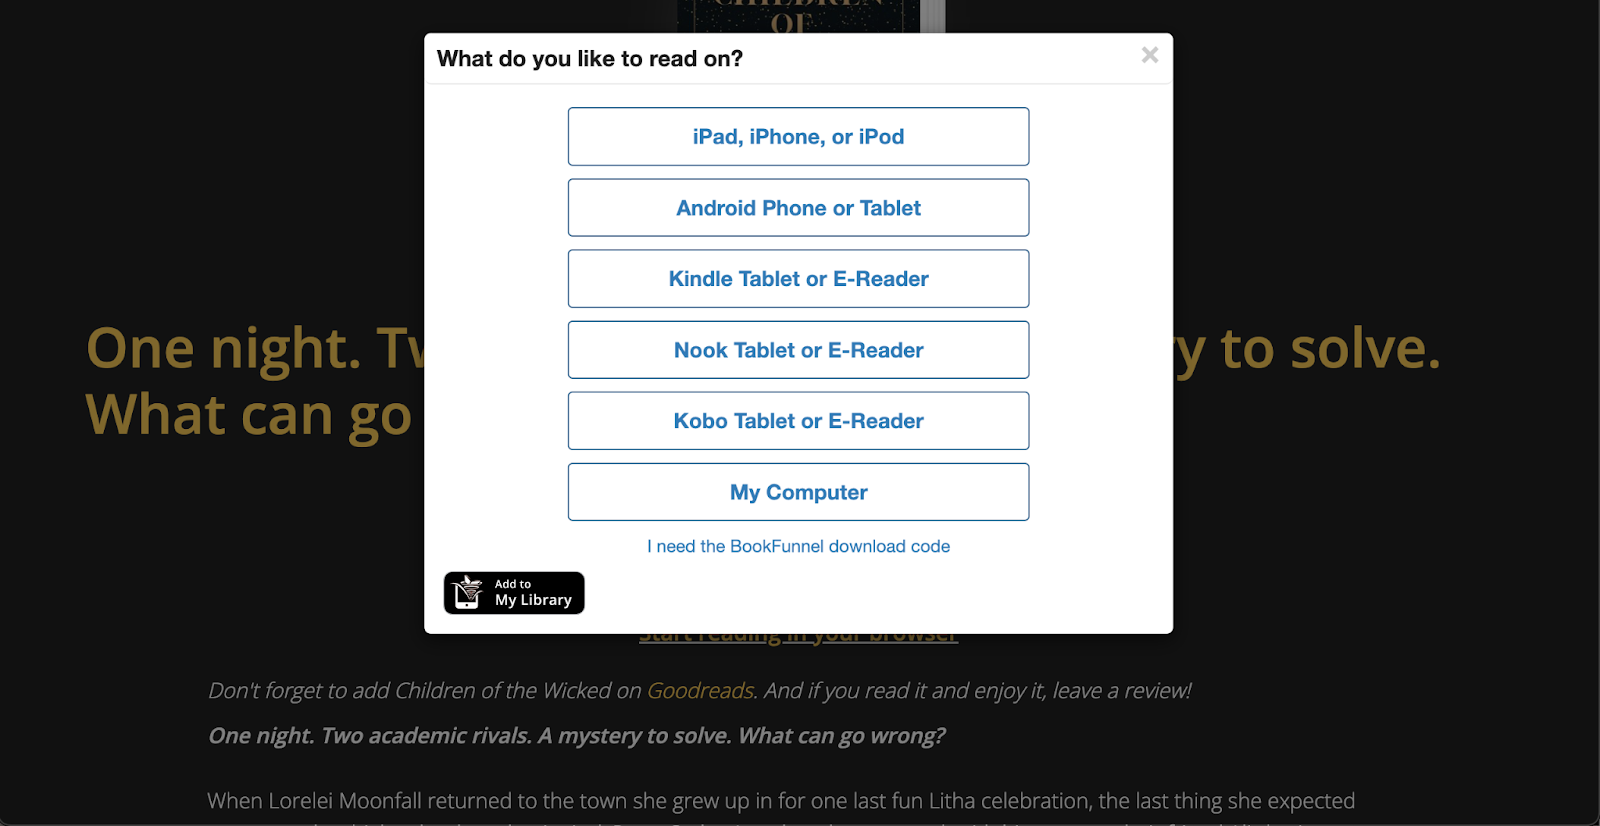
The best thing you can do is to offer your readers an option to choose in which format they want to read your ebook. If you use a tool like BookFunnel to distribute your ebooks, they allow you to upload different formats and make it super easy for the readers to choose which one they want to download:
Whether your ebook is free and you use it as a lead magnet to get people into your sales funnel, or not, you always want to include calls to action (CTA). It’s a crucial part of your marketing and it keeps your audience engaged.
So, once you’re done with the ebook content and design, before publishing an ebook, go over it once again and see where you can include a call to action. There are different types of CTA’s to consider:
Depending on the topic of your ebook and what your goal is, you can invite people to buy your online course, join a private community or sign up for a membership, follow you on social media, or join your email list.
A landing page (or a sales page) is the ultimate tool you’ll use to promote your ebook. So, you want to make sure you design a solid landing page that entices your audience to buy and read your ebook.
When designing the landing page, here are some key points to include:
Once you’ve created your ebook and created the sales page comes the fun part: publish your ebook and promote it! Promote your ebook to your email list, and social media following, in your private student groups, and through all the other channels you use.
Create a book online with these free and low-cost tools:
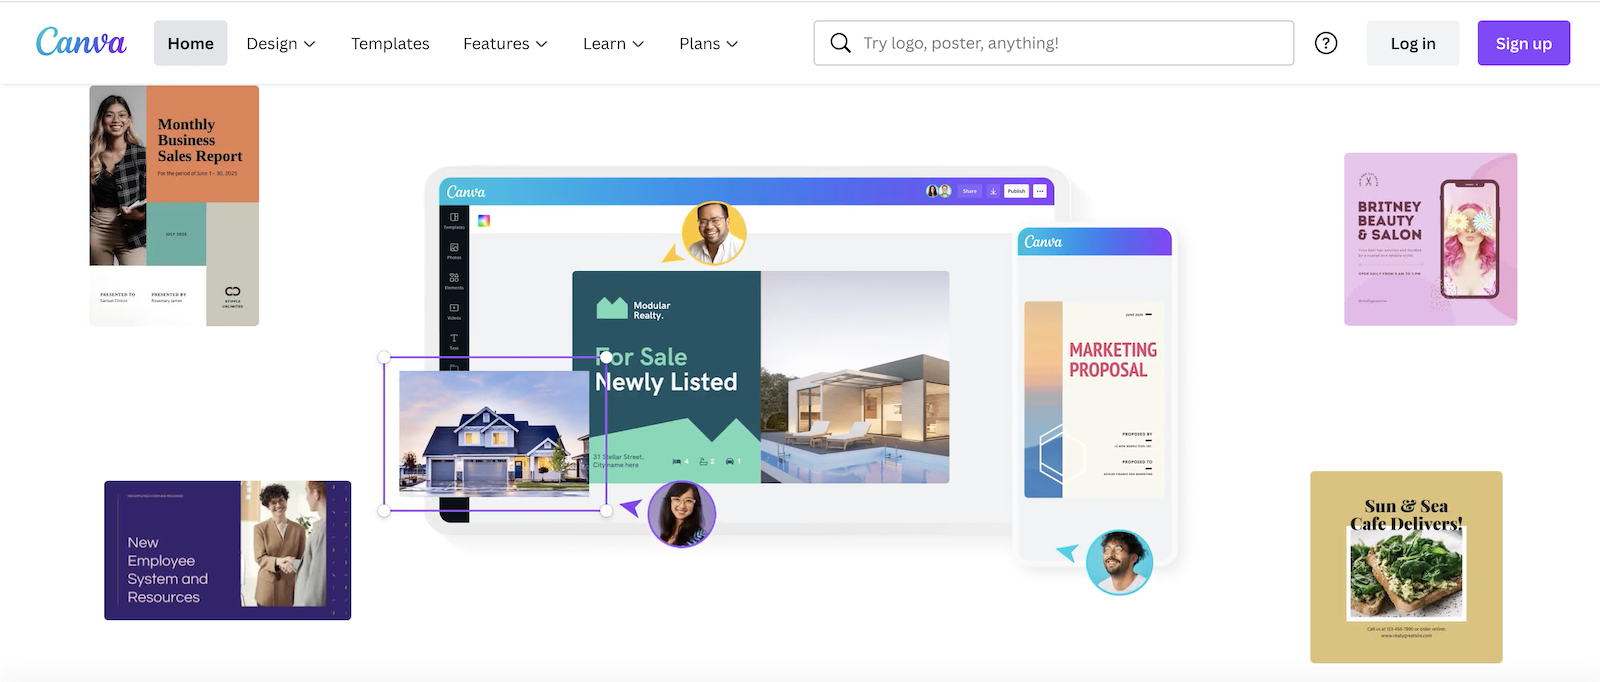
Canva is undoubtedly one of the most popular beginner-friendly tools for creators from various backgrounds. While popular graphic designing tools such as Adobe Suite can require a lot of skill to bring your creations to life, Canva is the perfect alternative if you’re looking for something easy to navigate.
As far as ebooks are concerned, Canva has more than 1,500 fillable templates to create ebook covers and complete layouts. Of course, as with any other Canva template, every element is fully customizable to ensure you’re creating a project that is a true reflection of your brand.
Price: Free; Canva Pro subscription $12.99 per month

Helping you create better content faster is the ultimate goal of Visme. Visme’s template library featuring robust, ready-to-go designs takes the pressure off of creating the visuals for your ebook so you can focus on inputting valuable information for your readers. This tool makes creating your ebook is as simple as:
Price: Free; paid plans starting at $12.25 per month
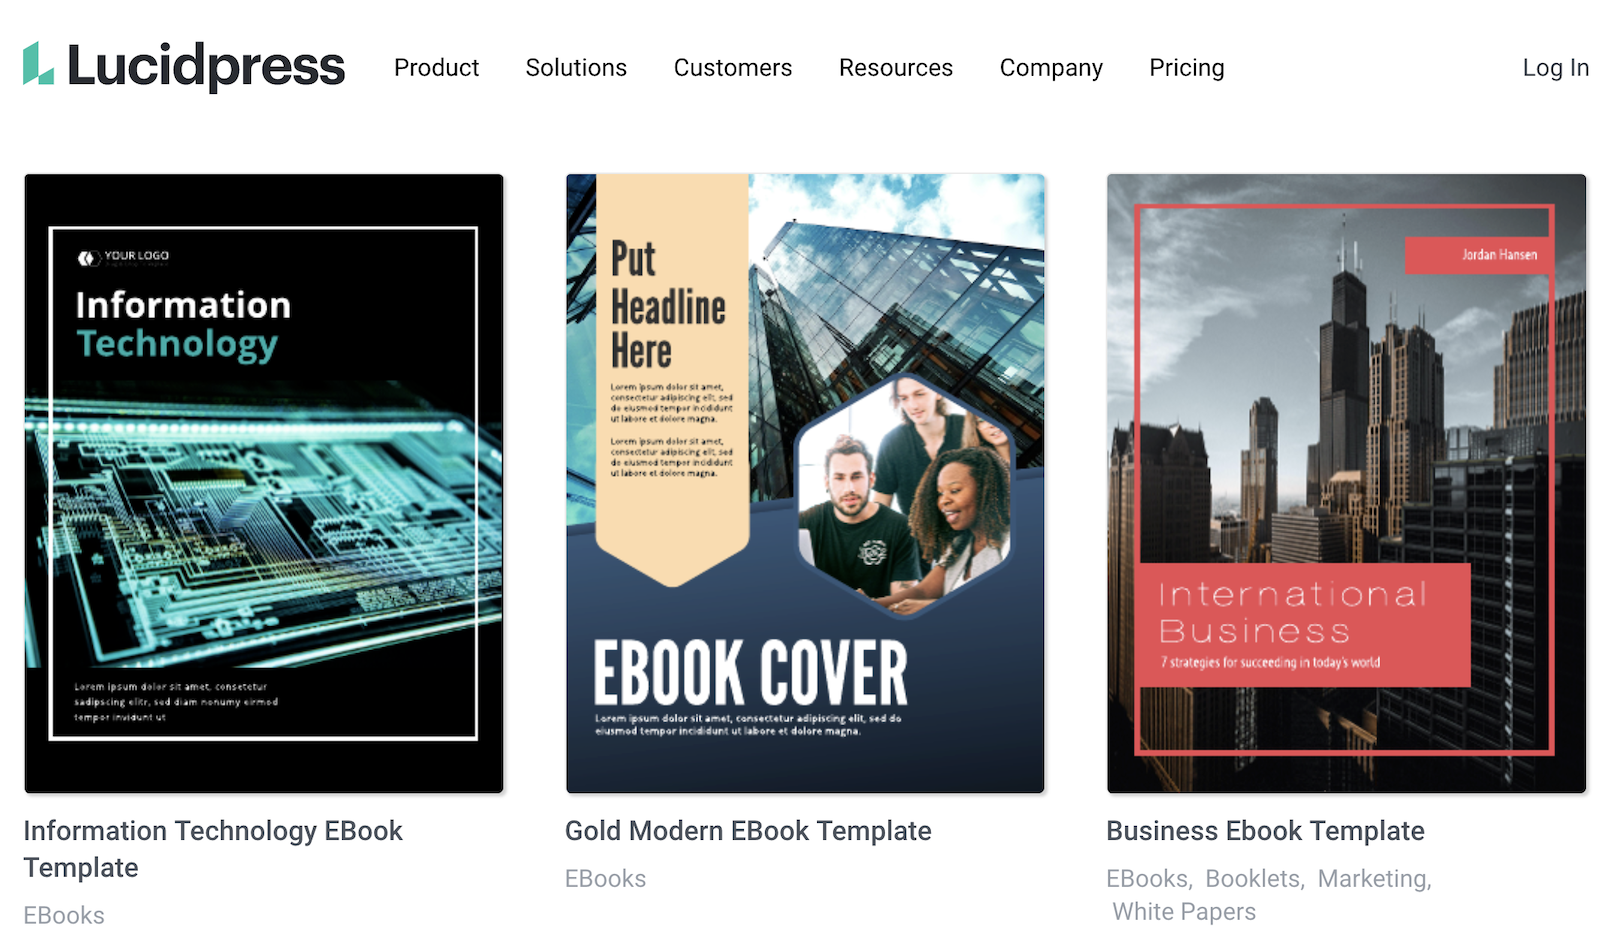
One standout feature of LucidPress is that the platform offers free stock imagery, so you don’t have to venture out on your own to find it. In addition to creating content such as ebooks, you can create lockable branded templates (available with paid subscription) to ensure that any content you create is on-brand. When you get to building a team, you’ll truly appreciate how LucidPress can help with brand consistency, which matters in the age of creating digital products.
Keep in mind that the free version of LucidPress only allows you to create up to three documents and doesn’t give access to premium templates. If you see a lot of ebook creation in your future, the free plan is a great way to introduce yourself to the process and get your feet wet before jumping to a paid plan.
Price: Free; paid plans starting at $10 per month

The simplest and most accessible way to create an e-book is to use Google Slides, a cloud-based client that allows you to create from anywhere so long as you have wifi access. One great thing about Google Slides is that it makes collaboration simple if you need a second or third pair of eyes on your ebook. You create a presentation with each slide being a dedicated page, input all the imagery, text, and links you need, and export it as a PDF.
FYI, if you use Powerpoint instead of Google Slides, you can create an ebook using this program as the two are pretty much interchangeable.
Price: Free
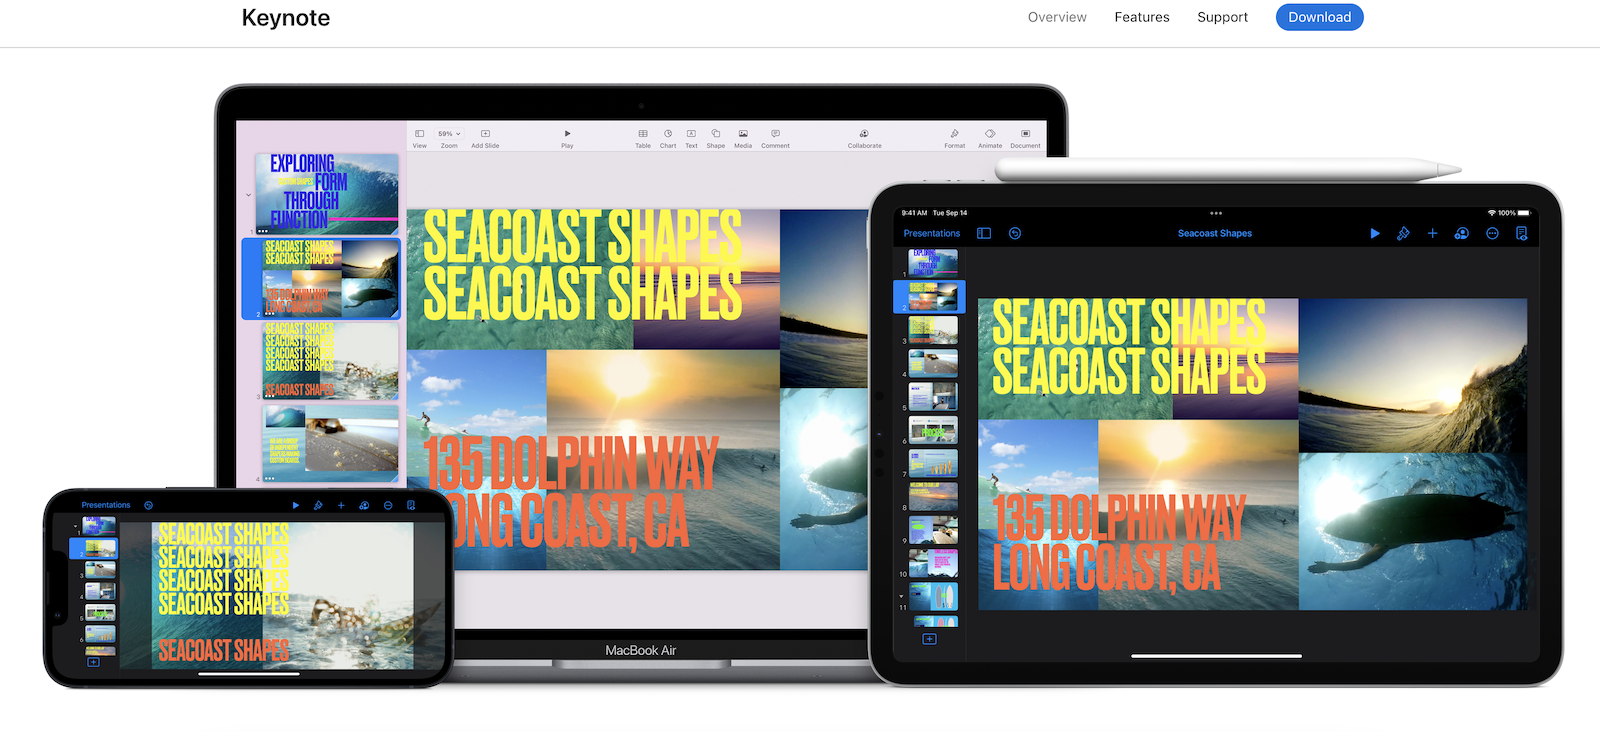
This sleek, sophisticated presentation software, which is very similar to Google Slides and Powerpoint, is available for free for Apple users (on mobile and desktop). Like the previous presentation programs, Keynote presentations can be exported as PDFs, making putting together your ebook easy as pie.
Price: Free
Some of the online applications and tools we’ve found to be the most useful—and cost effective—include Canva, Visme, LucidPress, Google Slides, and Keynote. We compare the pros and cons in this article. All have free plans, and most have paid plans with extra features to support ebook creation.
No! Creating an ebook is much more affordable than all the production costs of a physical book. There are online tools with free and paid plans.
Yes! There are many online tools for creating ebooks that are free. This article covers some of the best we’ve tried.

The start of a new year is a prime time to reflect, realign, and set fresh goals for personal and professional growth.
For creators, this moment is an opportunity to elevate their businesses, expand their reach, and deepen their impact.
If you're ready to embrace 2025 as a year of transformation, read on for actionable steps and inspiring ideas tailored to Teachable creators.
Did you know that over 50 million people consider themselves creators?
In fact, Influencer Marketing Hub reported that not only do people identify themselves as creators in the traditional sense, but they’re also making money. According to the report, 43% of surveyed creators made over $50,000 annually from monetizing their passions online.
If one thing’s for sure, it’s that many have turned to making money online from their skills through various avenues. Needless to say, turning passion into profit is working well for many.
And the creator economy, as the phenomenon is dubbed, is only going to grow from here.
Before we get into how you can enter the creator economy in 2025, let’s define the buzz term first.
Simply put, the creator economy is a sector of business where those creators make a living online from monetizing their presence, passions, and talent. From musicians who create an online fanbase and earn money from music streams (vs. a traditional record deal) to influencers who monetize their online presence through sponsored content, there are many ways to enter the creator economy and make a consistent living from it.
If you have a skill set or talent that you’re passionate about, chances are you can find a way to make serious money. Keep reading for some ways to join creator economy if you’re considering betting on yourself in the new year.
{{todolist-component="/blog-shortcodes/blog-popup"}}
If you’re reading this, you’re probably already familiar with online course creation. You may already have a course available through Teachable. Teaching people online about something you’re an expert in is one of the best ways to make money online from your passions. Don’t underestimate how eager someone may be to learn something new that comes second nature to you. Click here to learn more about the endless possibilities of teaching online.
Blogging is one of the oldest profitable creator mediums. However, it’s not entirely that old (the oldest recognized blog dates back to 1994 and the first blogging platform, Open Diary, launched in 1998). It’s one of the more common ways to enter the creator economy. Launch a blog that features content about topics that you’re passionate about within your niche.
There are many ways to monetize a blog, including publishing ads with platforms such as , sponsored posts, and affiliate marketing. Like most platforms, making money from blogging won’t come overnight. You’ll have to post high-quality content consistently to get traffic and eventually be approved for advertising and affiliate networks. It’ll also take time to get the attention of brands willing to pay you to feature them in your content. However, the multiple revenue streams that can come from blogging make it worthwhile way to enter the creator economy.
Long gone are the days when you have to find a publishing house to get your book idea off the ground. You also no longer need to write an excruciatingly long body of work to be respected as an author. If you have an expertise or skill that you can put into a book, using a self-publishing platform such as Kindle Direct Publishing is a great way to teach people what you know and monetize in the process.
If running a blog or writing an e-book isn’t quite right for you, another great route is launching a newsletter. Traditionally newsletters were looked at as a means to support an online community such as a blog, but more and more creators are using newsletters to generate income on their own.
For starters, you can incorporate affiliate links into your newsletter. This way you can promote commissionable products or services within your niche. Additionally, you can create a subscription-based newsletter with platforms such as Substack to generate income from your newsletter alone. Tipping platforms such as Buy Me A Coffee can generate a profit in your newsletter so people can show their appreciation through small donations.
YouTube is the second largest search engine behind Google. TikTok is one of the fastest-growing social media platforms. If you’re talented with a camera or are passionate about something that you can teach or entertain people with, you should seriously consider venturing into these two powerful platforms.
Specifically, there’s a lot of potential to make money through Google Adsense (once your channel meets monetization requirements). There are also sponsored videos and affiliate linking to products and services. TikTok also offers a ton of earning potential through sponsorships and affiliate marketing, but also through TikTok’s Creator Fund, which essentially pays you to create engaging content on the platform.
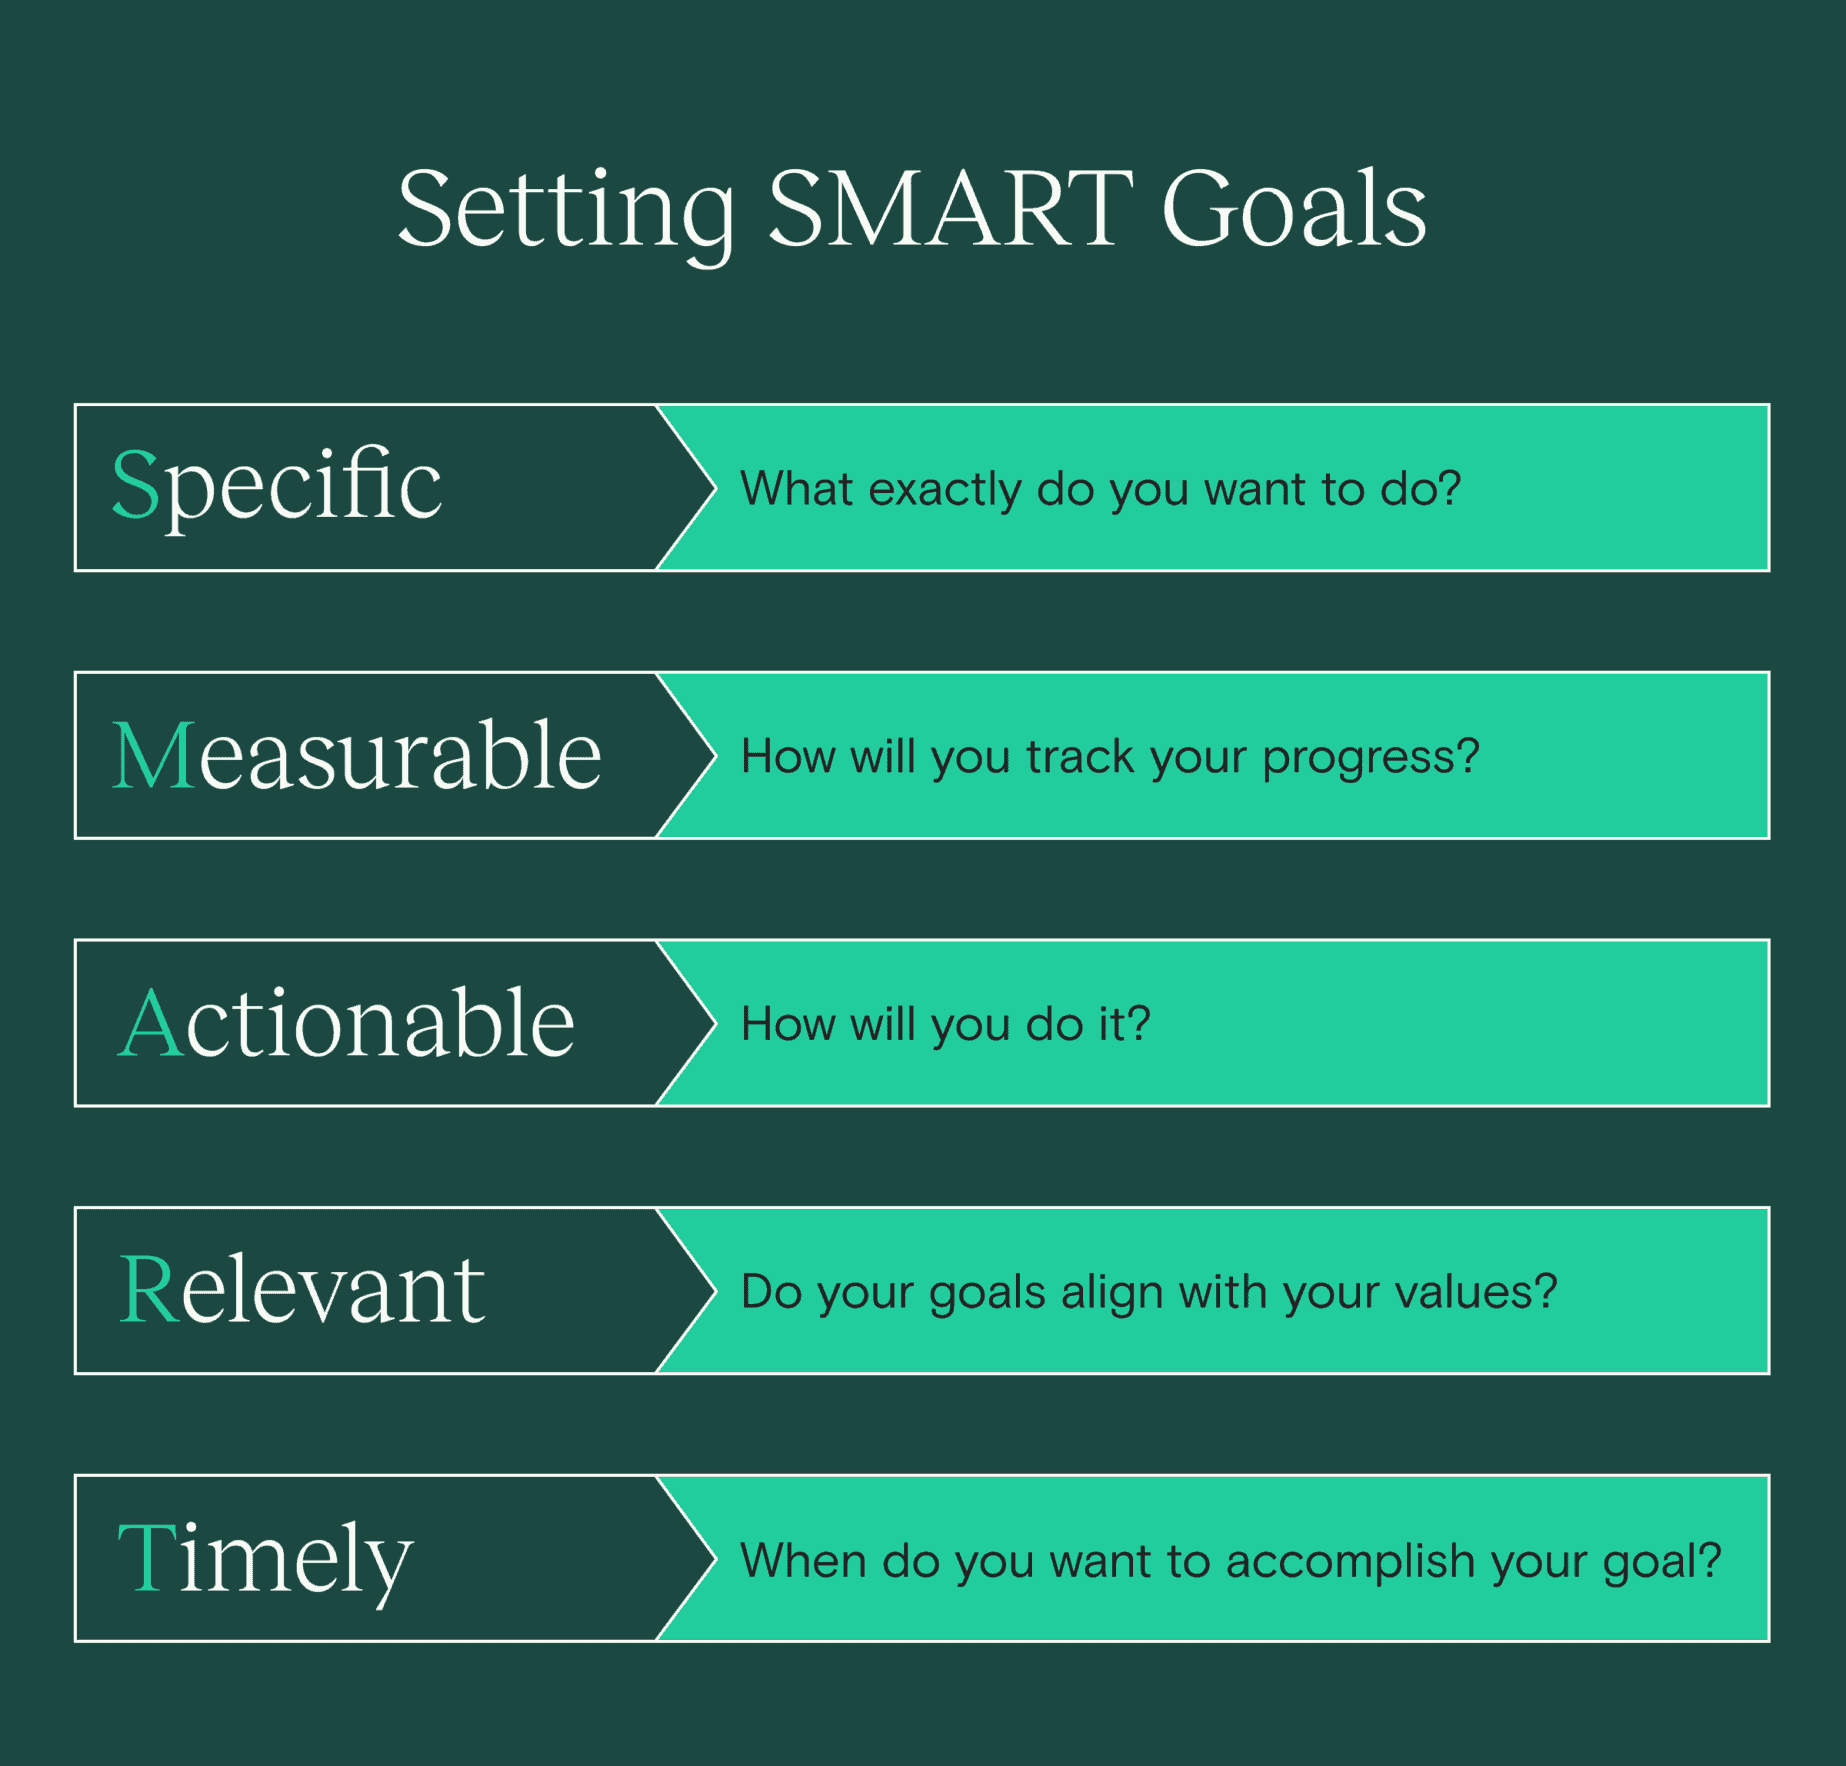
Setting goals is crucial for staying on track and achieving growth, but not all goals are created equal. Use the SMART framework to create goals that are:
Let's break down each of these in more detail.
A goal should be clear and precise, leaving no room for ambiguity. Specificity helps you understand exactly what you want to achieve and why.
Examples for Teachable Creators:
Actionable Tip: Break down larger goals into smaller milestones. For example, to grow your email list, focus on creating one high-value freebie and launching a social media campaign to promote it.
To know if you’re succeeding, your goal must have measurable criteria. Use numbers, percentages, or deadlines to quantify progress.
Examples for Teachable Creators:
Actionable Tip: Use tools like Teachable’s analytics dashboard, Google Analytics, or email marketing platforms to monitor and evaluate your progress.
While it’s important to stretch yourself, your goals should also feel achievable given your current resources and circumstances. Unrealistic goals can lead to frustration and burnout, while attainable goals keep you motivated.
Examples for Teachable Creators:
Actionable Tip: Assess your current bandwidth, skills, and resources. If a goal feels daunting, break it down into incremental steps or delegate parts of the process to tools or collaborators.
A realistic goal takes into account your personal commitments, resources, and the external environment. Ensure your objectives match your capacity and avoid overcommitting.
Examples for Teachable Creators:
Actionable Tip: Perform a quick audit of your available time, budget, and support systems. Use this to set achievable timelines and expectations.
Without a deadline, a goal is just a wish. Adding a time element ensures you stay focused and motivated to achieve your objectives within a reasonable timeframe.
Examples for Teachable Creators:
Actionable Tip: Work backward from your ultimate deadline and set smaller deadlines for intermediate steps, such as completing research, creating content, and launching marketing campaigns.
Here’s how you can combine all elements of the SMART framework into a cohesive goal:
No matter where you are right now, there’s still time to find your place in the creator economy. We encourage you to share your skills and explore that in the new year.

Instagram consistently releases updates that make navigating the app much easier (and more attractive) for creators. The Instagram Collab feature is no exception.
If you’ve been struggling to keep up with Instagram app updates over the last couple of years, you’re not alone. Luckily, we’ve tested out the Instagram Collab feature and have put together this guide to help you use it in your social media marketing.
When you first see a Collab post on your timeline, you may ask, “Why am I seeing posts from accounts that I don’t follow?” It’s because the author is using the Collab feature.
The Instagram Collab feature allows collaborators to co-author feed posts and Reels. At the moment, the tool, which is also called Collabs, only supports two collaborators. However, if we know Instagram, the app is probably looking into how to increase that number. For now, if you follow one of the two collaborators, the Collab post will show up in your feed.
The feature is also not yet available for Instagram Stories and live streams. Although, that could change if the app decides to expand.
In Instagram’s Twitter announcement about the new tool, it broke down exactly how it works and how it will appear on your feed.
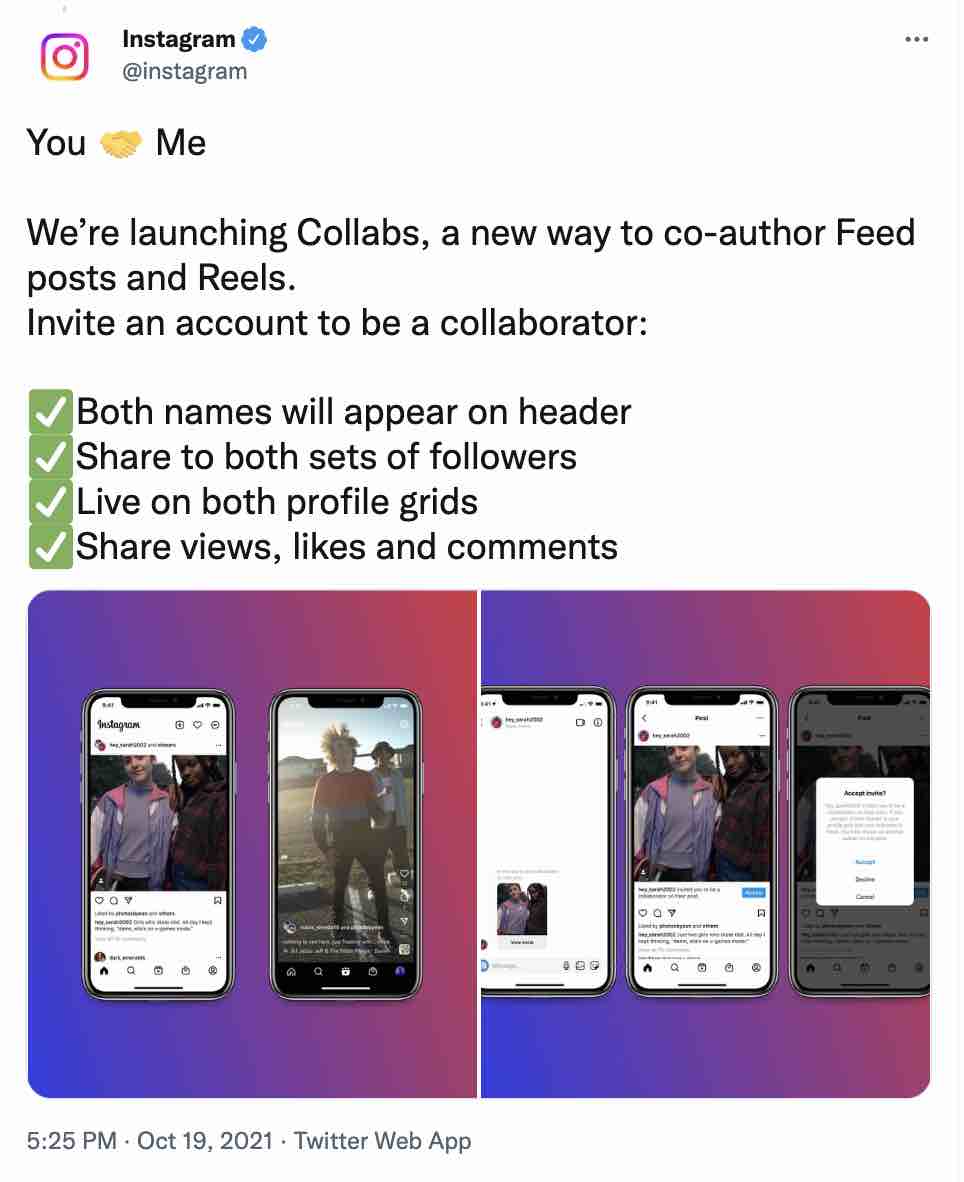
In some cases, sharing the spotlight as a creator may not be attractive. In the case of Instagram, where estimates place monthly active users between one and two billion, it is appealing.
When you co-author a post or Reel, you can reach your audience and your collaborator’s audience. For brands, the feature opens a new door to collaborate with customers and influencers.
Note that the Instagram collab feature is not a replacement for the paid partnerships tag on Instagram. For instance, if a brand pays an influencer for a post, then it falls under paid partnerships.
You must still properly disclose sponsored content on social media according to Federal Trade Commission (FTC) guidelines. You can check out the FTC’s social media endorsement guide here if you’re unsure whether or not your content meets its requirements.
Unlike some features, Instagram Collabs is pretty straightforward. Most importantly, it won’t require you to pivot much from your current social media strategy. There are, however, some considerations for choosing who to partner with and what types of content to share.
Below is a quick explanation of using the Collabs tool, along with some helpful tips to get you started.
The first step is to, of course, create the content. When creating partner content, it’s super important that the content makes sense for you and your co-author. To determine if your content will resonate with both audiences, ask these questions:

If you’ve ever tagged another user in an Instagram post, adding a collaborator will come naturally to you.
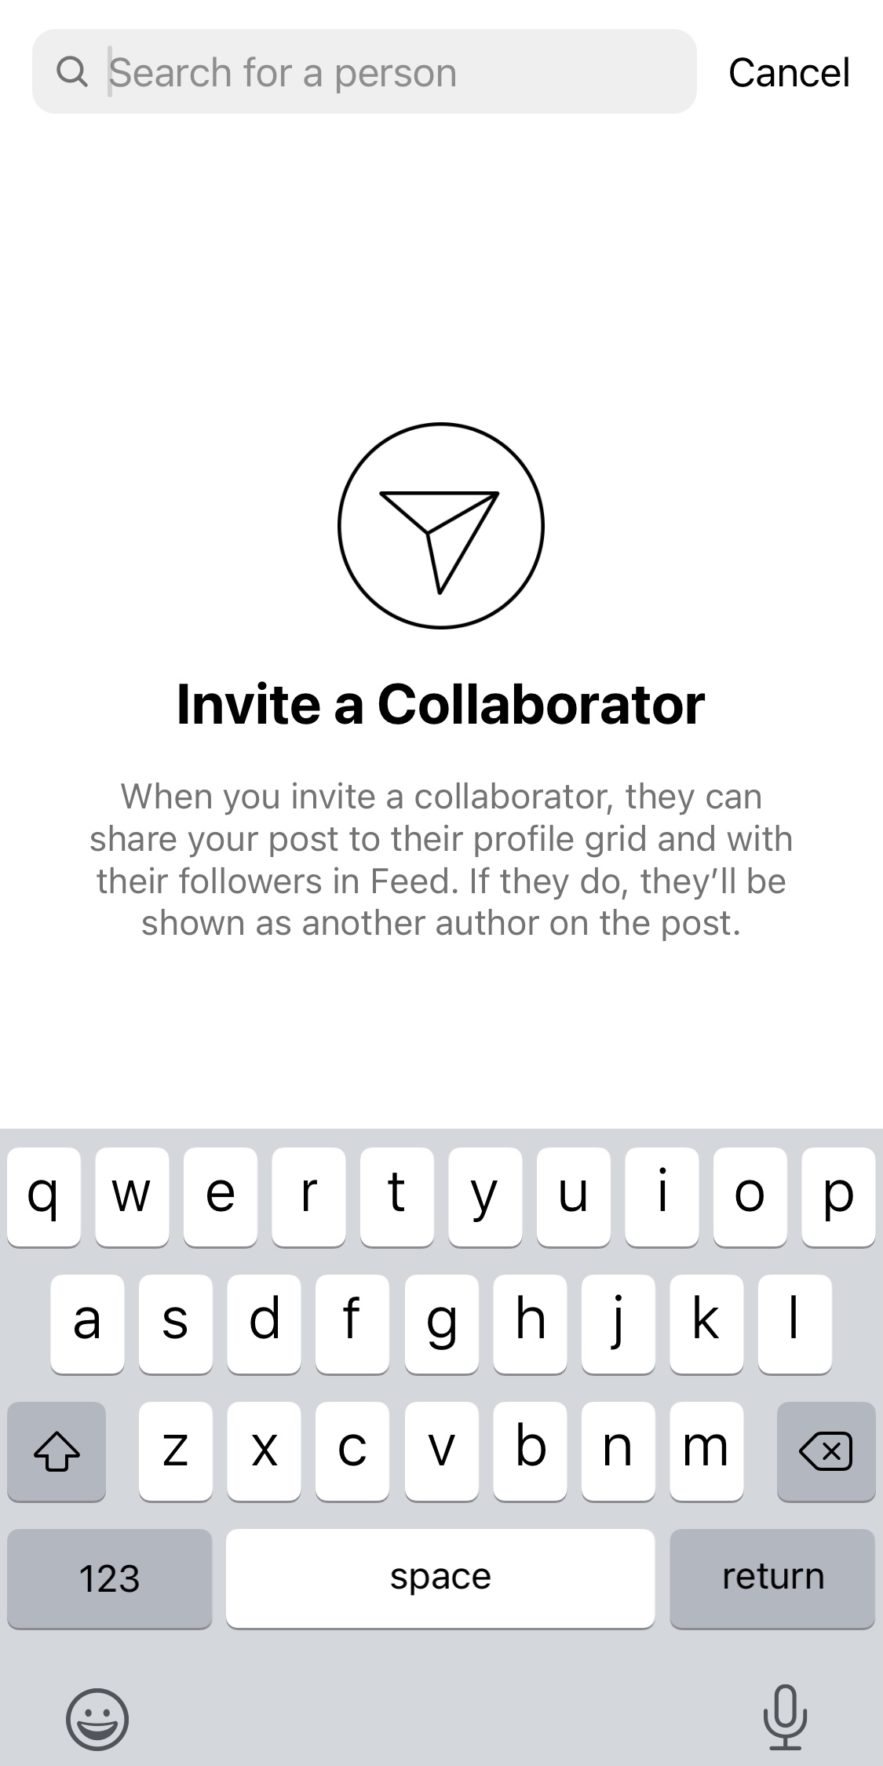
When you’re on the share screen of your Instagram post, you’ll see the words “Invite Collaborator” right next to the “Add Tag” button.
All you have to do is click the button, type in your co-author’s handle, and send a request that will go to their DMs.

If you’ve been invited to partner with another account, then the request will appear in your DMs. At any point, if you want to stop being a collaborator, you can. In the app, it takes as little as three steps:
Instagram Reels are short video clips with access to editing features like split-screen filming, filters, and other effects.
You can either upload a pre-recorded video or record it live. However, avoid reposting videos from other social media platforms—Instagram de-prioritizes videos with logos from other networks or low-resolution videos.
Follow the steps below to use the Collab feature for Reels:
Your co-author will receive a request immediately after the last step. Once they approve the request, the Collab Instagram Reel will display you and your collaborator’s username on the post.
Instagram feed posts are the images and videos that users add to their feeds. You can either add a single image, a carousel of images, or a short video.
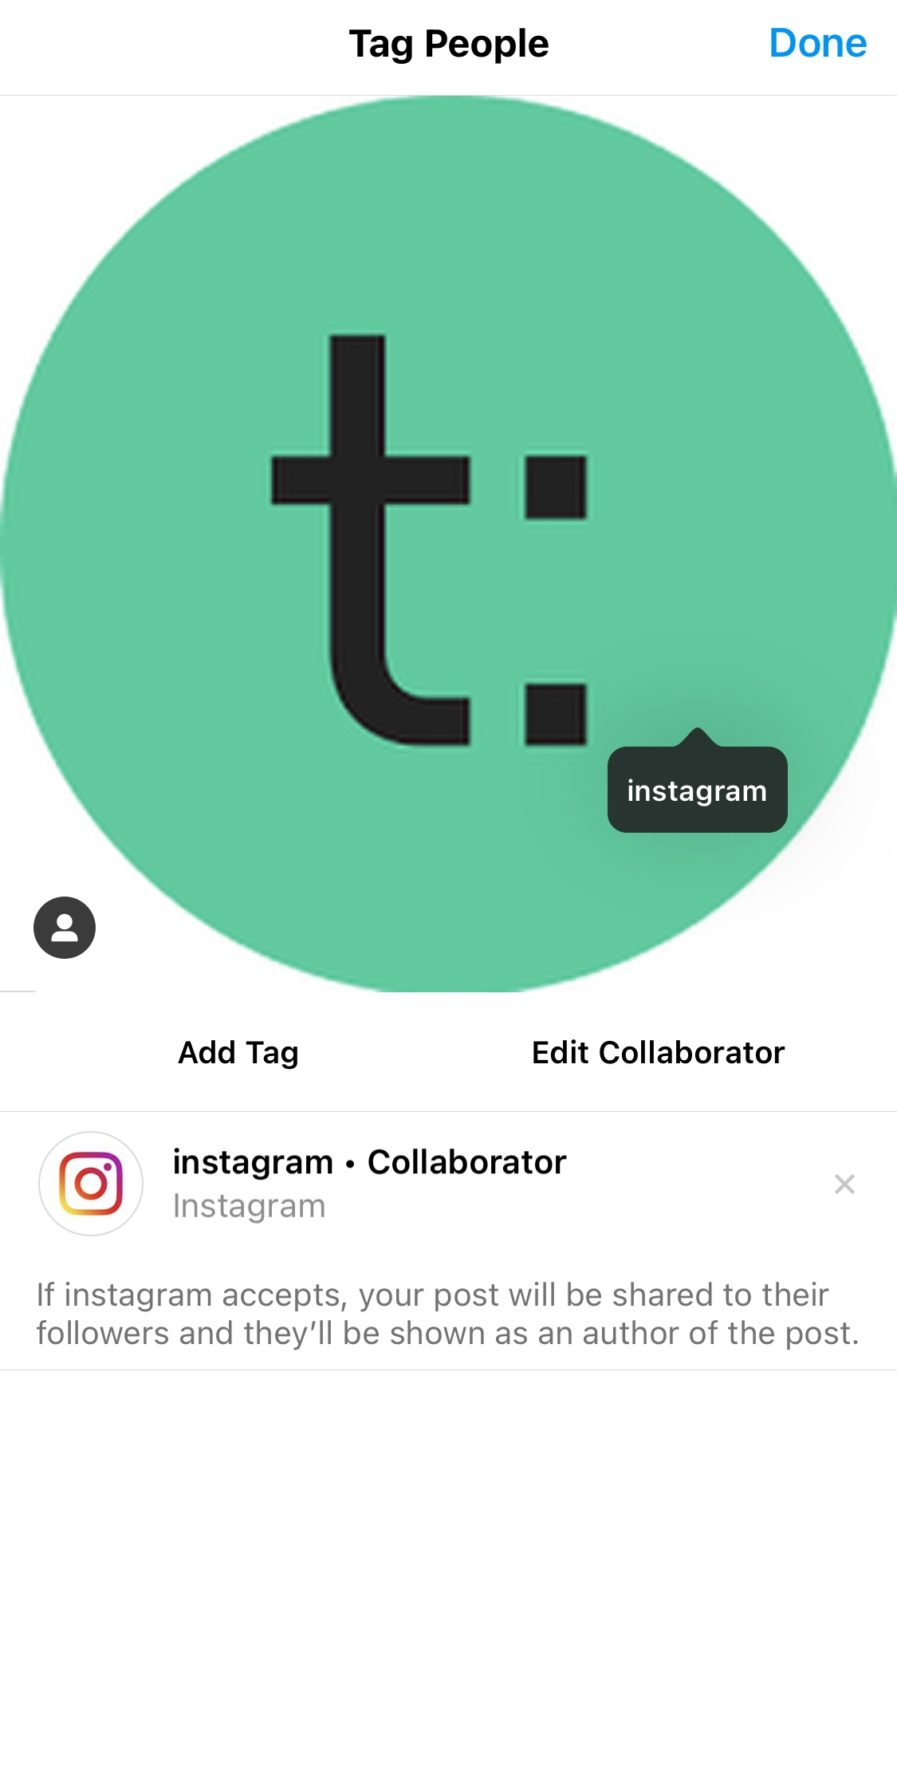
Feed posts appear in your profile grid and stay there unless you choose to delete them. Follow the steps below to use the Collab feature for feed posts:
Once your collaborator approves your request for collaboration, your Collab post will appear on both profile grids.
With this feature, there are many opportunities to partner with other course creators, brands, influencers, students, and more. Below are a few ideas that you can add to your social media content calendar.
There’s a fine line between business and personal on social media. It’s not uncommon for creators to run multiple businesses or social media pages. If you find yourself sharing the same sort of content in numerous places, using the Collab feature on Instagram may help streamline your posts and convert followers on one page to followers on another.
If you’ve ever hosted or participated in an Instagram giveaway, then you know that it’s not the easiest to manage in the app. For instance, both giveaway hosts typically ask their respective followers to comment or like the two separate posts to enter.
To streamline a giveaway with two partners, use the Instagram Collab feature. The post will live on both pages simultaneously and doesn’t require users to jump through hoops to enter.
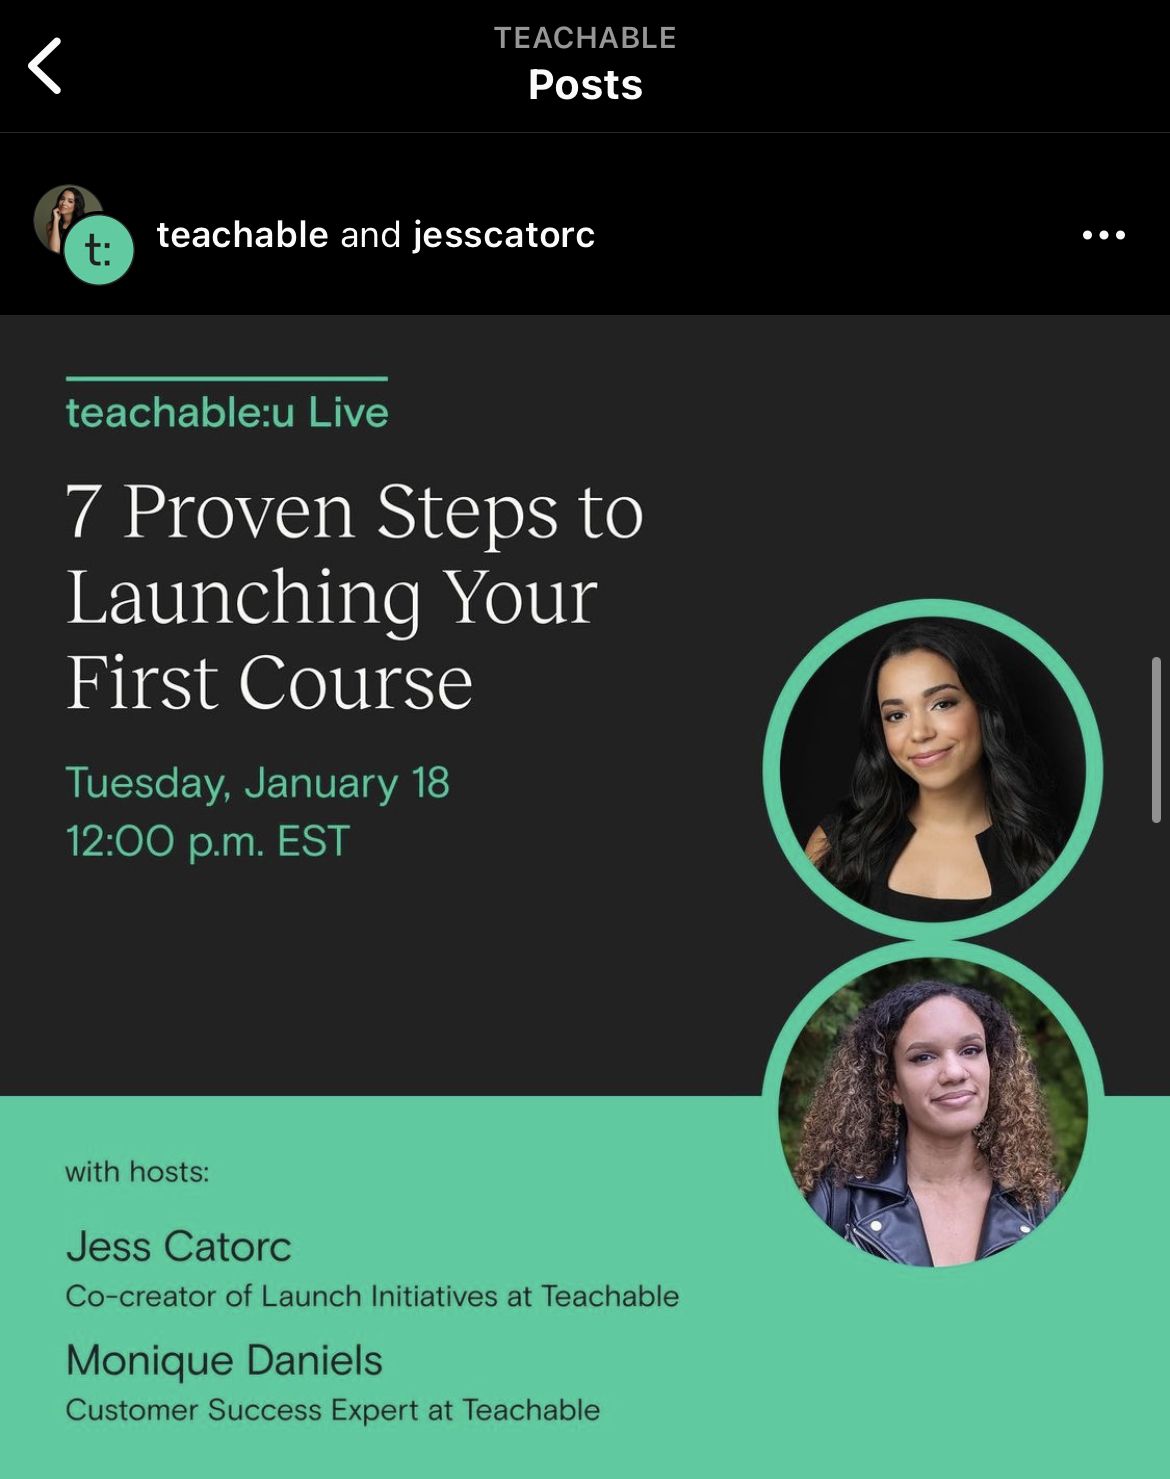
Additionally, the Collab feature works great for virtual events in which two hosts team up. Check out how we utilized the feature for one of our webinar events. In this case, both Teachable’s Instagram followers and Jess Catorc’s followers saw the post.
At the end of the day, Instagram is known to show favoritism towards pages that take full advantage of new features. Our advice is to be an early adopter of the Collabs tool so you can be a star in Instagram’s eyes. And, of course, get the hang of it early on.

As a small business owner or solopreneur, you may struggle to manage and complete your growing to-do list. If you find yourself spread so thin that you can’t give important tasks your undivided attention, it’s time to hire a virtual assistant (VA).
Hiring a virtual assistant is an exciting step in growing your business. For many solopreneurs, it’s the first person that you’ll add to your team. It can also signal your transition from a side-hustle or solopreneur to a full-time business owner.
The benefits of hiring a virtual assistant can more than compensate for the initial costs. For one, it is a cost-effective option to scale your business while taking mundane tasks off your plate.
However, like any hiring process, there are many considerations to finding and hiring candidates successfully. To help, we’ve created this complete guide on how to hire a virtual assistant that’s the right fit for your business.
As the name suggests, a virtual assistant works remotely and provides administrative services for a client. Virtual assistants often work with multiple clients at once on a freelance or contract basis. They usually aren’t employees.
Personal assistants (PAs) are similar to VAs, and the terms are often used interchangeably. Both perform the same types of tasks, but personal assistants usually connect with clients primarily in person.
Sometimes but not always, virtual assistants have “traditional” (in-person) administrative or assistant experience. In some cases, virtual assistants are simply highly skilled freelancers eager to assist you with tasks you’d like to get off your plate.
Some virtual assistants charge per hour, while others charge per task or work on retainer.
Usually, hourly rates for VAs range from $10 to $50. Although, it could be more for highly technical and specialized services.
Generally, the cost of a VA will depend on three factors. Virtual assistants set their rates depending on experience, task, and location. Here’s how each may influence the quotes you receive.
While hiring a VA with low rates may be economical, hiring an assistant with years of experience could be worth the extra cost. For example, if you’re not familiar with a task and need special expertise, they can provide you with the knowledge you need. In addition, if they have experience, you may not need to spend as much time training and onboarding them.
You can find a VA for any task that can be done remotely—data entry, digital marketing, customer support, social media management, administrative duties, accounting, and more.
Typically, more specialized tasks cost more. According to Upwork, a data entry VA can charge $12 to $20, while a marketing VA could charge $20 to $35. On the other hand, advanced VAs in IT support may charge $38 to $50 or more.
Since virtual assistants work remotely, their charges vary based on their location and cost of living. For example, VAs based in the Philippines or India charge much lower rates than those in the United States or the United Kingdom.
However, rates do not reflect experience level or capabilities. An experienced VA from India could charge a fraction of what a VA in the United States charges. You’ll also want to consider the difference in time zones though. A person in India may not be available to work during certain business hours in the U.S.
Since there’s no standard payment model, you might be wondering how to tell if you can afford a virtual assistant.
First, compile a list of all tasks you need help with, and estimate how long it will take a VA to complete. Then multiply the hourly rate by the number of hours. For example, if a VA’s hourly rate is $20 and you need about 15 hours each month, your monthly cost would be $300.
You’ll also want to consider how increasing the time you have to spend on revenue-generating activities will impact your income. For example, if you now have 15 more hours a month to focus on selling your course, how much is that time worth?
Once you know what you can afford, set a sensible budget and negotiate rates per project.
The primary benefit of hiring a virtual assistant is that it allows you to delegate tedious tasks so you can focus on more demanding parts of your business.
Other benefits of hiring a virtual assistant are that you can:
Technically speaking, a virtual assistant can do pretty much any task you’re comfortable delegating to them.
Even personal errands like scheduling doctor appointments or researching resorts for your next vacation are fair game.
Before beginning your search for a virtual assistant, get a clear idea of what tasks you want to delegate. In most cases, you’ll want to delegate tasks that are:
Start listing all the tasks you perform to figure out which specific tasks you need to outsource for your business.
To decide what to delegate, ask these questions.
For instance, if you struggle to complete a task, a VA can do it for you, sometimes faster and better.
Tasks that virtual assistants typically do include:
Ideally, you’ll delegate as many tasks as you can afford, and dedicate your time to tasks that only you can do.
The qualifications to look for in a virtual assistant depend on the tasks you’d like them to complete.
For example, let’s say you’re looking for an assistant primarily for bookkeeping, managing your email inbox, and sorting files. In that case, you may want to look for skills such as basic accounting knowledge, computer savviness, and organizational skills.
Some essential qualifications that every virtual assistant should have, regardless of their focus areas, are:
Since more people have shifted to remote work, you can choose from a large pool of VA candidates. Typically, you can find and vet a virtual assistant on freelance job posting sites like other contract workers. You can also create your own virtual assistant job posts to attract qualified candidates.
Here are some sites you can use to find and hire virtual assistants.
Some services will manage the hiring process for you but charge a monthly subscription fee. Others, like Upwork, are free to sign up, but you manage the entire process from posting the job to hiring and compensation.
Now that you have a clear idea of the tasks to delegate and platforms to find VAs, you can start hiring. Here’s a step-by-step guide on how to hire a virtual assistant.
You should already have a list that you created when deciding which tasks to delegate. In this case, you’ll take your initial list of tasks and further hone them into a bulleted list.
You’ll use these to form the duties and responsibilities section of your job description. It will also be useful to set a budget.
Based on the tasks you need help with, estimate the hours you will need per month. Most VAs charge hourly rates, so you can set a rough budget by multiplying the average hourly rate by the hours each month.
As mentioned, the standard hourly rates range between $10 to $50 or more, depending on the skills required. You should be prepared to pay more if the job requires advanced skills such as web development.
You’ll also want to factor in hiring platform fees. For example, Upwork takes 20% of a worker’s commission for new contracts. As a result, they may charge a higher hourly rate to make up for that fee.
The job description (JD) should summarize the responsibilities, skills, and qualifications for the VA role. Ideally, the JD should provide enough information to help the candidate decide whether they’re the right match for the role.
Your virtual assistant job description should include the following.
The job title should accurately describe the role to target suitable job candidates. According to Indeed, more than a third of job seekers searching for work on job sites use the exact title of the position they’re looking for as the search phrase. Are you hiring an administrative assistant, social media assistant, or customer service assistant? Write the exact job title. You’ll also want to use the phrase at least once in the body for search purposes.
Include a strong summary providing an overview of your business and the position’s expectations. Briefly highlight your business culture to show why the candidate should work with you. Also, remember to let the candidate know they will be working remotely.
Give a clear and concise outline of the core responsibilities of the VA. Further detail the day-to-day activities to help candidates determine if the position is a good fit for them. Remember, many VAs have other job or school duties, so they need to know your expectations to determine whether they can juggle the responsibilities.
Specify the hard and soft skills the position requires. However, keep the list concise as a long list can dissuade the applicants.
Here’s a sample VA job description template you can use.
Job title: Administrative virtual assistant
Brief overview:
Are you looking for a flexible job that allows you to work remotely with a team of creatives? Join a digital marketing company committed to teaching businesses how to grow with data-backed marketing strategies.
We are looking for a reliable administrative virtual assistant to support our business operations remotely. You will be responsible for administrative tasks such as scheduling meetings, answering emails, managing calendars, and tracking and managing expenses and payments. The position requires you to have a strong internet connection.
Responsibilities and duties:
Qualifications and skills:
When hiring a virtual assistant, review their resume closely, check references, and ask for work examples when applicable.
Look for resumes that are personalized to the role. If you get a lot of resumes, you can filter them by searching for skills keywords like “data entry” or tools like “Mailchimp”. Many hiring platforms can search resumes for specific words to help you find the most qualified candidates.
Once you have your shortlist, schedule phone interviews with five to ten applicants. A phone interview over Zoom can help you assess if a candidate is a good fit for your business.
Once you have one to three candidates in mind, narrow down your choices with a project.
Projects are the best way to test a VA’s skills. You’ll provide each candidate with the same prompt and give them a set time to complete it. Ideally, you’ll choose a small task that will be similar to what they will do in the role.
Of course, be mindful of their time, and try to keep the test below one hour. If it is longer than an hour or requires a lot of investment in time and resources, you may also want to compensate them for their time.
Once you’re confident that you have a suitable VA, make them an offer. Agree whether you will pay them per project basis or hourly, and put it in writing.
If you have hired them via a freelancing platform such as Upwork, you need to set up a payment and contractor agreement. It’s smart to do this regardless of the platform that you use because it sets clear expectations and helps protect you legally and financially.
Fortunately, sending and signing contractor agreements is much quicker with online e-signature tools like DocuSign and HelloSign.
Mostly, you’ll pay the VA online, although some accept checks and credit card payments. If you are hiring through a freelancing platform, then you issue payment to the platform and it administers funds to the VA. If you didn’t use a site like Upwork, then the VA will likely send you invoices to pay each month.
To complete work, VAs must be granted access to specific programs, shared files, and anything else needed to complete their assigned tasks. Creating an SOP prevents errors and ensures the work quality is consistent with your brand’s standards.
Standard operating procedures, or SOPs for short, are detailed guides that describe how to complete tasks. They go through each task step-by-step and include where to find login details or important files.
Don’t be afraid of overcommunicating in SOPs. No step is too small to include. Where necessary, add screenshots or record a quick Loom video. Generally, visuals make it easier to understand and leave little room for error.
When sharing passwords and payment information, you need to protect your data. Remember to run background checks. You can also use password managers like LastPass to send information securely.
Like in a typical job interview, asking the right questions can help you find your best match for a virtual assistant. Below are some examples of open-ended questions you could ask candidates.
Though both parties should be open to communication through various mediums, it’s crucial to grasp how your potential virtual assistant prefers to communicate to determine if it aligns with the tasks to be delegated.
Virtual assistants don’t have an IT department to walk over to when their computer crashes, the internet goes out, or another unfortunate technical difficulty occurs.
It’s comforting to know that if some technical difficulties happen, your future VA has a solid plan to resolve any issues. And, most importantly, understands the importance of communicating the issue immediately. Things like having a backup laptop or access to wifi at a nearby public space (library, cafe, etc.) may not be required but show your potential hire thinks quickly and is prepared for the unknown.
If tasks don’t require your virtual assistant to be online during a specific time window, inquiring about their preferred schedule may not be of the utmost importance. However, if you’re assigning timely tasks like engaging on your social media accounts at specific times of the day, you should confirm that your virtual has the ideal availability.
As mentioned above, virtual assistants typically work with more than one client simultaneously. While being able to balance multiple client loads can attest to their time management and prioritizing abilities, you want to ensure that your virtual assistant has the bandwidth to take on your tasks while putting their best foot forward.
Hiring a virtual assistant not only frees up your time to concentrate on revenue-generating activities, but it increases productivity and overall business performance.
However, to reap these benefits you still need to manage your VAs well. Fortunately, there are tons of resources to help. Here are some tips and tools that will help you manage your virtual assistant.
In addition to providing detailed SOPs, make sure your instructions have clear expectations and deadlines. You will avoid miscommunication and save time answering questions. If it helps, you can use one of the project management tools below.
If you provide the VA with clear instructions and they understand your expectations, there’s no need to micromanage.
As a leader, you can’t do everything yourself. If you micromanage, you’re not leveraging your free time for other more important tasks. Micromanaging can also make your team lose confidence in their abilities and negatively impact their work.
By not micromanaging, you’ll show your VA that you trust them to complete tasks on your behalf.
Even though you aren’t hovering over your VA’s shoulder every day, you still want to make sure that your goals and expectations are met. You should work with your VA to set measurable goals. For example, you might expect a VA to answer emails within 24 hours on a business day.
Some tasks may appear small, yet their complexity necessitates more time for completion. Be practical when setting expectations and deadlines and welcome feedback from the VA. This way, you can know when you’re stretching them too far.
Depending on the assigned tasks, have the VAs report regularly on their work progress. You can create a standard template where they report on their progress at a set interval.
There are various productivity tools you can use to manage your VAs effectively. They can help you speed up communication and increase organization and efficiency. Here are some of them.
Once you’ve hired an assistant to help you, you can focus more time on growing your business. Think about all the time that would be available if you didn’t have to answer emails or schedule calls each day.
These are all benefits of hiring a virtual assistant that you will see pretty immediately after hiring them. You can also always try out having an assistant for a busy time because they work on a freelance or contract basis. Whatever you need to do to help build your business, your assistant can help.
{{guidecreatoreconomy-component="/blog-shortcodes/blog-popup"}}

Chances are, if you came across this article and were intrigued enough to click it, you might be looking to improve your relationship with money. Maybe you’re in a state of feeling like you don’t have enough money. Or maybe you’ve got money and are looking for the confidence to use it. Even if your financial situation is good you might not know what opportunities exist to make your good financial situation great.
Getting comfortable with money and shifting self-limiting beliefs may make a difference between feeling stuck and thriving.
Money may not end your problems and can’t buy happiness. But getting good with money can help make some of life’s most significant burdens feel much more manageable. If your relationship with money could use a bit of a reset here are a few finance-centric reads that will help reshape your money mindset.
When people talk about feeling “whole” they’re usually referring to spiritual and mental well-being. Get Good With Money author Tiffany Aliche dives into the 10-step process that helped her climb out of a “financial hole.” After the mishaps of a recession and misguidance from a shady financial advisor, Aliche found herself struggling. Not only does financial educator and “budgetnista” Tiffany share her recipe for financial success, but she also includes helpful resources. The worksheets, checklists, and advice included in her book help readers learn by doing.
New York Times called this “a cheerful manifesto on removing obstacles between yourself and the income of your dreams.” And that’s probably the best way to describe it. It was written as a follow-up to the NYT times bestseller, You Are a Badass: How to Stop Doubting Your Greatness and Start Living an Awesome Life. Author Jen Sincero uses her humor and sharp wit to shift how readers view their relationship with money. She has plenty to teach about fully tapping into your earning potential. She was able to do so herself.
Napoleon Hill published Think and Grow Rich during the great depression and now it’s required reading material for anyone looking to improve their relationship with money. Since 1937, folks have flocked to Napoleon Hill’s teachings of Andrew Carnegie’s tried and true 13-step formula for making money. Hill touches on everything from desire, “the starting point of all achievement.”
When you don’t have money management skills, investing can feel completely out of reach. Trusted financial advisor Nancy Dunn wrote this book to challenge that self-limiting belief. She offers advice on investing to readers of all experience levels. From selecting the best bank account to breaking down more complicated things such as mutual funds and stocks, Dunn meets readers where they are. And helps them get better acquainted with the concept of investing.
It’s no secret that marginalized communities have a historically complicated relationship with money. In communities where simply talking about money is taboo, it’s hard to dig in deeper sometimes. Discussing generational wealth, avoiding financial traps, and designing a life of your dreams can be rare conversations. Author Paris Woods has had her own financial struggles to work through. She created this relatable guide geared explicitly towards helping Black women of any age become their best financial selves. The shift in the conversation surrounding money starts here, one financial journey at a time.
“Why didn’t they teach me this in school?” is a question many of us have asked while facing our finances head-on. If you reflect on what you learned in school and wondered why it didn’t include the basics of finances, your sentiments are heard and addressed in this candid read. This one a great starting point for someone who has little to no knowledge of how to manage money.
“…In the real world, people don’t make financial decisions on a spreadsheet. They make them at the dinner table, or in a meeting room, where personal history, your own unique view of the world, ego, pride, marketing, and odd incentives are scrambled together.” If you’re a fan of learning from other people’s experiences, you’ll love Morgan Housel’s approach. Housel takes a deep dive into the intersection of money and psychology through sharing short stories. Each one is rooted in exploring why we spend money the way we do. And why we harbor certain feelings towards it.
If you like your education with a side of entertainment, you won’t regret adding this book to your reading list. This book asks some hard questions. Like, “Do you treat money like a tinder date or as marriage?” That’s just one of the thought-provoking questions this read forces us to explore. All in hopes of going from living “paycheck to paycheck” to thriving as “financial badasses.”
But, changing your relationship with money won’t be an overnight adjustment. It can happen with a little bit of work. The books on this list can help you get there and in no time you might find your mindset has changed.
{{guidecreatoreconomy-component="/blog-shortcodes/blog-popup"}}

Whether you’re a veteran creator or a rookie, you know there are many moving pieces involved in growing your business. And, a major key to your growth is social media. Unfortunately, it can be one of the most time-consuming parts of scaling your business. If want to keep your social media presence thriving while taking back time for important tasks such as creating valuable content for your students, social media automation is the answer. After all, the key to using social media for business is posting with intention and not getting lost in the clutter. And, what better way to do that than through automated posting?
From batch-creating content to scheduling months of content in advance, going on autopilot is probably one of the best ways to run your business. Particularly for social media, preplanning and prescheduling can help build consistency, gain leads for your business, and save valuable time in the long run. Luckily, there are many tools available to you to get you going on autopilot. From native tools built into the social media platforms you know and love to pro tools, here are some of the automated posting best platforms.
If you’re new to the idea of social media automation, the good news is that you don’t necessarily have to look too far to get started. Nowadays, many social media websites have scheduling and planning built into them. Typically, they don’t require you to do much more than setting up your social media profile as a business page, which you should always do to get analytics on the content you post and your audience. The best part of these built-in automated posting tools is that they’re all entirely free.
Facebook has owned Instagram for some time now, which of course, means a lot of the tools for the two respective sites are integrated. So long as you have your Facebook and Instagram set up as professional/business pages, you can utilize Facebook Business Suite to plan content and even engage with your audience on both platforms.
Facebook Business Suite, which you can access through Facebook on desktop or the dedicated Business Suite app, even has helpful tools built in such as “Moments.” This lists holidays and national days relevant for your content. You can also search trending hashtags and save them for future use in planning,
Chances are, if you’re an active Twitter user, you don’t typically tweet from desktop. However for the sake of venturing into scheduling Tweets, you may want to consider it. On the web, you can schedule Tweets right from Twitter.com. Although you can’t schedule engaging Twitter Threads, automated posting can be a helpful way to schedule promotional Tweets without venturing off into a new platform that requires some use getting to.
If you’re not on Pinterest, you should be. This “visual search engine” is a goldmine for sending traffic to your site and converting content consumers to customers. Similar to above, a Pinterest Business account gives you access to some pretty valuable features such as in-depth analytics and, of course, the ability to schedule pins. Scheduling a pin is as simple as plugging in a date and time.
If you’re using social media to share your expert insights with your audience and promote your business, you may use Canva to create eye-catching graphics. But, did you know that in addition to creating striking visuals, you can also use Canva to schedule the content? Canva’s Content Planner (free with the pro plan) provides you with a calendar with Holidays and Key Dates plugged in to help you plan out the content you create on the site.
Once you’ve given the native scheduling tools a chance, it’s time to get into the more robust tools that live outside these apps.
In addition to being a platform that easily allows you to share clickable links, Twitter is an excellent place for social listening and staying in the know. Whether you’re following trending topics or hashtags or even Tweets from particular users, TweetDeck allows you to customize your interface and user experience to best suit your business needs. Best of all: TweetDeck is free to use and available to anyone who has a Twitter account. Did we mention you can also manage multiple Twitter accounts at once using this tool?
When it comes to Instagram, making sure the grid is aesthetically pleasing and regularly updated with valuable, engaging content is a pain point of many creators. Planoly has grown in popularity amongst creators for its ability to help visually plan content on Instagram. But, it also works with platforms such as Pinterest, Facebook, and Twitter. One of the most innovative functionalities of Planoly is the ability to create shoppable links on virtually any platform. This is ideal for creators like you looking to sell digital products.
If it seems like you’re always finding yourself trying desperately trying to find the time and bandwidth to manage a growing number of social accounts, Sendible may be the platform for you. This particular scheduler and planner supports Instagram, Facebook, Twitter, LinkedIn, Google My Business, Youtube, and WordPress. This pretty much allows you to manage everything in one place. From recycling evergreen content to monitoring keywords and scoping out the competition, Sendible offers a robust selection of tools to help you plan out content and scale your business through your social media.
With Instagram and Pinterest as the top visual social media platforms, it makes sense to take back valuable time by creating and scheduling content for the platforms simultaneously. And, that’s where Tailwind comes in. One of the standout features of Tailwind is the SmartScheduler, which suggests the best times for your automated posting. This scheduler can also help you spruce up imagery with its built-in auto design tools.
If your blog is a core part of promoting your business, your social media posts have a logical connection to what you post on the blog. CoSchedule is a content marketing platform that also supports blogging and social media scheduling. CoSchedule is great because it allows you to create blog content and convert it onto WordPress or HubSpot. Additionally, it will preschedule the post plus any social media content related to it in advance. If you draft blog posts in other places such as Google Drive, CoSchdule integrates with that as well.
The most important thing to remember with automated posting is the goal is to help you utilize your time wisely and creatively.
{{socialmedia-component="/blog-shortcodes/blog-popup"}}