Thank you! Your submission has been received!
Oops! Something went wrong while submitting the form.
MENU

You’ve got to walk before you can run, and you’ve got to plan your course content before you can ever become a six-figure online course creator. Planning course content can seem like an intimidating task for those of us who don’t have teaching degrees or have never lesson-planned in our lives, but we’re here to ease your worries and assure you that it’s easier than you might imagine.
Some people get hung up in this stage. But as you set out to plan your course content acknowledge your fears. We realize many online course creators have that moment of panic that says, “Who am I to teach this? I’ve only just learned it myself and I’ve never taught anyone anything! I’m not even an expert!”
But, you don’t have to be an expert and you don’t have to have experience teaching. What you do need to be is an authority and at least one step ahead of your audience. The more recently you were in your students’ shoes, the better you remember their pain points and, more importantly, how you overcame those pain points.
For the purpose of this post, we’re going to imagine that you already have a pretty solid idea of what you’re going to teach. But before we go any further, let’s refine it.
Oftentimes we see our course instructors trying to be everything for everybody. And that is something you want to avoid. It’s tempting to want to create the biggest, flashiest, most comprehensive course on your chosen topic ever. Yet, we’ve found that’s not actually what most students want. Instead, students have a very specific pain point they want solved.
For example, if you’re creating a knitting course, your target audience might not want to know every single thing about knitting in a basic, 101-level course. In fact, they don’t have any interest in knitting anything other than afghans. While your modules on mittens, scarves, and ponchos may all be great and informative, your audience won’t care to watch them.
Instead, solve a specific pain point. Reach out to your audience directly and see what it is they’re struggling with and want to know, and go from there. You can post a tweet asking your followers what they’re struggling with, or send a survey out to your email list.
Pain point: I don’t know how to knit an afghan
If you’re intent on creating the ultimate resource on everything that has to do with your topic, consider creating a course bundle in the future. That means you can combine five different courses about knitting and combine them into an ultimate bundle. This gives your audience the freedom to choose what they want to learn based on what they already know.
When you’re working to plan your course content, you need to decide what level your audience is currently at. If they already know the basics of your topic and you’re going to help them advance in their skills or apply them in a new way, you don’t need to spell out the very beginning steps.
On the other hand, if our example audience has never even touched knitting needles, you’re going to have to put yourself back into their shoes and think about your struggles when you were just getting started.
Again, this is a good time to look towards your current audience. Do they already know how to knit and want to apply those skills to making afghans? Or are they complete beginners with big afghan dreams? (Again, this might be a point where you consider creating two separate online courses: 1. The Basics of Knitting and 2. Knit Beautiful Afghans.)
Take yourself back to when you knew what your target audience knows and nothing more. Now, start writing down every single step you took to get to where you are now, no matter how small or insignificant it might seem.
Pro tip: It’s easy to gloss over the things that now feel like second nature for you. Really try to put yourself in your audience’s shoes. The things that you don’t even think about now may have been what you struggled with the most when you were starting out.
Once you’ve created a list that is thorough you can start grouping like steps into sections or modules. That might look like this, with your steps on the left, and the grouping on the right:
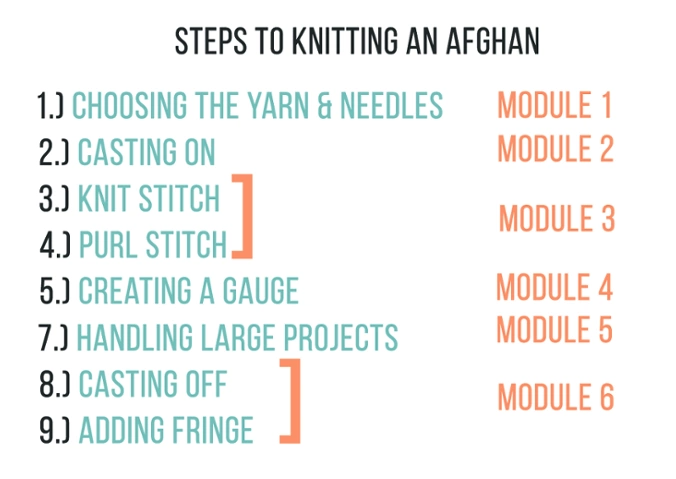
Once you’ve broken your course topic down to steps, you’ll need to buff each individual step out further. For example, sticking with our knitting example, casting on is more than just “casting on.” There is some twisting and tying and looping and pulling. List out every thing involved in each step. Don’t treat anything like it’s too obvious.
By filling out the small steps within each main step, you’re effectively creating the video script that you’ll use when it comes time to record.
You may find that a lot of what you’re trying to teach is easier shown than explained, so as you fill out the steps, decide whether you’d rather create a slide with bullet points or a talking head video where you sit and physically show your audience what you’re trying to teach them.
Depending on the niche, you may find that all of your videos are very visual or that all of your videos are slides with text. Others may find that their courses are a mix between the two. Just make sure you’re noting how you want to present your content as you fill out the steps.
It’s easier to do so now while it’s fresh on your mind than it would be to make an entire extra step of this process later.
Before you go all in and commit to recording everything, consider asking a friend you trust (who doesn’t have experience with what you’re teaching) to take a critical look at your outline. Ask them what questions they might have or what gaps need filling.
The most important question you need to ask your friend: Would you feel comfortable executing what my course is teaching after reading this?
If the answer is no, ask them why and work with them to fill in the blanks.
Pro tip: We all have that friend who is too nice for their own good. Don’t ask them because they won’t want to hurt your feelings. Ask someone who will be critical.
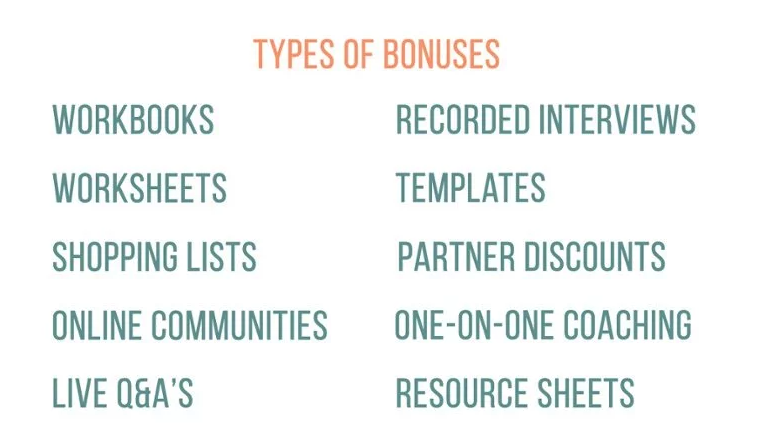
A lot of online course creators like to add bonuses to their online course. Things like workbooks, checklists, online communities, and whatever else they can dream up. These bonuses help increase the value of your online course and sweeten the deal for people who might still be debating whether or not they want to take the plunge and purchase.
But as a word of warning: You do not want to create bonuses just for the sake of having them. They should add to the overall message of your course and bring extra clarity to your lesson.
That’s where your friend’s feedback can come in handy when you’re in the process of create a plan for your course content. Maybe they were really having trouble grasping the “Adding Fringe” lesson in your course. If you’re handy with Adobe Illustrator (or want to outsource to someone who is) you can create an entire diagram that visually takes your students through the various fringe–creating methods.
Keep in mind that some of these resources come with their own sets of pros and cons. For example, if you decide to create an online community that is something you’ll have to maintain indefinitely and you should charge accordingly.
And for bonuses like partner discounts, there will be a lot of coordinating with businesses and you have to count on them to uphold their end of the deal. For example, if they agree to give you a 30% coupon code for your students, you advertise that, and the brand pulls out last minute, that will reflect poorly upon you.
Again, you’re going to want to use that time–machine of yours to go back and put yourself in your students’ shoes. What would have been the most helpful piece of content for you? Think about what you wish you had when you were learning, and make that for your students.
If you think instant feedback is what your students need and you’re up for maintaining an online community, think about how you want to structure it. You can create daily threads, or a set list of rules so that the group doesn’t dissolve into chaos. You can also plan on hiring or enlisting a community manager to help you maintain the group, depending on your budget. List every single thing you want the group to accomplish, and then decide how you’ll accomplish that.
Maybe online communities aren’t your thing. Another valuable bonus you can consider is creating a shopping list. Keeping with my knitting example, make an easy-to-shop list of everything your audience will need from start to finish. You can create an Amazon store to make things easy for them and link to it, or just list products and provide links to where they can find them.
You’ve done the work to plan your course content. Now what? It’s finally time to bring your online course to life and start production. This is something you can be thrifty with, but it’s also something that can end up being very pricey if you decide to outsource or hire a production team. We’ve created an entire section on the Teachable blog to help you craft a DIY home video studio and understand all the equipment and tools you may need.
